Get free shipping on your order, with any water filter subscription. Find my filter

Open Hamburger Menu
Sears Parts Direct
Tips to find your model number

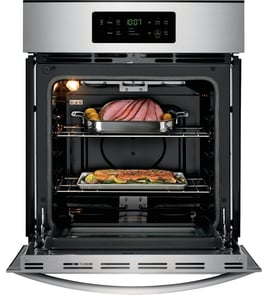
GE JT5000DF1BB electric wall oven Parts

Here are the diagrams and repair parts for GE JT5000DF1BB electric wall oven, as well as links to manuals and error code tables, if available.

GE JT5000DF1BB electric wall oven
By Schematic
By Part
SELECT DIAGRAM
?

This is the number corresponding to the part on the diagram / schematic

Browse Parts for JT5000DF1BB Wall Ovens

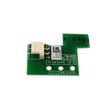
  • Wall Oven Cooling Fan Sensor Board for GE JT5000DF1BB - Part WB27T11463

    Control panel diagram

    Wall Oven Cooling Fan Sensor Board

    Part #WB27T11463
    This item is not returnable
    In Stock
    $59.02
    9% OFF Phone Price : $65.02Info Icon
    Minus Item
    Qty
    Plus Item
  • Range Oven Door Switch for GE JT5000DF1BB - Part WB24T10147

    Control panel diagram

    Range Oven Door Switch

    Part #WB24T10147
    This item is not returnable
    In Stock
    $20.54
    23% OFF Phone Price : $26.54Info Icon
    Minus Item
    Qty
    Plus Item
  • Wall Oven Door Lock Assembly for GE JT5000DF1BB - Part WB10X23814

    Door lock diagram

    Latch Assembly

    Part #WB14T10095

    Replaced by #WB10X23814

    Info Icon
    Manufacturer substitution
    This part replaces WB14T10095. Substitute parts can look different from the original.
    In Stock
    $90.39
    6% OFF Phone Price : $96.39Info Icon
    Minus Item
    Qty
    Plus Item
  • Cooking Appliance Screw, #10-32 for GE JT5000DF1BB - Part WB01T10008

    Door diagram

    Cooking Appliance Screw, #10-32

    Part #WB01T10008
    This item is not returnable
    In Stock
    $10.87
    16% OFF Phone Price : $12.87Info Icon
    Minus Item
    Qty
    Plus Item
  • Wall Oven Door Inner Glass for GE JT5000DF1BB - Part WB56T10351

    Door diagram

    Wall Oven Door Inner Glass

    In Stock
    $77.04
    7% OFF Phone Price : $83.04Info Icon
    Minus Item
    Qty
    Plus Item
  • Broil Elemen for GE JT5000DF1BB - Part WB44X48685

    Body parts diagram

    Wall Oven Broil Element

    Part #WB44T10128

    Replaced by #WB44X48685

    Info Icon
    Manufacturer substitution
    This part replaces WB44T10128. Substitute parts can look different from the original.
    In Stock
    $131.61
    Minus Item
    Qty
    Plus Item
  • Range Screw for GE JT5000DF1BB - Part WB1M1

    Door diagram

    Screw

    Part #WB01K5150

    Replaced by #WB1M1

    Info Icon
    Manufacturer substitution
    This part replaces WB01K5150. Substitute parts can look different from the original.
    This item is not returnable
    In Stock
    $8.13
    11% OFF Phone Price : $9.13Info Icon
    Minus Item
    Qty
    Plus Item
  • Wall Oven Door Outer Panel Assembly (black) for GE JT5000DF1BB - Part WB56X33188

    Door diagram

    Wall Oven Door Outer Panel

    Part #WB57T10374

    Replaced by #WB56X33188

    Info Icon
    Manufacturer substitution
    This part replaces WB57T10374. Substitute parts can look different from the original.
    In Stock
    $112.45
    10% OFF Phone Price : $124.45Info Icon
    Minus Item
    Qty
    Plus Item
  • Wall Oven Control Board for GE JT5000DF1BB - Part WB27X25342

    Control panel diagram

    Control Board

    Part #WB27X20229

    Replaced by #WB27X25342

    Info Icon
    Manufacturer substitution
    This part replaces WB27X20229. Substitute parts can look different from the original.
    In Stock
    $364.01
    $12.00 OFF Phone Price : $376.01Info Icon
    Minus Item
    Qty
    Plus Item
  • Nut He X for GE JT5000DF1BB - Part WB02X35585

    Convection fan diagram

    Hex Nut

    Part #WB02T10608

    Replaced by #WB02X35585

    Info Icon
    Manufacturer substitution
    This part replaces WB02T10608. Substitute parts can look different from the original.
    In Stock
    $32.52
    Minus Item
    Qty
    Plus Item

GE Electric Wall Oven JT5000DF1BB FAQs

To replace the control panel on your GE JT5000DF1BB electric wall oven, shut off power at the breaker, remove the mounting screws, tilt the panel out, then lift it up to release it. Transfer wiring one connector at a time to avoid miswiring; use the owner's manual for model-specific access details.

Safety first (before you touch the panel)
  • Turn off the oven circuit breaker and confirm the display is dark
  • Let the oven cool completely
  • Use cut-resistant gloves to protect against sharp sheet metal
  • Take a quick photo of wire routing before disconnecting anything
  • Avoid pulling on wires; release connectors by the plug body
Basic replacement steps (typical for this GE wall oven design)
  1. Disconnect power at the household distribution panel.
  2. Open the oven door to access the control panel mounting area.
  3. Remove the control panel screws (often along the underside or behind trim).
  4. Pull the bottom of the panel outward, then lift up to release the panel from its tabs.
  5. Label and move connectors one at a time from the old panel/control assembly to the new one.
  6. Reinstall the panel, secure screws, restore power, and test Bake, Broil, and keypad response.
What you may be replacing (control panel vs. control board)
Symptom Most likely area What to check first
Dead display, no response Control board or power supply Breaker, wiring connections, control board seating
Some keys do not work Keypad/control panel Ribbon/connector fit, signs of moisture/grease
Oven heats but controls act erratic Control board or sensor input Error codes, wiring, temperature sensor

If temperature readings seem off after reassembly, the oven sensor circuit is a common cause; the wall oven temperature sensor WB21X10165 is a model-matched part used to monitor oven temperature.

Why it matters

The control panel area carries live electrical connections and is easy to miswire if multiple plugs are moved at once. Moving connectors one at a time and following the JT5000-series instructions in the manual helps prevent blown fuses, error codes, and repeat failures.

Last updated: February 2026

An electric oven like the GE JT5000DF1BB is built around heating, airflow, lighting, and safety-control components. The core parts you will see most often are the bake and broil heating elements, oven racks, a temperature sensor, a convection fan system, door sealing parts, and the electronic controls that regulate temperature and modes.

Main electric oven components (what they do)
  • Bake system: provides the primary heat for baking and roasting (lower heat source in most ovens)
  • Broil system: provides high, top-down heat for broiling and browning
  • Temperature sensing and control: monitors oven temperature and tells the control board when to cycle heat
  • Airflow and cooling: convection fan circulates hot air; cooling fan helps protect controls and cabinetry
  • Door and insulation: keeps heat in the cavity and helps maintain stable temperatures
  • Lighting and user interface: oven light and control panel for selecting modes like Bake, Broil, Convection, and Clean
Common parts you may replace on JT5000DF1BB

These are examples of real, model-matched parts customers commonly shop for:

Quick “part to symptom” guide
If you notice this Often involved part(s) What to check first
Oven not holding temp Temperature sensor, door seal Compare set temp vs actual; inspect gasket gaps
Broil not working Broil element Look for visible damage; test continuity
Uneven baking Oven rack placement, convection fan blade Try different rack position; confirm fan runs in convection
Oven light out Light bulb or halogen lamp Verify correct lamp type; power off before servicing
Why it matters

Knowing the major oven parts helps you troubleshoot faster and order the right replacement the first time. It also supports safer DIY work, since wall ovens require power to be shut off at the breaker before servicing.

Where to confirm features and safe handling

For your exact cooking modes (Bake, Broil Hi/Lo, Convection Bake, Convection Roast, Self Clean, Steam Clean) and safety steps, use the owner's manual.

Last updated: February 2026

On the GE JT5000DF1BB electric wall oven, the model number is printed on the appliance rating label. You will find that label on the side trim, or on the front of the lower oven frame behind the oven door (open the door to see it clearly). See the owner's manual for the exact label location diagram and wording.

Quick steps to locate the label
  • Turn the oven light on and open the oven door fully.
  • Look along the front frame area behind the door, especially on the lower oven.
  • Check the side trim area if you do not see it on the front frame.
  • Write down both the model number and the serial number.
  • Take a clear photo of the label for future parts ordering.
What the label typically includes
Item on label What it’s used for Example (format)
Model number Matching parts and diagrams JT5000DF1BB
Serial number Identifying production details Varies
Electrical ratings Verifying power requirements Varies
Why it matters

We use the model number to match the correct GE wall oven parts for your exact configuration (for example, the correct oven rack, door seal, or temperature sensor). Even small model-number differences can change which control board, latch assembly, or wiring harness fits.

Last updated: February 2026
Most common symptoms to help you fix your wall oven

Choose a symptom to see related wall oven repairs.

Main causes: bad oven door lock assembly, faulty electronic control board, wiring failure…

Main causes: faulty oven temperature sensor, control system problem, weak burner igniter, damaged oven element…

Main causes: lack of gas supply, broken igniter, tripped circuit breaker, broken oven element, tripped thermal fuse, con…

Main causes: lack of electrical power, bad electronic control board, faulty oven control thermostat…

Main causes: broken broil element, faulty broil burner igniter, control system failure…

Main causes: broken bake element, bad bake burner igniter, tripped thermal switch, control system failure…

Most common repair guides to help fix your wall oven

These step-by-step repair guides will help you safely fix what’s broken on your wall oven.

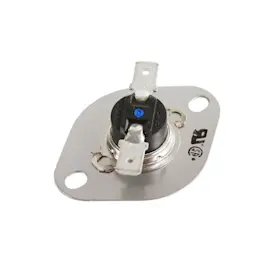
How to replace the thermal switch in a wall oven

How to replace the thermal switch in a wall oven

If the oven won't heat after resetting the thermal switch, replace the thermal switch.…

Repair time and Difficulty

 60 minutes or less
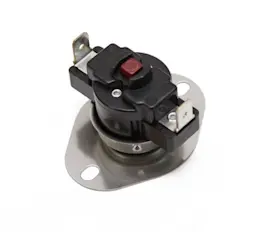
How to replace a wall oven thermal fuse

How to replace a wall oven thermal fuse

The thermal fuse trips to prevent the over from excessively overheating. The oven won't heat again until you replace the…

Repair time and Difficulty

 60 minutes or less
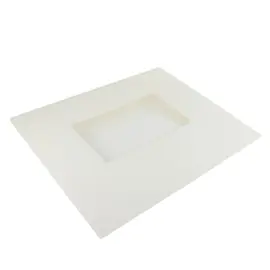
How to replace a wall oven door outer glass panel

How to replace a wall oven door outer glass panel

Learn how to replace a damaged outer window panel on your wall oven door with these step-by-step instructions. …

Repair time and Difficulty

 45 minutes or less

Effective articles & videos to help repair your wall oven

Use the advice and tips in these articles and videos to get the most out of your wall oven.

How to remove grease from your oven

How to remove grease from your oven

Oven looking grimy? Discover how to clean a greasy oven using safe, effective methods like baking soda and more.…

How to read a wiring schematic video

How to read a wiring schematic video

Learn how to decipher symbols so you can buy the right part for your problem.…

How to correct an oven's temperature setting

How to correct an oven's temperature setting

If your oven consistently undercooks or overcooks, it might need recalibration. You can reset it yourself.…

Parts & More

Bottom-Mount Refrigerator
Carpet Cleaner
Dishwasher
Dryer
Electric Range
Gas Chainsaw
Gas Leaf Blower
Gas Line Trimmer
Generator
Microwave
Parts
Room Air Conditioner
Side-By-Side Refrigerator
Snowblower Attachment
Top-Mount Refrigerator
Washer
Water Softener
Weight System