Installation guide
 Owner’s manual

Can you get parts for a Kenmore dryer?
Yes. For the Kenmore stacked laundry center model 11081452710, we can help you get common dryer repair parts such as the drum belt, door catch and start switch so you can fix issues like a dryer that will not start, will not tumble, or makes noise.
Common Kenmore dryer parts you can replace
These are some of the most frequently replaced dryer-side parts for model 11081452710:
- Drum belt 3394652 for a drum that will not tumble
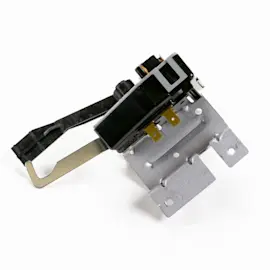
- Dryer push-to-start switch WP3977456 for a dryer that will not start
- Dryer idler pulley WP691366 for squealing or thumping noises
- Door closing parts such as the strike (279570) and door catch (WP3389441)
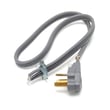
- Electrical connection parts such as the terminal block (WP3397659)
How to make sure you order the right part
Use your model number 11081452710 and match the part by name and ID. We recommend these checks before you buy:
- Confirm the symptom (won’t start, won’t heat, won’t tumble, noisy)
- Compare the part ID on the listing to the part you are replacing
- Inspect related wear items (belt, idler pulley, support rollers) at the same time
- Review safety and access steps in the 11081452710 use and care guide
Quick symptom-to-part starting point
| Symptom | Common part to check first | What you may notice |
|---|---|---|
| Dryer won’t tumble | Drum belt (3394652) | Motor runs but drum does not move |
| Dryer won’t start | Push-to-start switch (WP3977456) | No response when pressing Start |
| Loud squeal/thump | Idler pulley (WP691366) | Noise increases as drum turns |
| Door won’t stay closed | Door catch (WP3389441) / strike (279570) | Door pops open or won’t latch |
Why it matters
Using the correct Kenmore parts for model 11081452710 helps restore safe operation, proper drying performance, and reduces repeat failures caused by mismatched components.
Last updated: February 2026
How do I remove the front panel of my Kenmore dryer?
To remove the front panel on your Kenmore 11081452710 stacked laundry center dryer, we disconnect power first, then remove the top and release the front-panel retaining clips or screws (depending on the exact cabinet style). Follow the step-by-step access-panel procedure in the 11081452710 installation guide.
Safety first
Unplug the laundry center or shut off the breaker before you open the cabinet. If you need to move the unit, turn off the water supply to the washer side as well.
Steps to remove the front (access) panel
Most Kenmore stacked laundry centers use an access panel secured at the top edge.
- Disconnect power.
- Move the unit forward enough to reach the top edge of the access panel.
- Remove the screws at the top of the outer access panel (the count varies by cabinet width).
- On some 27-inch cabinets, remove the bumper at the top of the access panel (if present).
- Pull the top of the panel toward you, then lift the panel off the lower tabs.
- Set screws and any bumper aside so you can reinstall the panel securely.
What you may see once the panel is off
Removing the front panel is usually the first step for diagnosing a no-tumble or squealing issue.
| Symptom | Common area to inspect | Example part for this model |
|---|---|---|
| Dryer won’t tumble | Belt and idler system | Drum belt 3394652 |
| Squealing or thumping | Idler pulley and drum support rollers | Dryer idler pulley WP691366 |
| Door won’t stay closed | Door catch/strike | Dryer door catch WP3389441 |
Why it matters
The front panel supports the dryer drum area and provides access to wear items like the drum belt, idler pulley, and support rollers. Removing it the right way prevents bent panels, broken clips, and misaligned doors.
Last updated: February 2026
What size is a Kenmore Model 11081452710 dryer?
For Kenmore stacked laundry center model 11081452710, the installation guide shows it’s built in a 27-inch class cabinet; the overall laundry center footprint is about 27 1/4 in. wide and 75 1/2 in. tall, with depth varying by venting and hookups. See the 11081452710 installation guide for the exact dimension diagram.
Key dimensions to plan for
These measurements come from the 27-inch model dimension/clearance diagram in the installation documentation.
- Width: 27 1/4 in. (692 mm)
- Overall height: 75 1/2 in. (1918 mm)
- Depth: plan for roughly 32 7/16 in. to 35 3/4 in. depending on how you route venting and connections
- Closet spacing: allow extra room for airflow and venting behind the unit
Quick reference table
| Measurement | Approx. size (in.) | Metric (mm) |
|---|---|---|
| Width | 27 1/4 | 692 |
| Height | 75 1/2 | 1918 |
| Depth (varies by setup) | 32 7/16 to 35 3/4 | 824 to 908 |
Clearances we recommend (so the dryer performs correctly)
Even when the cabinet fits, tight installs can cause long dry times and overheating if venting is restricted.
- Keep the exhaust routed to the outdoors
- Leave space so the vent does not kink or crush behind the unit
- Use the closet spacing shown in the 11081452710 installation guide
- Make sure the floor is level; an uneven floor can affect tumbling and sensor cycles
Why it matters
Correct sizing is not just about fitting the laundry center into a closet; it also protects airflow for the dryer exhaust, helps prevent damp clothes, and reduces wear on components like the drum belt and idler system.
Last updated: February 2026