 Installation guide
 Owner’s manual



Can a clogged drain cause an FTD error?
Yes. On the GE GSD2100V00BB dishwasher, an FTD (fail to drain) condition commonly happens when water cannot leave the tub because the drain path is restricted, such as a clogged air gap, blocked disposer connection, or an improperly routed drain hose. See the GSD2100V00BB installation guide for correct drain setup.
- Turn off power at the breaker before inspecting wiring or components.
- Check the kitchen sink drain; if the sink drains slowly, the dishwasher often will not drain well.
- If the dishwasher drains through a garbage disposer, run the disposer to clear it.
- If you have an air gap, remove the cap and clean out debris.
- Inspect the drain hose for kinks, crushing, or a clog.
- Confirm the drain connection height is correct; a low connection can cause improper draining.
Improper drain routing can mimic a “clog” and trigger drain problems.
| Installation detail | What “right” looks like | What goes wrong if it’s wrong |
|---|---|---|
| Air gap vs. high drain loop | Use an air gap when required; otherwise a high drain loop can be acceptable | Backflow or slow draining |
| Drain connection height | If connected to a waste tee or disposer lower than 18 inches above the floor, use an air gap | Improper draining |
| High drain loop height (special cases) | If installed on an elevated platform, provide a high drain loop at least 32 inches above the platform | Poor drain performance |
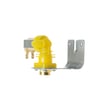
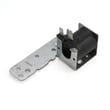
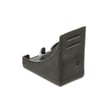
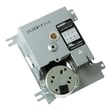
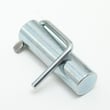
If the hose and air gap are clear but the dishwasher still will not pump out, the drain system may need service. A failed drain solenoid can prevent proper draining on many GE designs; the model-specific replacement is the GE dishwasher drain solenoid assembly WD21X10268.
A restricted drain can leave dirty water in the tub, cause odors, and reduce cleaning performance. Correct drain routing (air gap or high drain loop) also helps prevent sink water from backing up into the dishwasher.
Last updated: February 2026
What is the average lifespan of a GE dishwasher?
A GE dishwasher typically lasts 10 to 12 years. For your GE GSD2100V00BB, regular cleaning, correct detergent and rinse aid use, and fixing small leaks or drain issues early are the biggest factors that keep it running closer to the high end of that range (see the GSD2100V00BB owner's manual).
Most GE dishwashers fall into this practical range:
| Usage and care level | Typical lifespan | What usually ends it first |
|---|---|---|
| Light use, good maintenance | 12 to 15 years | Door seal leaks, rack rust, minor electrical wear |
| Average household use | 10 to 12 years | Drain/circulation pump wear, timer/control issues |
| Heavy use, poor maintenance | 8 to 10 years | Pump/motor failure, chronic draining or leaking |
We see these habits make the biggest difference over time:
- Clean the tub and spray arms regularly so food soil does not recirculate.
- Use fresh automatic dishwasher detergent and the right amount for your water hardness.
- Keep rinse agent filled to improve drying and reduce spotting and film.
- Check the door gasket area for debris so the door seals evenly.
- Address slow draining quickly so the pump is not working against restrictions.
When these wear items fail, repair cost versus age often becomes the deciding factor:
- Wash system: circulation pump, pump and motor assembly
- Draining: drain hose, drain solenoid
- Controls: timer, door switch
- Leaks: door seal
If you are troubleshooting poor wash performance on this model, the dishwasher spray arm, lower WD12X10244 is a common inspection point for clogs and damage.
Knowing the expected lifespan helps you plan: if your GSD2100V00BB is already near 10 to 12 years old, investing in maintenance (cleaning, sealing, proper detergent use) often prevents the most common failures that shorten dishwasher life.
Last updated: February 2026
Can I replace dishwasher parts myself?
Yes, for GE dishwasher model GSD2100V00BB, we replace many common parts ourselves if we’re comfortable turning off power and water and following the correct steps. Simple mechanical items (racks, spray arms, door seals) are good DIY jobs; wiring, grounding, and hard-wiring work should be handled carefully.
- Shut off electrical power at the breaker (turning the dishwasher off is not the same as disconnecting power).
- Shut off the water supply valve before opening any water line.
- Replace non-electrical parts like a rack, spray arm, or door seal.
- Clear drain issues caused by a clogged air gap or a disposer plug that was never removed.
- Reinstall the access panel and toe panel using the correct screw types and locations.
| Part | What it affects | Typical DIY level |
|---|---|---|
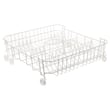
| Dishwasher dishrack, lower WD28X31819 | Loading, rack rolling, rusted rack replacement | Easy |
| Dishwasher spray arm, lower WD12X10244 | Cleaning performance, spray coverage | Easy to moderate |
| Dishwasher door seal WD08X10057 | Leaks at the door | Moderate |
| Dishwasher drain hose WD24X10014 | Draining, leaks under sink | Moderate |
The manual calls out grounding and electrical safety; improper grounding can create a shock risk. Use a technician when the repair involves:
- Hard-wiring, cord kits, or grounding connections
- Control/timer diagnostics (intermittent power, burning smell, repeated tripping)
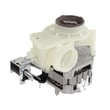
- Pump and motor replacement if you’re not comfortable with water seals and wiring
DIY repairs can save time and money, but dishwashers combine electricity and water. Following the correct shutdown steps and installation requirements (like drain routing and clearances) prevents leaks, poor draining, and safety hazards.
For model-specific procedures and safety notes, follow the GSD2100V00BB owner's manual and the GSD2100V00BB installation guide.
Last updated: February 2026
What are the commonly replaced parts in a dishwasher?
In the GE GSD2100V00BB dishwasher, the most commonly replaced parts are the wash and drain components (spray arms, pump parts, drain parts), door sealing and safety parts (door switch, door seal), and high-wear rack items. These parts typically fail from clogs, leaks, wear, or physical damage.
- Spray arms that clog or crack (poor cleaning)
- Pump and motor components that wear or leak (no wash pressure, loud grinding)
- Drain parts that clog or stick (standing water)
- Door sealing and interlock parts (leaks, won’t start)
- Racks and baskets that rust, break, or stop rolling smoothly
| Symptom | Likely part area | Example model-matched part |
|---|---|---|
| Dishes not getting clean | Wash circulation, spray | Dishwasher spray arm, lower WD12X10244 |
| Dishwasher won’t drain | Drain path, drain actuator | GE dishwasher drain solenoid assembly WD21X10268 |
| Unit won’t start or stops when door moves | Door interlock | Dishwasher door switch WD21X10261 |
| Water leaking at the door | Door sealing | Dishwasher door seal WD08X10057 |
| Rack is rusted or wheels bind | Rack hardware | Dishwasher dishrack, lower WD28X31819 |
- Disconnect power before any inspection or maintenance; turning the dishwasher off does not disconnect power.
- Check for simple clogs first: food debris in the sump area and blocked spray arm holes.
- Inspect the door seal for tears, flattening, or debris stuck along the sealing surface.
- Confirm the door closes firmly; a misaligned rack can prevent full latch engagement.
- If draining is the issue, verify the drain hose routing is not kinked or crushed.
Replacing the correct “failure point” part restores wash pressure, proper draining, and leak protection. It also helps prevent repeat problems like poor cleaning from a partially blocked spray arm or water damage from a worn door seal.
For safety and model-specific procedures, follow the GSD2100V00BB owner’s manual.
Last updated: February 2026
What is the most common problem with GE dishwashers?
The most common GE dishwasher problems are not draining, not starting, and leaking. On the GE GSD2100V00BB, these issues are usually tied to a clogged drain path, a door switch/latch problem, or a worn seal; many fixes start with basic cleaning and a power reset (see the GSD2100V00BB owner's manual).
- Won’t run or seems dead: check the breaker or fuse, then try the Start/Reset procedure listed in the manual.
- Not draining: clear the sump area, check for a kinked or clogged drain line, and confirm the sink/disposer connection is open.
- Leaking: inspect the door gasket for gaps, tears, or debris; also check loading so items do not block the door.
- Poor cleaning: confirm spray arms spin freely and holes are not plugged; use fresh detergent.
- White film or cloudy glasses: adjust detergent for water hardness and use rinse aid consistently.
| Symptom | Common cause | Example part for GSD2100V00BB |
|---|---|---|
| Won’t start or stops when door moves | Door switch not closing reliably | Dishwasher door switch WD21X10261 |
| Not draining or drains intermittently | Drain path restriction or drain components not operating | Dishwasher drain hose WD24X10014 |
| Leaks at the door | Worn or deformed gasket | Dishwasher door seal WD08X10057 |
Drain and start problems can leave standing water and odors, while leaks can damage flooring and cabinets. Catching the cause early often prevents bigger repairs like pump or motor replacement.
- Run hot water at the sink before starting a cycle.
- Keep detergent dry and only fill the cup right before a wash.
- Use rinse aid; a full dispenser typically lasts about a month.
- Load so tall items do not block spray arms.
- If your water is hard, use the detergent amount recommended for hard water.
For installation-related causes (kinked hoses, improper routing, or mounting issues), follow the GSD2100V00BB installation guide.
Last updated: February 2026
What is twin turbo dry boost?
Twin Turbo Dry Boost is a marketing name GE uses on some newer dishwashers for enhanced drying. Your GE GSD2100V00BB uses standard drying features instead, mainly the Heated Dry option and proper rinse agent use as described in the GSD2100V00BB owner's manual.
On this model, drying results come from heated drying (when selected), hot final rinse performance, and rinse agent that helps water sheet off dishes.
- Select Heated Dry ON for faster, drier results (it adds about 30 minutes)
- Keep rinse agent filled to reduce droplets, spots, and film
- Load plastics on the top rack and angle cups so water drains
- Avoid nesting bowls and blocking spray paths
- Crack the door open after the cycle (when safe) to speed air drying
| Drying approach | What it does | What you control on GSD2100V00BB |
|---|---|---|
| Twin Turbo Dry Boost (newer models) | Uses advanced airflow and heat management | Not a named feature on this model |
| Heated Dry | Turns on the heater for faster drying | Heated Dry ON or OFF |
| Rinse agent | Helps water drain and reduces spotting | Fill and maintain dispenser |
Plastics and concave items hold water because droplets cling to smooth surfaces. Heated drying plus rinse agent reduces beading and improves evaporation, so you get drier glasses, silverware, and plastic containers.
Use these checks to improve drying on GE dishwashers:
- Confirm incoming water is 120°F to 150°F for proper wash and rinse performance
- Use a rinse agent consistently and wipe up any spills
- Choose a cycle that includes a heated dry option (avoid Rinse Only for drying)
- Make sure the door fully latches so the cycle completes
For control-panel options and cycle details specific to your unit, use the GSD2100V00BB owner's manual.
Last updated: February 2026





