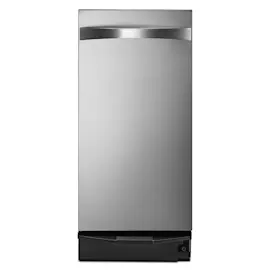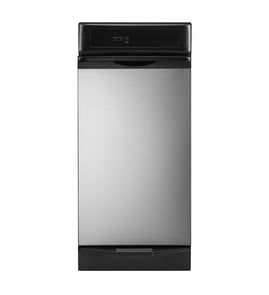

Where is the model number on a Kenmore trash compactor?
On Kenmore trash compactor model 66542500, the model number is printed on a rating label that’s usually on the cabinet frame just inside the opening, most often behind the compactor door or drawer. Check the front frame area first, then the lower side panels.
Most common places to check
- Inside the opening on the cabinet frame (near the door/drawer opening)
- Behind the door or drawer, along the inner front edge
- On a side panel near the bottom (left or right side)
- Along the top edge of the opening (less common)
- On the back panel (only if the unit has been pulled out)
Quick steps to find it safely
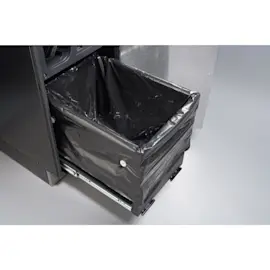
- Open the compactor door or pull the drawer out.
- Look along the front frame rails and inner edges for a white or silver label.
- Use a flashlight and take a photo; the print can be small.
- If the label is worn, gently wipe dust off with a dry cloth (avoid soaking the label).
What the label typically includes
| Label item | What it’s used for |
|---|---|
| Model number (example: 66542500) | Matching parts and diagrams |
| Serial number | Identifying production run |
| Electrical rating | Verifying power requirements |
Why it matters
We use the exact model number to match the correct Kenmore trash compactor parts (switches, latches, fasteners, and trim). Even small model variations can change which parts fit.
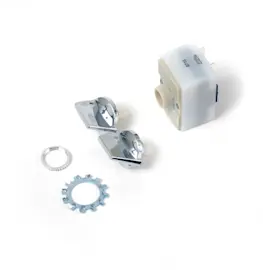
If you’re also checking door alignment or closure while you’re there, inspect the latch area and strike; a worn strike can keep the door from closing firmly (see door strike 279570).
Last updated: February 2026
What is the life expectancy of a trash compactor?
A Kenmore trash compactor like model 66542500 typically lasts 10 to 15 years with normal household use. Lifespan depends most on how often you compact, how heavily you load the drawer, and whether the door and latch close tightly every cycle.
Typical lifespan ranges
| Use pattern | What it looks like | Typical life expectancy |
|---|---|---|
| Light | Occasional cycles, lighter bags | 12 to 15 years |
| Normal | Regular weekly use | 10 to 15 years |
| Heavy | Multiple cycles per day, overpacked loads | 7 to 10 years |
What shortens a compactor’s life fastest
- Overfilling the drawer so the ram strains or stalls
- Compacting wet, sticky, or loose debris without a bag
- Slamming the door or running with a door that does not latch cleanly
- Ignoring unusual noises (grinding, thumping, squealing)
- Running repeated cycles back-to-back when the unit is hot
Quick checks that help you get the full lifespan
- Confirm the door closes and latches firmly; replace worn latch hardware such as the door strike 279570 if the door pops open or the cycle will not start.
- Keep the drawer tracks and contact points clean and dry.
- Use the correct bag and avoid compacting glass, hot ash, or liquids.
- Stop using the unit if you smell burning or hear the motor struggling; investigate before the next cycle.
Why it matters
A trash compactor’s motor and drive components are designed for steady, even resistance. When the door does not latch securely or the drawer is overloaded, the compactor works harder each cycle, which accelerates wear and leads to earlier failures.
Last updated: February 2026
How much does it cost to fix a trash compactor?
Trash compactor repair costs vary most by what failed (latch/door hardware vs. electrical vs. drive components) and whether you hire service. For a Kenmore 66542500, many common fixes are low-cost parts plus labor; major mechanical or electrical repairs cost more.
Typical repair cost ranges
These ranges help you budget before you order parts or schedule service.
- Minor hardware fix (door won’t latch, won’t start because door isn’t closed): $10 to $75 parts; $150 to $300 with service call
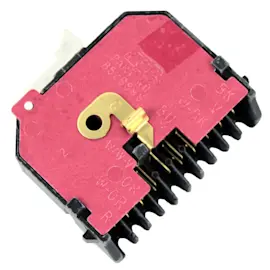
- Switch or wiring issue (intermittent power): $25 to $150 parts; $200 to $450 with labor
- Mechanical/drive issue (won’t compact, loud grinding): $75 to $300+ parts; $300 to $700+ with labor
- Diagnosis only (no repair): commonly $100 to $200
What usually drives the price
- Service call minimums often exceed the cost of small parts
- Access time (built-in units take longer to pull out and reinstall)
- Multiple worn items (fasteners, bumpers, latch pieces) replaced together
- Electrical troubleshooting time (testing switches, wiring, motor circuits)
- Availability of parts and whether you choose OEM-equivalent replacements
Quick “symptom to likely fix” guide
| Symptom | Common cause | What to check first |
|---|---|---|
| Won’t start | Door not fully latched | Door strike alignment, latch engagement |
| Starts then stops | Loose connection | Harness connections, damaged wires |
| Loud bang/rattle | Worn cushion/stop | Cabinet bumpers, loose bolts |
| Runs but won’t compact | Drive/mechanism issue | Ram movement, binding, broken hardware |
If the door is not latching reliably, replacing the door strike 279570 is a common low-cost first step.
Why it matters
A trash compactor that will not latch or has loose hardware can mimic bigger failures (motor or controls). Fixing the simple mechanical issue first often restores normal operation and avoids unnecessary parts.
Last updated: February 2026
What is a common problem with trash compactors?
A common problem with the Kenmore 66542500 trash compactor is a drawer or door that will not latch or open smoothly, which can keep the unit from starting. We typically fix this by clearing jams, cleaning the drawer tracks, and checking the door-latch hardware for wear.
Most common trash compactor issues we see
- Won’t start: power cord, wall outlet, drawer/door not fully closed, or a failed switch.
- Drawer stuck or hard to open: overpacked bag, jammed trash, dirty rails/rollers.
- Loud grinding or thumping: worn drive components, loose fasteners, debris in the mechanism.
- Stops mid-cycle: overload, obstruction, or an intermittent switch.
- Odors: residue in the drawer, cabinet, or around the ram.
Quick checks you can do first (safe, no disassembly)
- Make sure the drawer is fully closed and latched.
- Unplug the compactor for 2 minutes, then plug it back in and try again.
- Remove the bag and look for a hard object wedged between the drawer and cabinet.
- Wipe the drawer, cabinet edges, and tracks with mild soap and water; dry completely.
- If the door will not catch, inspect the latch area and replace worn latch hardware such as the door strike 279570.
Symptoms and likely causes
| Symptom | Most likely cause | What to do |
|---|---|---|
| Won’t start | Drawer not latched, switch issue | Reseat/close drawer; inspect latch alignment |
| Drawer won’t open | Jammed trash, overpacked bag | Remove bag; clear obstruction |
| Loud noise | Loose hardware, worn drive parts | Tighten fasteners; schedule service if persistent |
| Bad smell | Built-up residue | Clean drawer and cabinet surfaces |
Why it matters
Trash compactors are designed to run only when the drawer is fully closed and latched. A small latch or alignment problem can look like a “dead” compactor, and a jam can strain the drive system and create louder operation.
Last updated: February 2026
Why can't I press the trash compactor button?
If you can’t press the button on your Kenmore 66542500 trash compactor, the drawer usually is not fully closed or the control panel is locked out by a safety interlock. Clear any trash that’s preventing the drawer from seating, then re-close the drawer firmly so the door switch can engage.
Quick checks that fix most “button won’t press” problems
- Pull the drawer out and remove anything sticking up above the rim of the bag.
- Look for debris or a fallen item behind the drawer that blocks it from closing.
- Push the drawer in until it’s fully seated and flush with the cabinet front.
- Check the door latch area for misalignment or a loose strike.
- If the drawer feels “bouncy” at the end of travel, inspect for worn bumpers.
Parts to inspect on Kenmore 66542500
A drawer that won’t close far enough can keep the door switch from enabling the Start/Compact button. These model-listed parts are common culprits when alignment is off:
| Symptom | What to inspect | What it affects |
|---|---|---|
| Drawer won’t latch or feels loose | Door strike 279570 | Door closure and switch activation |
| Drawer closes but won’t seat firmly | Bumper 238614 | Final “home” position of the drawer |
| Hardware looks loose or shifted | Screws/bolts/nuts (mounting points) | Panel and latch alignment |
Why it matters
Trash compactors use a door switch interlock so the ram can’t run with the drawer open. When the drawer is even slightly out of position, the compactor prevents the button from operating to protect you and the machine.
If the drawer closes fully but the button still won’t work
Use safe electrical troubleshooting steps:
- Verify the outlet has power (try a small lamp).
- Reset the kitchen circuit breaker if it tripped.
- Inspect the power cord for damage.
- If you suspect an electrical issue, follow are diy appliance repairs safe before testing live circuits.
Last updated: February 2026