 Installation guide
 Owner’s manual
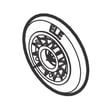


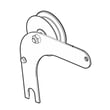
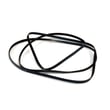
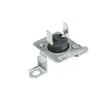
Where can I find my Frigidaire dryer model number?
On your Frigidaire dryer, the model number label is typically located along the top edge of the door opening. On the FFSE5115PW3, open the dryer door and look around the upper door frame area for the model and serial tag; it is usually easy to spot.
Quick steps to locate the tag
- Open the dryer door fully and turn on a flashlight.
- Check the top lip of the door opening first (most common spot).
- Look along the inside front panel near the hinge side and latch side.
- Wipe lint and dust off the frame so the printing is readable.
- Write down the full model number and serial number exactly as shown.
What the label looks like and what to record
Most Frigidaire dryer tags include both a model number and a serial number. Record both before ordering parts like a drum belt, door switch, or thermostat.
| Item on tag | What it’s used for | Example for this dryer |
|---|---|---|
| Model number | Ensures parts diagrams and parts match your unit | FFSE5115PW3 |
| Serial number | Helps confirm production details and compatible revisions | (Varies by unit) |
Why it matters
Using the exact model number prevents ordering the wrong Frigidaire dryer parts, especially for fit-sensitive items such as a door catch, door hinge, or drum support roller.
Helpful references
- Use the FFSE5115PW3 owner’s manual to confirm label location and other identification details.
- If you’re troubleshooting a display or flashing code, use Frigidaire dryer error codes to match the code to likely causes.
Last updated: February 2026
How much does it cost to replace a heating element in a Frigidaire dryer?
For a Frigidaire dryer like model FFSE5115PW3, the total cost to replace a heating element is usually the part cost plus labor. Most repairs land in the $200 to $450 range depending on service rates and whether additional heat-related parts are replaced.
Typical cost breakdown
Replacement cost varies mainly by whether you DIY or hire service.
- Heating element part (electric dryers): commonly $60 to $200
- Labor (service call + install): commonly $120 to $250
- Optional related parts (if failed/overheated): $20 to $80
- Total typical: $200 to $450
| Scenario | What you pay for | Typical total |
|---|---|---|
| DIY replacement | Part only | $60 to $200 |
| Pro repair (standard) | Part + labor | $200 to $450 |
| Pro repair (multiple heat parts) | Part + labor + thermostats/limiters | $250 to $550 |
Parts that often get checked at the same time
When a dryer stops heating or overheats, we often see a heat component fail because airflow is restricted (lint buildup, crushed vent, blocked exterior hood). During a heating element job, these parts are commonly tested and sometimes replaced:
- Dryer high-limit thermostat 3204267
- Dryer inlet thermal limiter 137032600
- Dryer thermistor (temperature sensor)
- House/terminal block wiring connections (signs of heat damage)
Why it matters
A new heating element can fail early if the venting system is restricted. Good airflow protects the heater, thermostats, and wiring, and it also shortens dry times.
What we recommend before you buy parts
Use the installation and venting requirements to confirm airflow and clearances, then diagnose the heat circuit.
- Clean the lint screen and lint chute
- Inspect the full vent run for kinks, crushing, or heavy lint
- Confirm strong airflow at the outside vent hood
- Follow the venting and clearance guidance in the FFSE5115PW3 installation guide
Last updated: February 2026
Is Frigidaire a good brand for dryers?
Frigidaire is a good, dependable dryer brand for most homes, and the Frigidaire FFSE5115PW3 is built for home use with standard safety and installation requirements. With correct venting, routine lint care, and basic maintenance, Frigidaire dryers typically deliver consistent drying performance and long service life.
What “good” looks like in real use
We judge a dryer brand by how well it handles everyday loads, how easy it is to maintain, and how available common replacement parts are.
- Consistent heat and airflow when the vent system is installed correctly
- Straightforward maintenance (lint screen, vent cleaning, drum support)
- Common wear parts are replaceable (belt, rollers, thermostats)
- Clear setup and safety guidance in the FFSE5115PW3 installation guide
- Troubleshooting help is easier when you can reference Frigidaire dryer error codes
Maintenance that protects performance (and why it matters)
Airflow is the biggest factor in drying time and temperature stability. The installation guidance for this dryer calls out avoiding flexible plastic or foil venting because it can crush, trap lint, and restrict airflow.
- Clean the lint screen before every load
- Inspect and clean the vent duct periodically (more often with pets)
- Use a rigid or semi-rigid metal vent where possible
- Keep the outside vent hood clear and opening freely
- Do not overload; large loads need room to tumble
Quick airflow check
| Symptom | Most common cause | What we recommend |
|---|---|---|
| Long dry times | Restricted venting or lint buildup | Clean vent path and confirm strong exhaust airflow |
| Clothes feel very hot | Poor airflow causing overheating | Check vent material and routing; shorten runs if possible |
| Dryer shuts off early | Overheat protection tripping | Clear lint, verify venting, then re-test |
Parts availability: a practical “brand quality” indicator
A big reason Frigidaire is a solid choice is that typical wear items are serviceable. For example, if the drum stops turning or you hear squealing, common fixes include replacing the white-westinghouse dryer drum belt 134719300 or inspecting drum support components.
Why it matters
A “good” dryer is one that dries efficiently without overheating and stays repairable over time. Correct venting and routine cleaning reduce strain on the motor, thermostats, and drum support system, which helps the dryer run better for longer.
Last updated: February 2026
What does code e64 mean on a Frigidaire dryer?
On a Frigidaire FFSE5115PW3 dryer, error code E64 points to a heating circuit problem (most commonly the heating element or its wiring). We treat it as a “no heat or improper heat” condition and troubleshoot the heater circuit and airflow before replacing parts.
What to check first (fast, no parts)
- Unplug the dryer (and shut off gas if you have a gas model) before opening panels.
- Confirm the cycle and temperature setting are appropriate for heated drying.
- Clean the lint screen and make sure the exhaust path is clear.
- Verify proper venting: use 4-inch rigid or semi-rigid duct, keep runs short with minimal turns, and never use foil or plastic venting.
- If the code returns immediately after reset, focus on the heater circuit components.
Likely causes and the parts that usually fix it
E64 is typically triggered by an open heater circuit, overheating protection opening, or a sensor issue.
| Symptom you notice | Most likely area | Common related part(s) for this model |
|---|---|---|
| Runs but no heat | Heater circuit open, wiring, control | Thermal protection or sensor checks first |
| Heats briefly then stops | Overheating from restricted airflow | Venting and lint buildup, then limit devices |
| Intermittent heat | Loose connection, sensor drifting | Temperature sensing components |
For FFSE5115PW3, these model-listed parts are often involved in heat-related faults:
- Dryer high-limit thermostat 3204267
- Dryer inlet thermal limiter 137032600
- Dryer thermistor 134587700
Why venting matters for E64
Restricted airflow makes the heater area run too hot; that can trip a high-limit thermostat or thermal limiter and cause repeated heat errors. The installation guidance calls for free-flowing exhaust venting and specifically warns against foil or plastic venting materials. Use the venting checklist in the installation guide.
When to use the manual
Use the FFSE5115PW3 owner's manual for the model-specific error code list (if included), cycle selection guidance, and safe access instructions for service checks.
Last updated: February 2026





