Installation guide
 Owner’s manual






Are gas dryers 110 or 220?
For the Hotpoint HTX21GASK0WW gas dryer, the electrical supply is 120V (commonly called 110/120), not 220/240. Gas dryers use electricity to run the motor, controls, and igniter, while the heat comes from the gas burner; confirm outlet and circuit requirements in the installation guide.
What to expect for gas vs. electric dryers
- Gas dryer: 120V, 60 Hz; typically on a 15 or 20 amp grounded circuit
- Electric dryer: 240V; typically on a 30 amp circuit with a 3- or 4-prong connection
- Gas dryers still need a working outlet because the drum motor and blower are electric
- Gas dryers also require a gas supply line and shutoff valve
Quick comparison
| Dryer type | Typical voltage | Typical breaker | What makes the heat |
|---|---|---|---|
| Gas dryer (HTX21GASK0WW) | 120V | 15A or 20A | Gas burner/valve assembly |
| Electric dryer | 240V | 30A | Electric heating element |
Why it matters
Using the correct voltage prevents nuisance tripping, no-start problems, and unsafe wiring. For HTX21GASK0WW, the right setup is a properly grounded 120V outlet plus a correctly installed gas connection and venting clearances.
Safety and installation notes we follow
- Use a properly grounded 3-prong outlet on the correct circuit
- Provide required clearances for airflow and service access
- When checking for gas leaks, use a soapy solution, never an open flame
- For LP (propane) setups and gas pressure checks, use a qualified installer
Last updated: February 2026
Is a 7.4 cu ft dryer big?
Yes. A 7.4 cu. ft. dryer is considered large capacity, which means it handles bigger loads and bulky items more easily than many standard-capacity dryers. For your Hotpoint HTX21GASK0WW gas dryer, the best way to confirm the exact capacity and recommended load size is the owner's manual.
What “7.4 cu. ft.” means in real use
A larger drum gives clothes more room to tumble, which typically improves airflow through fabrics and helps drying performance.
Common benefits of a large-capacity dryer:
- Fewer loads for family laundry days
- Better room for bulky items (comforters, blankets, jackets)
- Less wrinkling when you avoid overloading
- More consistent drying when airflow is strong
Load size tips (so “big” actually dries well)
Even with a large drum, overloading can still cause long dry times.
We recommend these habits:
- Fill the drum loosely; items should tumble freely
- Mix similar fabric weights (avoid heavy towels with lightweight tees)
- Clean the lint screen before every load
- Use timed dry for very small loads if auto cycles end too soon
- If loads take longer than normal, check venting and airflow
Why venting matters more than capacity
Drying speed depends heavily on airflow. The manual stresses that the dryer must be vented outdoors and that proper 4-inch metal ducting and a short, uncrushed vent path help performance. If venting is restricted, even a large-capacity dryer will run longer and use more energy.
Helpful reference: dryer takes a long time to dry
Quick comparison: standard vs large capacity
| Capacity class | Typical range (cu. ft.) | Best for |
|---|---|---|
| Standard | ~5.0 to 7.0 | Everyday mixed loads |
| Large | ~7.1 to 8.0 | Bigger loads, bulky items |
| Extra-large | ~8.1+ | Very large households, frequent bulky loads |
Why it matters
Choosing the right capacity helps you match your washer load size, reduce drying time, and avoid overheating or wear caused by poor airflow and overstuffed loads.
Last updated: February 2026
What is the most common problem with a GE dryer?
The most common GE-style dryer complaint is no heat or poor drying, and on a gas dryer like Hotpoint HTX21GASK0WW that usually traces to restricted airflow (venting/lint buildup) or a failed heat-safety/control part such as a thermostat or igniter. Start by confirming the dryer is vented outdoors and the gas supply is on per the installation guide.
Most common symptoms and what they usually mean
- Tumbles but no heat: gas supply off, igniter issue, thermostat/high-limit issue
- Long dry times: clogged lint screen, blocked lint chute, crushed/too-long vent duct
- Stops mid-cycle or overheats: restricted airflow causing high temperatures and safety shutdowns
- Won’t start: power supply issue, start switch issue, timer/control issue
Quick checks we recommend first (fast, high-impact)
- Clean the lint screen every load; replace it if damaged or warped (see g.e. dryer lint screen WE03X23881).
- Confirm outdoor venting and safe ducting: this dryer must exhaust outdoors; avoid plastic venting and replace old foil or plastic duct with UL-listed ducting.
- Check airflow: strong air at the outside hood; weak airflow points to a vent restriction.
- Verify gas supply is on: make sure the shutoff at the dryer and the main shutoff are open.
- Check power: a tripped breaker or blown fuse can cause start or heat complaints.
Parts that commonly fix “no heat” on HTX21GASK0WW
| Symptom | Common suspect | Example part for this model |
|---|---|---|
| No ignition or intermittent heat | Igniter | Igniter WE04X25996 |
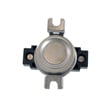
| Overheats, then shuts down | High-limit thermostat | Dryer high-limit thermostat WE04X26138 |
| Poor temperature control | Operating thermostat | Dryer operating thermostat WE04X25201 |
Why it matters
Airflow problems are the root cause behind many “no heat” and “takes too long to dry” complaints because restricted venting raises temperatures, triggers safety devices, and reduces drying performance. The venting rules and limits in the owner's manual help prevent repeat failures.
Last updated: February 2026
Is HTX21GASK0WW stackable?
The Hotpoint HTX21GASK0WW gas dryer is not designed to be stacked. This model is intended for standard floor installation with required outdoor venting, so we recommend installing it side-by-side with a washer rather than in a stacked laundry center.
How to confirm for your exact setup
Use these checks to verify installation requirements before you plan cabinetry, shelving, or a closet layout:
- Review the installation requirements in the installation guide.
- Confirm you have floor space for a full-size, vented dryer footprint.
- Plan for a 4-inch exhaust duct run to the outdoors (rigid metal ducting is recommended).
- Make sure the dryer location allows safe access to the gas shut-off valve.
- Avoid placing the dryer where the vent duct will be crushed or kinked.
What “stackable” usually means (and why it matters)
“Stackable” dryers are built to mount on a washer using a manufacturer-approved stacking kit and specific cabinet structure. Using a dryer that is not designed for stacking can lead to:
- Poor vent airflow and longer dry times
- Excess vibration and noise
- Harder access for service and cleaning
- Unsafe installation conditions around gas and exhaust connections
Space planning reference (typical)
The installation literature for this style of GE-built/Hotpoint dryer family commonly shows these rough-in dimensions:
| Dryer capacity family | Typical width | Typical height |
|---|---|---|
| 6.2 cu. ft. class | ~27 in. | ~43 3/8 in. |
| 7.2 cu. ft. class | ~29 1/2 in. | ~43 3/8 in. |
| 7.4 cu. ft. class | ~30 1/2 in. | ~43 3/4 in. |
For the exact clearances and venting rules that apply to your HTX21GASK0WW installation, follow the installation guide.
If you need a space-saving alternative
If you need a stacked setup, we recommend choosing a washer and dryer pair specifically labeled as stackable and using the correct stacking kit for that pair.
Last updated: February 2026