 Installation guide
 Owner’s manual
 Error Codes



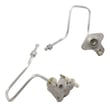
Are all stove igniters universal?
No. Stove igniters are not universal; for the best fit and reliable ignition on Kenmore gas range model 79071319705, the replacement needs to match the original style (mounting, connector, and electrical rating). “Universal” igniters can work, but they often require wire splicing and careful setup.
Universal igniters are designed to fit many ranges, not all ranges. They typically include extra hardware and wire connectors so you can adapt the wiring.
Common differences that prevent a true universal fit:
- Mounting bracket shape and hole spacing
- Igniter length and tip position relative to the burner
- Connector type (plug-in vs. bare leads)
- Wire length and heat shielding
- Electrical characteristics (how it draws power and heats)
For this Kenmore range, we recommend matching the igniter to the model’s parts list and service information in the 79071319705 owner's manual. If your oven is slow to light, won’t light, or takes multiple tries, a correct-fit igniter is usually the most dependable fix.
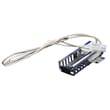
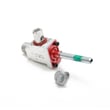
If you are replacing the oven burner igniter, a model-matched option is the range oven burner igniter 5304509706.
Some ignition problems are caused by burner or cap issues, not the igniter itself.
- Make sure the burner cap and head are seated correctly
- Clean clogged burner ports (spills can cause delayed ignition)
- Turn the knob to LITE only to ignite, then adjust flame (do not leave it on LITE)
- Confirm the burner actually lights and the flame does not extend past the pan
- If ignition is delayed, inspect the electrode area for damage or heavy residue
| Option | Pros | Cons | Best for |
|---|---|---|---|
| Model-specific igniter | Correct fit, no wiring changes | Must match the exact model | Most repairs |
| Universal igniter kit | Works across many models | May require splicing and bracket changes | When exact part is unavailable |
An igniter that does not match can cause delayed ignition, weak ignition, or repeated sparking. On a gas range, consistent ignition helps the burner light promptly and keeps cooking performance predictable.
Last updated: February 2026
How long should a Kenmore gas stove last?
A Kenmore gas range like model 79071319705 typically lasts about 15 years with normal household use. Regular cleaning to prevent grease buildup and addressing ignition or temperature problems early helps you get the full life out of the burners, oven, and controls.
Most ranges reach their expected life when they are installed correctly, kept clean, and repaired as needed.
- Heavy daily cooking can shorten lifespan
- Grease buildup and spills can damage finishes and create hot spots
- Igniter wear is common as the range ages
- Overheating from blocked airflow or poor cleaning habits can stress components
- Using the correct replacement parts helps prevent repeat failures
Your Kenmore manual emphasizes regular cleaning to keep parts free of grease that could catch fire and to avoid cleaner residue that can ignite.
- Clean the cooktop and the area under surface burners regularly
- Keep burner heads and ports clear so flames stay even
- Clean grates and drip areas; dry thoroughly after washing
- Avoid leaving excess aerosol or cleaner residue on hot surfaces
- Follow the cleaning steps in the 79071319705 owner's manual
These are typical patterns we see on gas ranges over time.
| Part type | What you may notice | Usual fix |
|---|---|---|
| Ignition parts | Clicking, delayed ignition, no bake | Replace igniter or switch/harness |
| Oven temperature sensing | Overbaking, underbaking | Test/replace sensor |
| Light and small hardware | Oven light out, loose handles/panels | Replace bulb/screws |
| Gas regulation/valving | Weak flame, inconsistent heat | Service regulator/valve |
If the oven will not ignite or takes a long time to light, the range oven burner igniter 5304509706 is a common replacement on this model.
A 15-year lifespan assumes safe operation and routine care. Keeping grease from accumulating and fixing ignition issues early helps maintain consistent burner flames, stable oven temperatures, and safer day-to-day cooking.
Last updated: February 2026
How much does it cost to replace a gas oven igniter?
Replacing the gas oven igniter on Kenmore model 79071319705 typically costs $150 to $325 total when you hire a service technician; the part is usually $50 to $120 and labor makes up the rest. If you DIY, you often pay for the part only, plus basic tools.
- DIY (parts only): about $50 to $120
- Professional labor: about $100 to $200 (varies by area and trip charge)
- Total installed: about $150 to $325
| Scenario | What you pay for | Typical total |
|---|---|---|
| DIY replacement | Igniter + your time | $50 to $120 |
| Service call | Igniter + labor + trip/diagnostic | $150 to $325 |
| “While we’re in there” repair | Igniter + extra diagnosis/parts | $250+ |
- OEM vs. universal parts: OEM-style igniters cost more but fit and wire up more predictably.
- Access time: some ranges require more disassembly to reach the igniter.
- Related failures: a weak igniter can be confused with a gas valve or control issue.
- After-hours service: evenings/weekends usually increase labor.
For this model, the oven burner igniter is a common fix for “no bake” or slow ignition.
- Igniter likely: bake burner does not light, or takes 60 to 90+ seconds to ignite
- Gas supply likely: no burners light anywhere, or you recently changed gas type
- Ignition system likely (surface): cooktop clicking issues point more to switches/harness
| Symptom | Most common cause |
|---|---|
| Bake won’t light, broil works | Weak/failed igniter |
| Bake lights late with gas smell | Weak igniter (not drawing enough current) |
| No heat in bake or broil | Gas supply, control, or safety valve issue |
A weak igniter can delay ignition, cause poor baking performance, and increase the chance of unburned gas odor during start-up. Replacing the igniter restores normal burner lighting and steadier oven temperatures.
We recommend following the disassembly and safety steps in the 79071319705 installation guide before starting any gas range repair.
Last updated: February 2026
How to remove the top of a Kenmore gas range?
On Kenmore gas range model 79071319705, the cooktop top is not removable; we do not recommend trying to lift or detach it. For most access and cleaning tasks, you remove the grates, burner caps, and burner heads instead, following the steps in the installation guide.
- Lift off the burner grates.
- Remove the burner caps.
- Pull the burner heads off by hand.
- If you need deeper access for service, pull the control knobs straight off the shafts.
- For gas regulator access, remove the storage drawer or warmer drawer (if equipped).
- Make sure all burner knobs are OFF and the cooktop is cool.
- Remove grates and caps.
- Lift the burner heads straight up.
- Clean and inspect the burner head ports and the igniter area; reassemble in the same positions.
Because this cooktop is designed as a fixed assembly, service access is usually gained from the front or below.
| What you need to reach | Common access point | What you remove first |
|---|---|---|
| Gas pressure regulator | Under the range | Storage drawer or warmer drawer |
| Surface burner ignition wiring | Under the cooktop area | Grates, caps, burner heads |
| Knob and switch area | Front control panel | Control knobs |
Trying to force a non-removable cooktop can bend the top, crack enamel, or damage gas components. Removing only the intended parts (grates, caps, heads, knobs, drawers) keeps the Kenmore range sealed and aligned so burners light and flame patterns stay correct.
Last updated: February 2026
What are the parts of a gas stove?
A Kenmore gas range like model 79071319705 is made up of a cooktop burner system (grates, caps, heads, igniters, and knobs) plus an oven system (burner, igniter, temperature sensing, and controls). These parts work together to deliver safe ignition, stable flames, and accurate baking.
Most gas stove cooktops are built around these components:
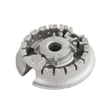
- Burner grates: support cookware above the flame
- Burner caps: help shape and stabilize the flame
- Burner heads: distribute gas through ports for even flame
- Electrodes/igniters: create the spark for ignition
- Control knobs and valve stems: control gas flow and flame size
The installation instructions for this model also call out burner head, burner cap, and burner skirt alignment (letters stamped on parts) to ensure proper ignition and flame size; see the installation guide.
The oven side of a gas range typically includes:
- Oven burner: produces heat for baking
- Oven burner igniter: lights the gas at the burner
- Oven temperature sensor: helps the control maintain set temperature
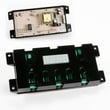
- Control board and user interface: manages bake/broil functions and timing
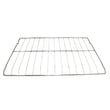
- Oven racks and door glass/handle: support cooking and retain heat
| System | Part example | What it affects |
|---|---|---|
| Oven ignition | Range oven burner igniter 5304509706 | Oven won’t heat, delayed ignition |
| Temperature feedback | Range oven temperature sensor 316233903 | Overheating, underheating, temp swings |
| Cooktop ignition | Range igniter switch and harness assembly 316580615 | Clicking/sparking issues, burners not lighting |
Knowing the major parts helps you troubleshoot faster. For example, if the cooktop clicks but won’t light, we focus on burner cap/head placement and ignition components; if the oven won’t heat, we focus on the oven igniter, gas valve, and temperature sensing.
Last updated: February 2026
Where to find model number on Kenmore gas range?
On the Kenmore gas range model 79071319705, the model and serial number are printed on the serial plate located on the right side of the oven front frame, inside the storage drawer or warmer drawer compartment. The quickest way is to pull the lower drawer out and look along the right front frame. See the 79071319705 owner's manual for the exact illustrated location.
- Turn the range off and let it cool.
- Pull the storage drawer (or warmer/broiler drawer, depending on configuration) fully open.
- Look on the right side of the oven front frame (the frame just behind the drawer opening).
- Use a flashlight; the label can be low and partially shadowed.
- Write down both the model and serial numbers for parts lookup and service.
For this model, the drawer area is the correct spot. If the label is hard to see, use this order:
| Location to check | What you will see | How to access |
|---|---|---|
| Storage/warmer drawer compartment (right oven front frame) | Model and serial plate | Open or remove the lower drawer |
| Oven door frame area | Sometimes a secondary sticker | Open the oven door and inspect the frame |
| Rear panel | Not typical for this model | Only if the front label is missing |
We use the model and serial plate information to match the correct Kenmore parts and configurations (for example, burner components, igniter assemblies, and LP conversion information). Using the exact model number prevents ordering a similar-looking part that will not fit.
Last updated: February 2026




