



Does the Speed Queen SDE907WF use a lot of water?
No. The Speed Queen SDE907WF is a dryer, so it does not use water during normal operation; it uses electricity or gas for heat and a blower to move air through the drum. If you are seeing water involved, it is coming from laundry, humidity, or a separate washer setup, not the dryer itself.
What you might be noticing instead
Dryers can create the impression of “water use” because moisture is being removed from clothes and sent out through the exhaust.
- Water droplets near the vent hood can happen in cold weather (condensation).
- A damp laundry room can point to a restricted vent or poor airflow.
- Water on the floor often comes from a washer, a drain, or a humidifier nearby.
- Steam or moisture at the vent can be normal when drying heavy loads.
- A musty smell usually means lint buildup or a venting issue, not water consumption.
Quick checks we recommend (SDE907WF)
Good airflow is the difference between normal moisture removal and a damp, inefficient dryer.
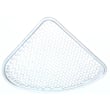
- Clean the lint screen every load; replace a damaged or missing screen with the Speed queen lint filter D503980W.
- Confirm the exhaust duct is not crushed, kinked, or excessively long.
- Check the outside vent hood for a stuck flap or lint blockage.
- If dry times are long, inspect the blower area and ducting for lint buildup.
- Make sure the drum is turning smoothly; a worn belt can reduce performance and increase dry time (see Speed queen dryer belt D511255P).
Common symptoms and what they usually mean
| Symptom | Most common cause | What to do first |
|---|---|---|
| Laundry room feels humid | Restricted venting | Clean/shorten vent run, clear vent hood |
| Water droplets at exterior vent | Condensation | Improve vent insulation, verify strong airflow |
| Clothes take too long to dry | Lint restriction or weak airflow | Clean lint path, check blower/duct |
| Lint on clothes | Damaged lint screen or seal issues | Inspect/replace lint filter |
Why it matters
A dryer that cannot move air efficiently runs longer, wastes energy, and can overheat. Keeping the lint screen and exhaust path clear protects performance and helps prevent nuisance shutdowns.
For more maintenance and efficiency tips, use our how to keep a dryer clean and economical guide. If you need replacement parts beyond what is listed for SDE907WF, search by model on Sears PartsDirect.
Last updated: February 2026
What are common problems with Speed Queen dryers?
Common problems we see on the Speed Queen SDE907WF dryer fall into three buckets: airflow issues (long dry times and overheating), “won’t start” electrical/switch problems, and drum drive problems (squealing or no tumble). Many symptoms improve after cleaning the lint path and verifying the vent is clear.
Most common symptoms and what they usually point to
- Dryer runs but takes too long to dry: restricted venting, clogged lint screen housing, crushed duct, or blocked exterior hood
- Dryer gets very hot or shuts off mid-cycle: poor airflow, lint buildup in the blower area, or a control/switch issue
- Dryer won’t start: start circuit problem (push-to-start switch, door switch, timer/control), or power supply issue
- Drum won’t turn or you hear squealing/thumping: worn belt, pulley, or drum support wear
- Weak airflow at the outside vent: lint blockage in the exhaust ducting or blower housing
Quick checks we recommend first (no parts needed)
- Clean the lint filter every load and wash it with warm water occasionally if you use dryer sheets.
- Check airflow: run the dryer for 2 to 3 minutes and confirm strong air flow at the outside vent.
- Inspect the vent run: keep it short, avoid kinks, and remove lint buildup.
- Listen and look: squealing, burning smell, or a drum that stops turning are strong clues.
- Unplug the dryer before opening any panels.
Parts that commonly solve “won’t start” or “won’t tumble” complaints
If basic airflow and power checks look good, these model-matched parts are common fixes:
| Symptom | Common suspect | Example part for SDE907WF |
|---|---|---|
| Drum won’t turn, belt looks loose/broken | Drum belt | Speed queen dryer belt D511255P |
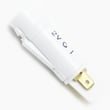
| Push-to-start does nothing | Push-to-start switch | Speed queen dryer push-to-start switch 55882 |
| Intermittent start/stop or odd behavior | Switch/control issue | Speed queen switch D512973 |
Why it matters
Airflow problems do more than slow drying; they raise operating temperatures, increase energy use, and can lead to repeated shutdowns. Fixing venting and lint buildup first prevents repeat failures and helps any new parts last longer.
For step-by-step maintenance that helps prevent long dry times and overheating, use our guide: how to keep a dryer clean and economical. If you need to order parts for the Speed Queen SDE907WF, use the parts list for this model or search by model number on Sears PartsDirect.
Last updated: February 2026
How do I find the model number on my SDE907WF?
Your Speed Queen dryer’s model number is printed on the appliance’s ID tag (not on the control panel). On model SDE907WF, check the door opening area first; the tag is usually on the door jamb or the front frame just inside the door.
Where to look on a Speed Queen dryer
Check these common ID-tag locations in order:
- Door jamb (the frame the door closes against)
- Front frame just inside the door opening
- Inside the door itself (along the edge)
- Rear panel (upper area)
- Side panel near the back edge
What the model tag looks like
The tag is typically a small sticker or metal plate that lists key identifiers.
- Model number (example format: SDE907WF)
- Serial number
- Electrical ratings (volts and amps)
- Sometimes a manufacturing date code
Why the exact model number matters
Speed Queen dryers can use different belts, switches, and panels that look similar but fit differently. Using the full model number helps us match the correct diagrams and parts for your exact configuration.
| If you need… | Use this from the tag | Why it helps |
|---|---|---|
| Correct part fit | Model number | Matches the right parts list and diagrams |
| Version-specific parts | Serial number | Identifies production changes |
| Electrical parts match | Voltage/amp info | Confirms compatibility for switches and wiring |
Quick tip if the tag is hard to read
- Wipe the tag gently with a damp cloth and mild soap; dry it
- Take a close-up photo and zoom in
- If the door area tag is missing, check the rear panel next
If you are confirming parts after you find the model number, a common wear item is the Speed queen dryer belt D511255P.
Last updated: March 2026





