Owner’s manual
 Error Codes


How to tell cubic feet of Kenmore refrigerator by model number?
For Kenmore Elite model 10656699501, the model number by itself usually does not spell out the exact cubic-foot capacity. The most reliable way is to look up the capacity in the specifications section of the 10656699501 owner's manual, or calculate an estimate by measuring the usable interior space.
The capacity is typically listed as “total capacity” (and sometimes split into refrigerator and freezer capacity) in the specifications section of the 10656699501 owner's manual.
Use this when you need a close number for planning shelves, bins, or a replacement.
- Empty the compartment you are measuring (fresh food and freezer can be calculated separately).
- Measure usable interior width, height, and depth in inches (do not include door bins; avoid counting areas blocked by the ice maker housing).
- Multiply:
width x height x depthto get cubic inches. - Divide by 1,728 to convert cubic inches to cubic feet.
- Add refrigerator + freezer results for an estimated total.
Kenmore model numbers that start with 106 identify the manufacturing source family, but they do not reliably encode the exact cubic-foot capacity in a way you can decode at home. For capacity, the manual specs or a measurement-based estimate is the dependable approach.
| Method | What you get | Accuracy |
|---|---|---|
| Manual specifications | Exact listed capacity | Highest |
| Interior measurement | Usable-space estimate | Medium |
| Model-number “decoding” | Not consistent for 106 models | Low |
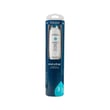
Cubic feet helps you compare refrigerators fairly and choose correctly sized replacement parts and accessories (for example, the correct water filter style and housing fitment). For this model, the manual also lists the correct replacement filter part number (9020), which corresponds to the genuine Kenmore refrigerator water filter EDR3RXD1.
Last updated: February 2026
What is the average lifespan of a Kenmore Elite refrigerator?
A Kenmore Elite refrigerator like model 10656699501 typically lasts 10 to 15 years. With good airflow, clean condenser coils, and tight door seals, many units reach the high end of that range; heavy use and deferred maintenance shorten it. See the owner's manual for care and cleaning guidance.
Most side-by-side refrigerators fall into a predictable lifespan range, and the biggest difference is maintenance and operating conditions.
- 10 to 15 years is the normal service-life window for a modern refrigerator
- Dirty condenser coils can raise compressor run time and heat load
- Worn or sticky door gaskets can cause warm air leaks and excess frost
- Poor leveling can lead to doors not sealing consistently
- Water and ice components (filter, inlet valve, ice maker) often need attention before the sealed system does
Use these practical checkpoints when your refrigerator is aging.
| If your refrigerator is... | And you’re seeing... | What we recommend |
|---|---|---|
| Under 8 years old | One failed part, otherwise cooling well | Repair is usually the best value |
| 10 to 15 years old | Repeated issues or temperature swings | Compare repair cost to replacement |
| Over 15 years old | Cooling problems plus multiple worn parts | Plan for replacement unless repair is minor |
These steps reduce run time, prevent frost issues, and protect food temperatures.
- Vacuum condenser coils and the grille area regularly (more often with pets)
- Keep door gaskets clean so they seal without sticking
- Confirm the cabinet is level so doors self-close and seal
- Replace the water filter on schedule; for this model, the replacement filter is genuine Kenmore refrigerator water filter EDR3RXD1
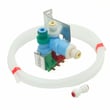
- If ice or water flow gets weak, check the refrigerator inlet valve W10408179 and water line connections
A refrigerator near the end of its lifespan often runs longer to hold temperature, which can increase noise, frost buildup, and food-safety risk. Preventive maintenance helps stabilize temperatures and reduces stress on the compressor and fans.
Last updated: February 2026
Can I run my Kenmore refrigerator without a water filter?
Yes. On Kenmore Elite side-by-side refrigerator model 10656699501, you can use the water dispenser and ice maker without a water filter cartridge installed; the refrigerator will dispense unfiltered water. Use the filter cap correctly so the housing seals and you avoid leaks (see the owner's manual).
- Press the eject button and pull the filter straight out.
- Twist the filter cap counterclockwise to remove it from the old filter.
- Keep the cap; it is designed to be reused.
- Install the cap into the filter housing and rotate it until it locks in the horizontal position.
- Dispense water for a moment to confirm steady flow and no dripping.
| Item | With filter installed | Without filter installed |
|---|---|---|
| Water quality | Filtered | Unfiltered |
| Taste/odor | Typically improved | Depends on your supply water |
| Flow rate | Can be slightly reduced | Often increases |
| Maintenance | Replace cartridge periodically | Keep cap installed and housing clean |
Removing the filter can be a good diagnostic step if you have low water flow at the dispenser or ice maker.
- If flow improves with the filter removed, the filter is likely clogged or not seated correctly.
- If you use a reverse osmosis system, removing the refrigerator filter can help prevent excessive pressure drop.
For normal use, we recommend replacing the water filter about every 6 months, or sooner if water flow drops.
- Replacement filter: genuine Kenmore refrigerator water filter EDR3RXD1
- If the cap is missing or damaged, replace it: refrigerator water filter cap (black) WP2260518B
Running without a filter is safe for operation, but it changes what you are drinking and can affect dispenser performance. Keeping the cap installed correctly protects the filter housing seal and helps prevent leaks and air in the water line.
Last updated: February 2026
What model is my Kenmore Elite refrigerator?
Your Kenmore Elite refrigerator’s model number is printed on the model and serial number label inside the refrigerator compartment. For Kenmore Elite model 10656699501, the label is typically on an inside wall of the fresh food (refrigerator) section; confirm the exact location in the 10656699501 owner's manual.
- Open the fresh food door and scan the inside side walls at eye level
- Check the upper interior walls near the control housing
- Look near the crisper area (inside wall above or beside the drawers)
- Use a flashlight; the label is often small and easy to miss
- Write down both the model number and serial number for parts matching
Most Kenmore Elite refrigerators list these items together:
- Model number (for example: 10656699501)
- Serial number
- Purchase date (sometimes recorded by the owner, not printed)
| Item on label | What it’s used for | Example format |
|---|---|---|
| Model number | Matching parts diagrams and replacement parts | 106.56699501 or 10656699501 |
| Serial number | Identifying production run details | Letters and numbers |
| Purchase date | Your records and warranty paperwork | Month/day/year |
We use the model number to match the exact Kenmore Elite side-by-side refrigerator parts that fit your unit. Even small model number differences can change which water filter, ice maker, or door bin fits.
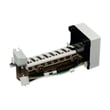
If your label shows 10656699501, common maintenance parts you may see for this model include the genuine Kenmore refrigerator water filter EDR3RXD1 and the refrigerator ice maker 2198597.
Last updated: February 2026
Why is my Kenmore Elite side by side ice maker not working?
If your Kenmore Elite 10656699501 side-by-side refrigerator ice maker is not working, the most common causes are the ice maker ON/OFF switch being OFF, the freezer door or ice bin not seated so the shutoff sensor stops production, or the water supply valve being closed. Start with the ice maker switch and water supply checks in the owner's manual.
- Confirm the ice maker ON/OFF switch is in the ON (left) position (top right of the freezer compartment).
- Make sure the freezer door closes fully; an open door can stop ice production.
- Reseat the ice storage bin so it clicks into place; the sensor cover (flipper door) can stop the ice maker when the bin is removed.
- Verify the household water shutoff valve to the refrigerator is fully open.
- Look for a kinked or pinched water line behind the refrigerator.
- If you recently emptied the bin, allow 24 hours for normal ice production to recover.
Use this to narrow the problem quickly.
| What you notice | What it usually means | What to do next |
|---|---|---|
| Ice maker is ON but no ice at all | Water supply is off or not reaching the ice maker | Confirm shutoff valve is open; inspect line; consider testing the refrigerator inlet valve W10408179 |
| Ice maker has ice stuck or won’t eject | Ice jam at the ejector arm | Clear the jam with a plastic utensil (per manual guidance) |
| Ice production is slow | Normal recovery time or temperature/control issue | Wait 24 hours after heavy use; confirm controls are set correctly |
- Turn the ice maker OFF (right), wait 30 seconds, then turn it back ON (left).
- Remove the ice bin, check for clumped ice, then reinstall the bin securely.
- If an ice cube is jammed in the ejector arm, remove it with a plastic utensil.
- Confirm the freezer is cold enough for ice making (ice makers typically need about 0°F for best output).
An ice maker can appear “dead” when the optical shutoff sensor is blocked (bin not seated, door open) or when water is not supplied. Fixing those basics prevents unnecessary part replacement and restores normal ice production faster.
Last updated: February 2026