 Owner’s manual



How to force GE washer to drain and spin?
To force your GE GTW845CSN0WS washer to drain and spin, select the Drain & Spin cycle and press Start. If the washer is paused, press Start/Pause to resume; if water remains, Drain & Spin is the correct cycle to empty the basket and spin out water (see the GTW845CSN0WS owner's manual).
- Press Power to wake the control.
- If a cycle is running, press Start/Pause once to pause.
- Turn the cycle selector to Drain & Spin.
- Close the lid fully (the washer will not start with the lid open).
- Press Start to begin draining, then spinning.
These checks fix most “won’t drain” situations on this style of top-load washer:
- Make sure the lid is closed; the washer can stop and display a lid-related message when open.
- Un-kink the drain hose and confirm the washer is not sitting on the hose.
- Check standpipe height; the top of the drain outlet should be under 8 ft (2.44 m) above the floor.
- If the load is off-balance, redistribute items and run Drain & Spin again.
- Listen for the drain pump: a steady humming during drain is normal; no pump sound often points to a drain restriction or pump issue.
| What you notice | What it points to | What to do next |
|---|---|---|
| Spin light blinking, clothes still wet | Out-of-balance detected | Redistribute load; run Drain & Spin |
| Washer pauses and won’t respond | Control lockout or paused too long | Close lid; reselect cycle; press Start |
| Won’t drain, hose looks pinched | Drain hose restriction | Straighten/route hose correctly |
| Loud humming but little/no draining | Pump struggling with blockage | Check hose path; consider pump replacement |
Running Drain & Spin is the safest way to remove standing water without restarting a full wash cycle. It also helps after an out-of-balance event so the washer can spin water out properly.
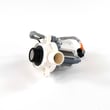
If you confirm the washer is set to Drain & Spin and the hose setup is correct, these model-compatible parts are often involved:
For model-specific parts diagrams and ordering, use the parts list for GTW845CSN0WS or search by model on Sears PartsDirect.
Last updated: February 2026
How often should I run self clean on my GE washer?
For your GE GTW845CSN0WS top-load washer, we recommend running the washer’s cleaning cycle once per month to prevent detergent residue, odors, and soil buildup. GE’s care instructions for GTW840/GTW845 models use the Bulky Items cycle as the monthly “tub clean” routine (see the GTW845CSN0WS owner's manual).
Use this routine exactly as a maintenance cycle:
- Empty the washer basket completely.
- Open the lid and add 1 cup (250 ml) liquid bleach (or a washing machine cleaner) directly into the basket.
- Close the lid and select Bulky Items.
- Press Start and let the cycle run to completion.
- Do not interrupt the cycle; if it gets interrupted, run a full Bulky Items cycle again before washing clothes.
Run the cleaning cycle more frequently (every 2 weeks) if you notice any of the following:
- Musty or sour odor after loads finish
- Visible residue in the basket or on the tub ring
- Lots of cold-water washing (slower detergent dissolving)
- Regular use of extra detergent or fabric softener
- Washer sits closed and unused for long periods
| Situation | Recommended frequency |
|---|---|
| Normal household use | Monthly |
| Odor or residue present | Every 2 weeks until resolved, then monthly |
| Heavy use (many loads per week) | Monthly (do not skip) |
A monthly tub-clean routine helps keep the wash basket, recirculation paths, and drain system cleaner, which improves rinsing and reduces odor-causing buildup. It also helps your washer run more consistently from cycle to cycle.
If you’re troubleshooting a cleaning-related error or unusual behavior, our GE gtw top load washer error codes guide can help you match what you see on the display to the next best step.
Last updated: February 2026
How do I run a diagnostic test on my GE washer?
On the GE GTW845CSN0WS washer, diagnostics are run through the service mode described in the GTW845CSN0WS owner's manual. Once you enter service mode, you can view stored error codes and run component checks to pinpoint issues such as draining, filling, lid lock, or motor problems.
- Empty the washer and close the lid.
- Turn the washer off; keep it plugged in unless the procedure says otherwise.
- If the display is scrolling “CAnCELEd”, wait out the 4-minute lockout before trying diagnostics again.
- If the display shows “Lid”, open and close the lid; the washer will not start another cycle until the lid has been opened.
- If Controls are locked, unlock them first (see the Control Lock steps in the manual).
Use the exact button and knob sequence for your model from the GTW845CSN0WS owner's manual. In service mode, we recommend focusing on these outputs first:
- Stored error codes (most useful starting point)
- Lid lock status (helps confirm a lid lock or wiring issue)
- Fill and drain functions (helps isolate inlet valve vs. drain pump problems)
- Motor and speed sensing checks (helps isolate drive system issues)
| Symptom | What to check in diagnostics | Likely part area |
|---|---|---|
| Won’t start, lid-related messages | Lid lock input/status | Lid lock and lid alignment |
| Won’t drain, water left in tub | Drain/pump function | Pump, drain hose |
| Won’t fill or fills slowly | Water valve function | Inlet valve, screens |
| No/weak agitation or spin | Motor/speed feedback | Motor inverter, stator/sensor |
These model-matched parts are commonly involved:
- For draining issues: GE washer drain pump assembly WH23X28418 and the drain hose path.
- For filling issues: washer water inlet valve assembly WH13X26637.
Running diagnostics first prevents guesswork. Error codes and component checks help you confirm whether the problem is electrical (control, wiring, sensor) or mechanical (pump, hose, lid lock), so you replace the right part the first time.
You can order replacement parts for the GE GTW845CSN0WS from the parts list for this model, or search by model number on Sears PartsDirect.
Last updated: February 2026


