 Installation guide
 Owner’s manual


How do you reset the heating on a GE dryer?
Unplugging your GE electric dryer model DHDSR46EG7WW for about 1 minute and plugging it back in is the practical “reset” for the heater circuit and controls. If it still tumbles but won’t heat, the most common cause is a tripped breaker or blown fuse on one leg of the 240V supply.
Quick reset and heat-check steps
- Turn the dryer OFF.
- Unplug the power cord (or switch the dryer breaker OFF).
- Wait 60 seconds.
- Restore power and start a Timed Dry cycle with a heat setting.
- If the drum turns but there’s no heat after a few minutes, move to the power and airflow checks below.
Check the most common “no heat” causes first
For this GE electric dryer, we see these issues most often:
- House power issue: many electric dryers use two fuses/breakers; one can trip and the dryer will still run but not heat.
- Cycle/setting mismatch: “air fluff/no heat” type selections will tumble with no heat.
- Restricted venting: poor airflow can cause overheating and safety devices to open.
- Failed heater or thermostat: the heater circuit can open if a component fails.
| Symptom | What it usually points to | What to do next |
|---|---|---|
| Tumbles, no heat | One breaker tripped or one fuse blown | Reset both breakers, check fuses |
| Long dry times, weak airflow | Vent restriction | Clean lint screen, inspect vent run |
| No heat on any cycle | Heater circuit problem | Test heater and thermostats |
Parts that commonly affect heating (when power and venting are OK)
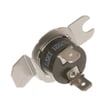
If you’ve confirmed correct settings and good airflow, heating failures often involve the heater circuit components. For this model, a common repair is replacing the heating element such as the mica unit WE11M10001.
Why it matters
A dryer that tumbles without heat is frequently a power supply problem, not a control reset issue. Checking breakers, settings, and venting first prevents unnecessary parts replacement and helps protect the heater and thermostats from overheating.
For model-specific operating and troubleshooting guidance, use the DHDSR46EG7WW owner’s manual.
Last updated: February 2026
What if I can't find my part on Sears PartsDirect?
If you can’t find a part for your GE DHDSR46EG7WW electric dryer, we recommend confirming the exact model and serial number first, then using the diagrams and part lists in the DHDSR46EG7WW owner's manual to match the part name to the correct component.
Quick steps to find the right part
- Check the model/serial label on the front of the dryer behind the door (this is the most common location for this GE dryer).
- Use the manual’s parts references and control panel descriptions to identify the component name.
- Search by the part ID (example format: WE03X29897) when you have it.
- Search by the manufacturer part number (example format: WE12M29) if that is what you have.
- If you’re replacing a common wear item, start with the most frequently replaced parts for this model (belt, glides, idler pulley).
- If the dryer was recently serviced, verify any wiring or control connections were restored correctly before ordering parts.
Common “missing part” situations (and what to do)
| What you have | What it usually means | Best next step |
|---|---|---|
| Only a description (example: “belt”) | Many similar parts exist | Match the part name in the manual, then search |
| A partial number | One digit off can change the part | Re-check the label or old part stamping |
| A symptom (won’t start, no heat) | Multiple parts can cause it | Troubleshoot first, then order the confirmed failed part |
Parts customers often look for first on DHDSR46EG7WW
These are common wear or failure items that are frequently replaced on GE electric dryers:
- Dryer drum belt WE03X29897 (drum won’t tumble, squealing, belt broken)
- Drum glides and pads (scraping, thumping, drum wear)
- Idler pulley and idler arm (squeal, belt tension issues)
- Door switch (dryer won’t start when door is closed)
- Heating element and thermostats (no heat, overheating)
Why it matters
Using the correct model number and the correct part ID prevents ordering a look-alike part that does not fit your drum, motor mount, or wiring harness. It also helps you avoid repeat repairs caused by replacing the wrong component.
Last updated: February 2026
What is the lifespan of a GE dryer?
A GE electric dryer like model DHDSR46EG7WW typically lasts 10 to 15 years with normal household use. Keeping airflow strong (clean lint filter, correct venting) and addressing wear parts early helps you stay closer to the high end of that range; see the DHDSR46EG7WW owner's manual.
What affects dryer lifespan the most
- Venting and airflow: restricted exhaust makes the dryer run hotter and longer.
- Lint filter cleaning: clean before each load to reduce heat stress.
- Load size: chronic overloading strains the drive system.
- Wear parts condition: belt, glides, felt seals, and idler pulley wear over time.
- Electrical supply: stable power and correct installation reduce component stress.
Maintenance checklist (best return for the effort)
- Clean the lint filter before every load.
- Inspect the outside exhaust hood to confirm the flaps move freely.
- Use 4-inch metal ducting and keep the run as short and uncrushed as possible.
- Vacuum lint from the cabinet and blower area periodically (power disconnected).
- Stop using the dryer if you hear persistent squealing or thumping; inspect drum support parts.
Common wear parts and what they usually cause
| Symptom | Likely wear area | Example part for DHDSR46EG7WW |
|---|---|---|
| Drum not turning, motor runs | Belt or idler system | Dryer drum belt WE03X29897, idler pulley WE12X83 |
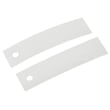
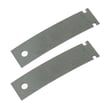
| Squealing, scraping, rough drum movement | Drum glides or felt seal | Dryer drum glide bearing (green) WE03X37317, felt WE09X27634 |
| Dryer runs but dries slowly | Airflow restriction or duct issue | Check venting guidance in the manual |
Why it matters
A dryer that runs longer because of poor venting uses more energy and puts extra heat stress on components like thermostats, the heating element, and the drive system. Good airflow and timely replacement of wear parts are the simplest ways to extend service life.
Last updated: February 2026
What is the most common problem with a GE dryer?
The most common GE dryer problems are long dry times (usually venting or lint buildup), noisy operation (often drum support wear), the drum not turning (belt or idler issues), and no heat (heating circuit or airflow problems). For your GE DHDSR46EG7WW electric dryer, start with airflow and lint filter checks from the owner's manual.
Most common symptoms and what they usually point to
- Clothes take too long to dry: lint filter clogged, vent/duct restricted, outside hood damper stuck
- Noisy cycles (squeal, thump, scraping): worn glides, felt seal wear, idler pulley wear
- Drum will not turn: broken belt, seized idler pulley, motor issue
- No heat or weak heat: heating element or thermostat issue, plus airflow restrictions that overheat the system
Quick checks we recommend first (fast, high-impact)
- Clean the lint filter before every load.
- Inspect the vent path for kinks, crushing, or blockage; use the shortest run possible.
- Check the outside exhaust hood; the flaps should move freely and be clear of debris or nesting.
- Avoid overloading; heavy fabrics need smaller loads to dry efficiently.
Common part-related causes on this model
| Symptom | Common wear item | Example part for DHDSR46EG7WW |
|---|---|---|
| Drum not turning | Belt | Dryer drum belt WE03X29897 |
| Squealing or rumbling | Idler pulley | Idler pulley WE12X83 |
| Scraping or metal-on-metal sound | Drum glide surfaces | Dryer drum glide bearing (green) WE03X37317 |
| Thumping, poor sealing, lint leaks | Drum felt seal | Felt WE09X27634 |
Why it matters
Airflow problems do more than slow drying; they increase energy use and can cause overheating that trips safety thermostats. Mechanical wear (belt, glides, idler pulley) can quickly turn a minor noise into a no-start or no-tumble failure.
For venting requirements and troubleshooting tips specific to this dryer, follow the DHDSR46EG7WW installation guide.
Last updated: February 2026
Where to find part number on GE dryer?
On your GE DHDSR46EG7WW electric dryer, the model and serial information you need for ordering parts is typically on a label on the front of the dryer behind the door (door opening area). Use that label to match the correct replacement part for your exact dryer.
Where to look on model DHDSR46EG7WW
Check these common label locations first:
- Front panel area behind the door (most common)
- Door frame (the cabinet opening the door closes against)
- Inside edge of the door itself
- Lower front area near the lint screen housing (on some GE designs)
If you are using the documentation, the label location is described in the DHDSR46EG7WW owner’s manual.
What to write down (so you order the right part)
We recommend recording:
- Model number: DHDSR46EG7WW
- Serial number: (unique to your dryer)
- Brand: GE
- Appliance type: electric dryer
Quick ID guide
| What you see | What it’s used for | Example |
|---|---|---|
| Model number | Ensures parts fit your exact design | DHDSR46EG7WW |
| Serial number | Helps with service history and production run | Varies |
| Part number / part ID | Identifies the replacement component | WE03X29897 |
Why it matters
GE often uses similar-looking dryers across multiple model families; using the exact model number from the door-area label prevents ordering a look-alike part that will not fit (for example, a belt or thermostat with different mounting or length).
Last updated: February 2026
Will an electric dryer require a 220V outlet?
Yes. The GE electric dryer model DHDSR46EG7WW needs a dedicated 30-amp dryer circuit that supplies 120/240V (or 120/208V in some homes), which is what people commonly call a “220V” outlet. Use the correct 3-prong or 4-prong cord to match your home receptacle as shown in the installation guide.
Electrical requirements for DHDSR46EG7WW
For this model, the installation instructions specify:
- An individual branch circuit (not shared with other appliances)
- Single-phase, 60 Hz, 30 amp circuit
- 120/240V or 120/208V supply
- No extension cord or adapter plug
- Proper grounding per electrical codes
3-prong vs 4-prong: what to use
Your outlet style determines the cord type.
| Outlet/cord type | Wires | When it’s typically used |
|---|---|---|
| 3-prong dryer cord | 3 | Older installations where grounding through neutral is allowed |
| 4-prong dryer cord | 4 | Mobile homes and many newer installations; required where neutral-ground bonding is prohibited |
Quick checks before you plug it in
- Confirm you have a dryer receptacle (not a standard 120V outlet).
- Verify the breaker is 30 amp and dedicated to the dryer.
- Match the cord to the receptacle (3-prong or 4-prong) and install the strain relief.
- Make sure the dryer is properly grounded.
- Avoid flexible venting that can crush and restrict airflow; follow the venting specs in the installation guide.
Why it matters
Using the correct voltage and a dedicated 30-amp circuit helps the heating system run properly and prevents nuisance breaker trips, overheating wiring, and poor drying performance.
Last updated: February 2026





