Owner’s manual
 Error Codes





How do I fix a low flow error on my washing machine?
A low-flow (slow fill) problem on your Kenmore washer model 11047512600 is usually caused by restricted water supply at the faucets, kinked inlet hoses, or debris clogging the inlet valve screens. Restoring full flow typically fixes the error without replacing major parts. See the 11047512600 owner's manual for the correct hose hookup and flushing steps.
- Confirm both hot and cold water faucets are turned on fully.
- Make sure the inlet hoses are not kinked, crushed, or pinched behind the washer.
- Verify hot hose is on H (hot) and cold hose is on C (cold).
- Run water through each hose into a bucket to flush grit that can clog inlet screens.
- Check for leaks at couplings; tighten with pliers about two-thirds turn past hand-tight.
- Unplug the washer.
- Shut off both water faucets.
- Disconnect the inlet hoses at the faucets.
- Run water through each faucet and hose into a bucket to clear particles.
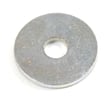
- Reconnect hoses using the flat washers in the couplings; hand-tighten, then tighten with pliers (do not overtighten).
- Turn faucets on completely and check for leaks.
If water supply is strong at the faucets but the washer still fills slowly, the inlet valve screens inside the washer can stay restricted or the valve can fail mechanically. At that point, a technician typically tests the inlet valve and related controls.
| Symptom | Most common cause | What to do first |
|---|---|---|
| Slow fill on both hot and cold | Supply valves partly closed, low house pressure, clogged screens | Fully open valves; flush hoses and faucets |
| Slow fill on one temperature only | One hose kinked or one screen clogged | Swap/check hoses; flush that line |
| Intermittent fill issues | Debris in lines after plumbing work | Flush lines again; recheck screens |
Low flow can prevent the washer from reaching the correct water level, which can stop the cycle, reduce cleaning performance, and cause longer run times. Keeping inlet hoses clear and correctly connected helps protect the inlet valve and improves reliability.
Last updated: February 2026
How to identify a Kenmore washer model?
Your Kenmore washer model number is printed on the appliance’s model and serial tag; for Kenmore units it often starts with 110 (like 11047512600). On most washers, you’ll find that tag inside the door opening (front-load) or under the lid (top-load); confirm the exact format in the 11047512600 owner’s manual.
Check these common tag locations first:
- Front-load washers: inside the door opening, around the door frame
- Top-load washers: under the lid, along the rim of the opening
- Any style: back panel near the power cord, or behind/near the control panel
- Sometimes: inside the lower access panel area (if your model has one)
Kenmore model numbers are typically 11 characters or longer and may include periods or letters depending on the product line. Using the exact model number helps us match the correct parts list, diagrams, and compatible replacements.
- Write the model number exactly as shown (include all digits and punctuation)
- Take a clear photo of the tag for reference
- Use the model number (not just “Kenmore washer”) when ordering parts
These two numbers serve different purposes:
| Item | What it tells you | Used for |
|---|---|---|
| Model number | The exact washer design and parts fit | Parts lookup, diagrams, manuals |
| Serial number | The specific unit’s production identity | Service history, manufacturing info |
A single digit difference can change the correct door boot, water pump, control board, or hose routing. Confirming 11047512600 before ordering prevents wrong-part returns and repeat repairs.
Last updated: February 2026
What is the UL code on the Kenmore Elite Oasis HE washer?
The UL code on a Kenmore Elite Oasis HE washer means the washer detected an unbalanced load and stopped or limited the spin to protect the tub and suspension. On Kenmore model 11047512600, correcting load balance and leveling typically clears the code.
- Pause the cycle and open the door when it unlocks.
- Redistribute items evenly; mix large items with smaller ones.
- Remove a few items if the drum is tightly packed.
- Run Drain/Spin again and watch for excessive shaking.
- Confirm you are using HE detergent only; oversudsing can worsen control issues during spin (see the 11047512600 owner's manual).
- Wash single bulky items (comforter, rug) on a bulky/bedding cycle when available.
- Avoid washing one heavy item by itself; add a few towels to balance.
- Make sure the washer sits solidly on the floor (no rocking).
- Verify the floor is firm; weak flooring can amplify vibration.
- Check pockets for heavy items that can shift (coins, tools).
| What you notice | Most likely cause | Best first fix |
|---|---|---|
| Loud banging during spin | Load shifted to one side | Redistribute load, reduce size |
| Washer “walks” | Not level, floor flex | Level feet, stabilize floor |
| Repeated UL with normal loads | Worn shock/suspension | Inspect and replace shocks if needed (example: shock absorber W10739670) |
Running repeated high-speed spins while the load is unbalanced increases stress on the outer tub, counterweight, and shock absorbers. Fixing balance and leveling first prevents bigger, more expensive repairs.
Last updated: February 2026
What is the average lifespan of a Kenmore washer?
A Kenmore washer typically lasts 10 to 15 years with normal household use. For Kenmore model 11047512600, regular cleaning, correct loading, and periodic checks like inspecting the water inlet hoses help you get the full expected life (details are in the 11047512600 owner's manual).
Most washers land in the same general range, but these factors move the needle:
- Load size and frequency (daily heavy loads shorten life)
- Detergent use (too much HE detergent can cause buildup)
- Water quality (hard water increases scale and residue)
- Drain and spin stress (chronic off-balance loads wear suspension and bearings)
- Preventive care (routine cleaning reduces odor, residue, and component strain)
If you see several of these together, repairs can become more frequent:
- Repeated drain problems or standing water after cycles
- Persistent leaks around the door area or underneath
- Loud rumbling/knocking during spin
- Frequent error codes or cycle interruptions
- Poor cleaning results even after maintenance
Our best high-impact habits for the 11047512600:
- Run the cleaning routine described in the 11047512600 owner's manual
- Check and replace water inlet hoses on a regular schedule
- Keep the door area clean and dry between loads
- Avoid chronic overloading; distribute items evenly
- Address leaks early to prevent damage to the motor and controls
| Situation | Usually worth doing | Usually points to replacement |
|---|---|---|
| Won’t drain, pump noisy | Replace the water pump WPW10730972 | If multiple major issues also exist |
| Small leak at door opening | Inspect/replace the washer door boot WPW10111435 | If tub/bearing noise is also present |
| Excess vibration | Leveling and load habits; inspect shocks | If severe noise and repeated failures |
A washer that is maintained and repaired early typically runs quieter, drains and spins more reliably, and avoids secondary damage (for example, a small leak can lead to bigger electrical or motor problems over time).
Last updated: February 2026
What is the cubic foot of my Kenmore washer model 11047512600?
The Kenmore washer model 11047512600 is a front-load HE2Plus-style washer; its capacity is typically about 3.2 cu. ft. For the exact listed capacity for your specific version, we recommend confirming it in the 11047512600 owner's manual.
Capacity is usually shown in the specifications section of the manual or on the model/serial tag.
- Check the Specifications or Features pages in the 11047512600 owner's manual
- Look for a model/serial label around the door opening or behind the door area
- If your washer is installed under a counter, verify you have the correct model; the manual covers the 110.4751 family
- If you use a pedestal, note it changes height only, not capacity
A 3.2 cu. ft. front-load washer is commonly considered a mid-size capacity and is designed for HE detergent.
| Capacity (cu. ft.) | Typical load examples | Best practice |
|---|---|---|
| ~3.2 | Everyday mixed loads, towels, jeans | Use HE detergent and avoid overfilling |
| Larger (4.0+) | Bulkier loads, larger households | More room for comforters |
Knowing the cubic feet helps us match your load size to the right cycle, detergent amount, and spin performance. Overloading a front-load washer can increase vibration, reduce cleaning, and contribute to drainage or balance issues.
Last updated: February 2026