Owner’s manual
 Error Codes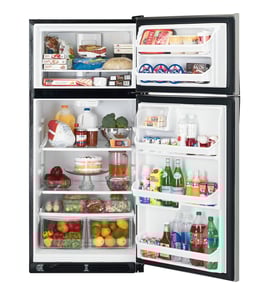


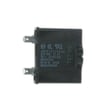
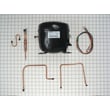
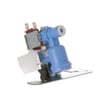
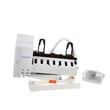
Can I replace fridge parts myself?
Yes. With your GE GTL18JCPWRBS top-mount refrigerator, we see many owners successfully replace common, non-sealed-system parts (like a door gasket, light bulb, or door shelf rail) using basic hand tools and the steps in the GTL18JCPWRBS owner's manual. For sealed-system or advanced electrical repairs, use a qualified technician.
Good DIY replacements for this model
These repairs are typically straightforward and low-risk when you unplug the refrigerator first:
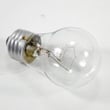
- Replace a burned-out appliance light bulb such as 40-watt appliance light bulb 40A15
- Replace a torn door gasket such as refrigerator door gasket (black) WR24X10184 or refrigerator freezer door gasket (black) WR24X10185
- Replace a broken door shelf rail such as refrigerator door shelf rail WR71X10681
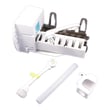
- Replace an ice maker accessory part such as refrigerator ice maker fill cup WR29X10092
- Replace a damaged power cord such as refrigerator power cord WR23X10300
Repairs we treat as “not DIY” for most homeowners
These involve higher shock risk, refrigerant system work, or complex diagnosis:
- Compressor or sealed-system work (compressor, evaporator, condenser, tubing)
- Wiring harness repairs inside the cabinet
- Diagnosing repeated breaker trips or outlet grounding problems
Safety steps we recommend before any repair
The manual emphasizes safe power and cord handling; follow these basics every time:
- Unplug by gripping the plug (do not pull the cord)
- Use a properly grounded 3-prong outlet and a dedicated outlet circuit
- Replace frayed or cracked cords immediately
- Protect the cord when moving the refrigerator away from the wall
- Keep screws and small parts organized so doors and hinges go back correctly
Quick “DIY or technician?” guide
| Task | Typical DIY? | Why |
|---|---|---|
| Light bulb, shelves, rails | Yes | Simple access, minimal disassembly |
| Door gasket | Yes | No electrical diagnosis required |
| Water inlet valve | Sometimes | Requires water shutoff and leak checks |
| Defrost heater/control diagnosis | Sometimes | Requires electrical testing |
| Compressor kit replacement | No | Sealed-system repair |
Why it matters
Choosing the right repair level prevents electrical shock hazards, avoids water leaks, and helps your GE refrigerator maintain stable temperatures (which protects food and reduces frost and moisture issues).
Last updated: February 2026
What is the most common problem with a GE refrigerator?
The most common problem we see with GE refrigerators, including the GE GTL18JCPWRBS top-mount, is a cooling complaint (fresh food too warm, freezer not cold enough, or temperatures swinging). In many cases, the root cause is restricted airflow, a dirty condenser area, or a defrost-related issue that reduces cold air circulation.
Quick checks that fix many “not cooling” complaints
- Make sure air vents inside the refrigerator and freezer are not blocked by food packages.
- Set temperatures back to a normal range and adjust one step at a time.
- Listen for fans: a failed fan often shows up as warm temps plus unusual quiet or intermittent noise.
- Confirm doors close and seal; poor sealing can cause long run times and warm spots.
- If the unit seems to stop cooling briefly, remember a defrost cycle can last about 40 minutes.
Common causes and what they usually look like
| Symptom | Most common cause | What you typically notice |
|---|---|---|
| Fridge warm, freezer OK-ish | Airflow blocked or fan issue | Warm top shelf, cold near vents |
| Freezer warm, ice soft | Sealed system or compressor-side issue | Long run time, little temperature drop |
| Frost buildup, then warming | Defrost system problem | Frost on back wall, airflow reduced |
| Clicking, humming, then stops | Start components or compressor strain | Intermittent cooling, repeated attempts |
Parts that often relate to cooling and airflow on this model
If troubleshooting points to a specific failure, these are examples of parts on the GTL18JCPWRBS parts list that can be involved:
- Refrigerator condenser fan motor WR60X10170 (moves air across the condenser to remove heat)
- Refrigerator temperature control thermostat WR09X26874 (controls compressor run based on temperature)
- Refrigerator defrost heater WR51X10038 and refrigerator defrost control WR9X565 (help prevent frost from choking airflow)
Why it matters
Cooling problems are more than an inconvenience; when airflow is restricted or a fan is failing, the compressor can run longer than normal. Fixing the underlying cause restores stable temperatures and helps prevent food spoilage.
Where to confirm settings and model-specific troubleshooting
We recommend using the owner's manual for GTL18JCPWRBS to verify control settings, normal operating sounds (including defrost noises), and the model’s troubleshooting chart.
Last updated: February 2026
How do I find the model number on my GTL18JCPWRBS?
On the GE GTL18JCPWRBS top-mount refrigerator, we find the model number (and serial number) on a gray label inside the fresh food compartment; it is on the left side near the top. Use that exact model number when ordering parts.
Where to look (fast checklist)
- Open the refrigerator (fresh food) door, not the freezer door
- Look inside the refrigerator compartment
- Check the left interior wall
- Look near the top area
- Find the gray label with “Model #” and “Serial #”
What the label looks like
The tag typically includes both identifiers together, so you can confirm you are reading the correct sticker.
| On the label | What it’s used for |
|---|---|
| Model # | Matching diagrams and ordering the correct replacement parts |
| Serial # | Identifying the production run and verifying compatibility for some parts |
Why it matters
GE often uses similar-looking refrigerators across multiple series; using the exact model number from the gray label prevents ordering the wrong door gasket, shelf, or electrical part.
Helpful tip before you order
- Write the model and serial numbers down
- Take a clear photo of the label for reference
- Use the model number to confirm fit before purchasing parts like a door gasket or fan motor
For more details and label location guidance, use the owner's manual.
Last updated: March 2026