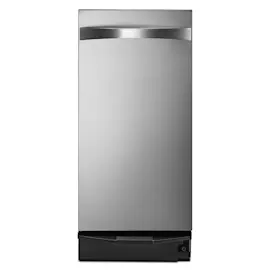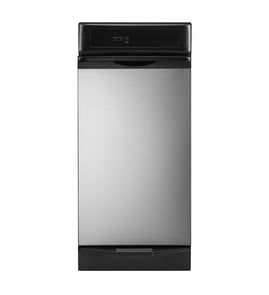

What is a common problem with trash compactors?
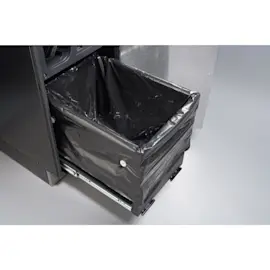
A common problem with a KitchenAid trash compactor like model KCC150 is that it will not start or it stops mid-cycle due to a power interruption, a door/drawer safety switch not engaging, or a tripped internal protector. Another frequent issue is a stuck drawer caused by an overfilled bag or jammed trash.
Most common symptoms and what they usually mean
- No power, no sound: outlet, cord, house breaker, or a failed start/control switch
- Motor hums but ram does not move: jammed mechanism, worn drive components, or a seized gearbox
- Stops partway through: overheating protector tripped, tight mechanism, or intermittent switch
- Drawer will not open/close smoothly: bag caught, rails dirty, or drawer misalignment
- Loud grinding or banging: worn gears, loose hardware, or debris in the drive area
- Bad odors: residue in the drawer, ram face, or cabinet interior
Quick checks we recommend first (safe, no disassembly)
- Confirm power: test the outlet with another device and reset the breaker/GFCI.
- Reseat the drawer: fully close it so the safety interlock can engage.
- Reduce a jam: remove the bag and any bulky items that can wedge the ram.
- Clean contact points: wipe the drawer rails and cabinet edges where the drawer rides.
- Let it cool: if it stopped mid-cycle, wait 20 to 30 minutes and try again.
Troubleshooting guide by symptom
| Symptom | Most likely cause | Best next step |
|---|---|---|
| Won’t start | Drawer switch not engaged, no power | Verify outlet, fully close drawer, retry |
| Drawer stuck | Overfilled bag, jammed trash | Remove bag, clear obstruction |
| Loud noise | Worn drive parts, debris | Unplug, inspect for debris; service if persistent |
| Odor | Residue buildup | Clean drawer, ram face, and cabinet interior |
Why it matters
Trash compactors use a safety interlock and a high-torque drive system. When the drawer is not fully latched or the mechanism is binding, the compactor can appear “dead” or get stuck, even though the motor and controls are fine.
Helpful DIY reference
For electrical checks like verifying a switch or confirming voltage safely, use our how to use a multimeter to test electrical parts video.
Last updated: February 2026
Where is the model number on a KitchenAid trash compactor?
On a KitchenAid trash compactor like model KCC150, the model number is printed on a rating label that’s typically on the cabinet frame behind the compactor door or drawer. It’s also commonly found on a side panel near the bottom of the unit.
Most common places to check
- Open the compactor door/drawer and look along the door opening frame (left or right side)
- Check behind the door/drawer on the inner cabinet frame
- Look on the side of the cabinet near the bottom front corner
- If it’s built in, check the front edges of the cabinet opening where the door seals
Quick steps to find it fast
- Pull the drawer/door fully open.
- Use a flashlight and scan the vertical frame rails.
- Wipe dust or residue off the label so the characters are readable.
- Write down the full model number exactly as shown (letters and numbers).
What the label usually includes
| Label item | What it’s used for |
|---|---|
| Model number | Matching the correct parts and diagrams |
| Serial number | Identifying production run details |
| Electrical rating | Confirming voltage/amp requirements |
Why it matters
We use the model number to match the correct KitchenAid trash compactor parts list, wiring layout, and compatible replacement components. Even small model-number differences can change switches, drive parts, or door hardware.
For extra help identifying the label format and where to look, use our guide: how to find your appliance model number (and what it means for parts).
Last updated: February 2026
Why can't I press the trash compactor button?
On your KitchenAid trash compactor model KCC150, the most common reason the button will not work is the safety interlock: the drawer is not fully closed or something is preventing it from closing flush, so the door switch stays open and the controls stay disabled.
Quick checks that fix most “button won’t work” problems
- Pull the drawer out and remove anything sticking up above the top edge of the drawer.
- Check behind and under the drawer for fallen items (utensils, bottle caps, broken glass).
- Reinstall the bag so it is even and not bunched at the back or caught in the rails.
- Push the drawer in firmly until it sits flush and latches.
- If the unit has a control lock, turn it off and try the Start/Compact button again.
What’s happening
Trash compactors use a door (drawer) safety switch so the ram cannot move with the drawer open. If the drawer is even slightly ajar or misaligned, the switch does not close; the button may feel unresponsive or the compactor will not start.
Troubleshoot by symptom
| What you notice | Likely cause | What to do |
|---|---|---|
| Button won’t start a cycle | Drawer not fully closed | Clear obstructions; close until flush and latched |
| Button works sometimes | Drawer alignment or bag interference | Refit bag; check rails and latch area |
| No lights or response at all | Power issue | Verify outlet power; reset breaker if tripped |
If the drawer closes correctly, check power safely
- Test the outlet with a small lamp.
- Reset the kitchen circuit breaker.
- If you’re comfortable testing, follow how to tell if a fuse is blown for basic electrical diagnosis.
Why it matters
The interlock protects you from pinch hazards and prevents damage to the latch, drawer slides, and door switch when the ram cycles.
Last updated: February 2026