 Owner’s manual




How to replace GE dryer sensor?
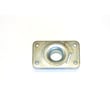
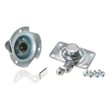
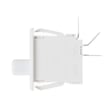
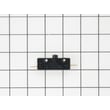
To replace the moisture (dryness) sensor on your GE DPSE810EG6WT electric dryer, we unplug the dryer, access the sensor bars inside the drum area, move the wire harness to the new sensor, then reassemble and test a Sensor cycle. Use the DPSE810EG6WT owner's manual for access and feature details.
What “dryer sensor” usually means on this model
On DPSE810EG6WT, the sensor most customers mean is the moisture sensor used by the Dryness Sensor cycles (it helps stop heat when clothes reach the selected dryness).
Common symptoms of a failing/dirty moisture sensor:
- Loads overdry or shut off too soon
- Sensor cycles act inconsistent between loads
- Cycle runs long even with a clean lint screen and good airflow
- Clothes feel damp but the cycle ends
Before you replace it: quick checks that often fix it
Many “sensor” problems are caused by residue on the sensor bars.
- Clean the lint filter and confirm strong airflow at the outside vent
- Wipe the sensor bars with rubbing alcohol and a soft cloth (no sandpaper)
- Avoid dryer sheets for a few loads (they can leave a waxy film)
- Try a different load size; very small loads can confuse sensor drying
Why it matters
If the sensor cannot read moisture correctly, the dryer can stop heating too early or keep heating too long. That affects dry time, energy use, and fabric care.
Replacement overview (typical GE electric dryer steps)
- Disconnect power (unplug or switch off the breaker).
- Open the door and locate the moisture sensor bars (usually near the lint filter housing or front bulkhead area).
- Remove the mounting screws, then pull the sensor forward enough to access the connectors.
- Transfer the wire harness to the new sensor (one connector at a time).
- Reinstall the sensor, reassemble any panels, restore power, and run a Sensor cycle test.
Parts you may need
If your diagnosis points to a sensor or wiring issue, these model-matched parts are commonly involved:
| What you’re checking | What it affects | Model-matched part to consider |
|---|---|---|
| Moisture sensor assembly | Auto-dry shutoff accuracy | Dryer moisture sensor WE1M575 |
| Sensor wiring | Sensor signal to control | Dryer sensor wire harness WE5M39 |
| Main control (less common) | Cycle logic and sensor input | Control board WE04M10004 |
Safety notes we follow
- Disconnect power before opening panels.
- Do not bypass door switches or safety thermostats.
- After reassembly, confirm the drum turns freely and the door closes fully.
Last updated: February 2026
Where to find part number on GE dryer?
On your GE DPSE810EG6WT electric dryer, the model and serial number label is located on the front of the dryer behind the door. Use the model number from that label when looking up the correct replacement parts and diagrams in our catalog.
Where to look (fast checklist)
- Open the dryer door fully.
- Look on the front panel opening (the cabinet front) just behind the door.
- Find the sticker that lists Model and Serial.
- Write the model number exactly as shown (for example, DPSE810EG6WT).
- Use that model number to match parts like a belt, heating element, or door switch.
Model number vs. part number (what each one means)
| What you’re looking at | What it identifies | Where you use it |
|---|---|---|
| Model number | The exact dryer version | To pull the right parts list and diagrams |
| Serial number | Your specific unit | For service history and warranty support |
| Part number / part ID | A specific replacement part | To order the exact component |
Why it matters
GE often uses similar-looking cabinets across multiple dryers, but internal components can differ. Using the label behind the door helps ensure you get the correct fit and electrical match for DPSE810EG6WT.
Common examples of “part numbers” customers mean
If you are trying to identify a replacement part (not the dryer model label), these are common items people search for:
- Dryer drum belt WE03X29897 (drum turns)
- Dryer door switch WE4M415 (dryer starts only when door is closed)
- Mica unit WE11M10001 (electric heating element)
For diagrams, wiring references, and label location details, use the DPSE810EG6WT owner’s manual.
Last updated: February 2026
What is the average lifespan of DPSE810EG6WT?
A GE electric dryer like model DPSE810EG6WT typically lasts 13 years with normal household use and proper venting and maintenance. Keeping airflow strong and replacing wear items (belt, glides, thermostats) on time helps the dryer reach its full service life.
Typical lifespan and what affects it
Most dryers fail early because of heat stress and restricted airflow, not because the cabinet or drum “wears out.” The biggest lifespan factors are:
- Venting length and lint buildup (overheats the heater and thermostats)
- Load size and cycle selection (overloading strains the drive system)
- Frequency of use (multiple loads daily shortens life)
- Routine cleaning (lint screen, blower area, exhaust duct)
- Timely replacement of wear parts (belt, idler pulley, drum glides)
Quick maintenance checklist (high impact)
Use this routine to protect the heater, motor, and control board:
- Clean the lint screen before every load
- Check outside exhaust airflow; it should be strong and steady
- Clean the full vent duct periodically (more often with pets)
- Avoid overloading; keep loads loose so air can circulate
- Stop using the dryer if you smell burning or notice repeated overheating
Common wear parts that can extend service life
If the drum squeals, thumps, or stops turning, these parts are frequent fixes for DPSE810EG6WT:
| Symptom | Likely wear item | Example part for this model |
|---|---|---|
| Drum not turning, motor runs | Belt | Dryer drum belt WE03X29897 |
| Squealing or chirping | Idler pulley or glides | Idler pulley WE12X83 |
| Thumping, scraping at front | Front glides/felt | Dryer drum front glide pad WE03X37318 |
| Overheating or shuts off | Thermostat/airflow issue | Dryer high-limit thermostat WE4M137 |
Why it matters
A dryer that runs hot or with a dragging drum uses more energy, dries slower, and stresses expensive components like the drive motor and control board. Simple airflow and wear-part maintenance is the most reliable way to get the full 13-year lifespan.
For model-specific operating and safety guidance (including venting and troubleshooting), use the DPSE810EG6WT owner’s manual.
Last updated: March 2026





