Installation guide
 Owner’s manual
 Error Codes


How to clean the coils on a Kenmore side by side refrigerator?
For Kenmore side-by-side refrigerator model 10653552201, cleaning the condenser coils means safely removing dust and pet hair so the refrigerator can transfer heat properly. Dirty coils make the compressor run longer and can reduce cooling performance; follow the steps in the 10653552201 owner's manual.
Before you start (safety and access)
- Unplug the refrigerator or disconnect power at the breaker.
- Pull the refrigerator straight out to avoid kinking the water line.
- Remove the base grille (most side-by-sides have coils behind or underneath it).
- Use only nonflammable cleaners on and around the refrigerator.
- Keep water and spray cleaners away from electrical parts.
How we recommend cleaning the condenser coils
- Vacuum loose dust from the grille area and coil surface using a brush attachment.
- Use a coil brush to loosen packed lint, then vacuum again.
- Clean the floor area under the unit so dust does not get pulled back in.
- Reinstall the base grille firmly when finished.
- Restore power and confirm the refrigerator is running normally.
What to use (and what to avoid)
| Item | Best for | Avoid because |
|---|---|---|
| Vacuum with brush attachment | Removing loose dust | Bare nozzle can snag fins/wiring |
| Coil cleaning brush | Packed lint and pet hair | Metal tools can damage coils |
| Soft cloth | Wiping the grille | Abrasives can scratch surfaces |
Why it matters
When condenser coils are dirty, airflow and heat transfer drop. The manual notes that dirty condenser coils make the motor work harder and run longer; cleaning the coils helps efficiency, temperature stability, and can reduce noise from extended run time.
Helpful tip for related symptoms
If you are also seeing weak ice production or dispenser issues, coil cleaning is a good first step, but water supply problems can also be involved. For prevention steps, use how to prevent water dispenser and ice maker problems.
Last updated: February 2026
How to replace an ice maker in a side by side refrigerator?
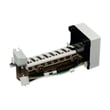
To replace the ice maker in your Kenmore side-by-side refrigerator model 10653552201, we shut the ice maker off, remove the ice bin or bucket for access, swap the ice maker assembly, then restore power and water and verify ice production. Follow the exact access steps in the 10653552201 owner's manual.
Before you start
- Unplug the refrigerator or switch off the circuit breaker.
- Turn off the household water supply shutoff valve.
- Empty the ice container; melt stuck ice with warm water if needed.
- Keep a plastic utensil handy to clear any ice jam at the ejector.
Replacement steps (typical)
- Turn the ice maker off:
- Style 1: lift the wire shutoff arm to OFF (up) until it clicks.
- Style 2: slide the ON/OFF control to OFF (right).
- Remove the ice bin or bucket to reach the ice maker.
- Remove mounting screws, then disconnect the wiring harness/connector.
- Install the new ice maker, reconnect the harness, and secure the screws.
- Reinstall the bin or bucket fully (the dispenser may not work if it is not seated).
- Restore water and power; turn the ice maker back on.
Part that’s commonly used
For model 10653552201, a common replacement is the refrigerator ice maker assembly 2198597.
| After install | What to check | What to do |
|---|---|---|
| No ice | Ice maker still OFF | Set to ON, close freezer door |
| Slow ice | Freezer not cold enough | Adjust colder slightly; wait 24 hours |
| Water in mold, no cubes | Ejector jam | Clear with plastic utensil |
Why it matters
Turning the ice maker off correctly and fully reinstalling the bin or bucket prevents dispenser problems and lets the automatic shutoff work as the container fills.
Last updated: February 2026
How to tell if a Kenmore refrigerator compressor is bad?
On a Kenmore 10653552201 side-by-side refrigerator, a “bad compressor” usually shows up as poor or no cooling along with unusual compressor behavior (repeated clicking, running constantly, or not running at all). Before condemning the compressor, we verify airflow, control settings, and normal operating sounds using the 10653552201 owner's manual.
Quick checks before blaming the compressor
- Confirm the refrigerator and freezer controls are set correctly for the room conditions.
- Make sure air vents are not blocked by food packages (blocked vents can mimic sealed-system problems).
- If your model has digital controls, turn the unit OFF then ON to reset.
- Listen for normal sounds: a high-pitched or pulsating sound can be normal as the compressor and fans adjust.
- Note whether the unit runs longer than an older refrigerator; high-efficiency designs often do.
Symptoms that strongly point to a compressor or sealed-system problem
These signs typically mean the compressor is not pumping refrigerant correctly or is not starting reliably:
- Refrigerator runs most of the time but temperatures stay warm
- Repeated clicking from the start device area (start attempt then shutdown)
- Compressor is very hot to the touch after trying to run (use caution)
- Little to no vibration or sound from the compressor when it should be running
- Frost pattern issues on the evaporator (often requires removing panels to inspect)
What a technician tests (and why)
A compressor diagnosis is confirmed with electrical and performance checks.
| Test/check | What it indicates | Typical next step |
|---|---|---|
| Amperage draw at startup/running | Hard-start, locked rotor, or overload trip | Check start components, then compressor |
| Continuity/insulation checks | Winding failure or short to ground | Compressor replacement |
| Temperature and cooling performance | Not pumping or restricted sealed system | Sealed-system service |
| Fan operation and airflow | Cooling issue not caused by compressor | Repair fan/airflow issue |
Why it matters
The compressor is part of the sealed refrigeration system; misdiagnosing it can lead to unnecessary cost. Many “not cooling” complaints are caused by blocked vents, control settings, or normal longer run times described in the manual.
Last updated: February 2026
How wide is a Kenmore side-by-side refrigerator?
Most Kenmore side-by-side refrigerators are about 32 to 36 inches wide; for your Kenmore 10653552201, the exact cabinet width is listed in the 10653552201 owner's manual and the 10653552201 installation guide. Plan for extra clearance so the doors can swing fully and airflow stays unrestricted.
Typical width ranges (what you can expect)
Side-by-side refrigerator widths commonly fall into these buckets:
- 32 to 33 inches: space-saving models
- 35 to 36 inches: most full-size side-by-sides
- 36+ inches: larger capacity or premium configurations
| Refrigerator type | Typical width | Best fit for |
|---|---|---|
| Compact side-by-side | 32–33 in. | tighter kitchens, smaller households |
| Standard side-by-side | 35–36 in. | most existing 36-in. openings |
| Oversize side-by-side | 36+ in. | larger cutouts, higher capacity needs |
Installation clearance that affects “how wide” it feels
Even if the cabinet width fits, you still need room around it. The Kenmore side-by-side installation guidance calls for ventilation space and added side clearance near walls for door swing.
- Allow about 1/2 inch on each side and at the top for airflow
- If installed next to a fixed wall, allow about 2 inches minimum on the hinge side (varies by setup) so the door can open
- Leave extra space behind the unit if you have an ice maker water line
- Measure with doors closed and also confirm door swing clearance
How to measure your refrigerator width correctly
Use a tape measure and check more than one spot.
- Measure the cabinet (main box) width at the front
- Measure the widest point (often the hinge area)
- If you are fitting into a cutout, measure the opening in three places (top, middle, bottom)
- Confirm whether you are measuring with or without handles
Why it matters
Width affects more than fit. Proper clearance helps the refrigerator cool efficiently, prevents door interference, and reduces the chance of vibration noise or warm spots from restricted airflow.
Last updated: February 2026
What is the cubic foot of my Kenmore refrigerator model 10653552201?
The cubic-foot capacity for Kenmore refrigerator model 10653552201 is listed in the specifications section of the product literature; the fastest way to get the exact total capacity (and the refrigerator vs. freezer breakdown) is to check the 10653552201 owner's manual.
Where to find the exact cubic feet
In the manual, capacity is typically shown as total volume and may also be split by compartment.
- Check the “Specifications” or “Product data” section
- Look for “Total capacity” (overall cubic feet)
- If shown, note “Refrigerator capacity” and “Freezer capacity” separately
- Use the model and serial label inside the fresh food compartment to confirm you are matching the correct model
What to expect for a side-by-side like this
Most Kenmore 106-series side-by-side refrigerators are in the low-to-mid 20 cu. ft. range total. Your exact number depends on the specific configuration and interior layout.
| Capacity term | What it means | Why it matters |
|---|---|---|
| Total capacity | Fresh food + freezer combined | Best for comparing overall size |
| Refrigerator capacity | Fresh food section only | Helps plan weekly grocery storage |
| Freezer capacity | Freezer section only | Helps plan frozen food and ice storage |
Why it matters
Cubic feet helps you compare replacement refrigerators, plan storage, and understand why usable space can feel smaller when bins, shelves, and an ice bucket are installed.
Related tip if ice storage affects usable space
If you are trying to reclaim freezer room or troubleshoot ice production, the common refrigerator ice maker problems and solutions guide covers common causes such as low water flow, a frozen fill tube, or a misaligned ice bin.
Last updated: February 2026
What's the average lifespan of a Kenmore refrigerator?
Most Kenmore refrigerators average 10 to 15 years of service life with normal household use. For Kenmore model 10653552201, consistent maintenance (cleaning, good door sealing, and prompt repairs) is what most often determines whether it lands closer to 10 years or pushes beyond 15.
Typical lifespan ranges (what we see most often)
- 10 to 15 years: common for many refrigerators with average maintenance
- 15 to 20 years: achievable when the sealed system stays healthy and upkeep is consistent
- Under 10 years: more likely when airflow is restricted (dirty condenser), doors do not seal, or cooling issues go unaddressed
| Lifespan range | What usually drives it | What to do about it |
|---|---|---|
| 10 to 15 years | Normal wear on fans, defrost parts, valves | Keep coils clean; fix small issues early |
| 15 to 20 years | Strong maintenance habits; stable temperatures | Maintain seals; avoid overloading; keep vents clear |
| Under 10 years | Poor airflow, heavy use, neglected leaks/noise | Address cooling, water, and ice issues quickly |
Maintenance that extends life the most
We recommend focusing on the items that reduce compressor run time and prevent moisture and frost problems:
- Clean the condenser area regularly (dust buildup makes the refrigerator work harder).
- Keep door gaskets clean so doors close and seal properly.
- Maintain steady temperatures (avoid frequent warm-ups from long door openings).
- Keep air vents inside the refrigerator and freezer unblocked.
- Replace failed cooling or defrost components promptly (frost buildup can strain the system).
For model-specific care and cleaning steps, follow the schedule and instructions in the 10653552201 owner's manual.
Why it matters
A refrigerator that runs longer and harder than it should (because of dirty coils, air leaks, or frost restriction) typically has a shorter lifespan. Good airflow and a tight door seal reduce wear on major components like the compressor and fans.
Last updated: February 2026
Where is the model number on a Kenmore side by side refrigerator?
On Kenmore side-by-side refrigerator model 10653552201, the model number is printed on the model and serial number label located on the inside wall of the refrigerator (fresh food) compartment. Use that label to record both the model and serial number for parts and service.
How to find it quickly
- Open the refrigerator (fresh food) door, not the freezer door
- Look along the inside walls of the fresh food compartment
- Check near the crisper area and side walls where labels are commonly placed
- Use a flashlight; the label can be small and easy to miss
- Write down the full model number and serial number exactly as shown
What the label typically includes
| Item on label | What it’s used for |
|---|---|
| Model number (example: 10653552201) | Matching parts and diagrams to your exact refrigerator |
| Serial number | Identifying production details for service and support |
| Purchase date (you add this) | Helpful for warranty and maintenance records |
Why it matters
We use the model number to ensure you get the correct Kenmore refrigerator parts (for example, an ice maker assembly, water inlet valve, or door gasket) because similar-looking side-by-side models can use different components.
Reference you can use
For the exact label location notes and record-keeping section, check the 10653552201 owner’s manual.
Last updated: February 2026