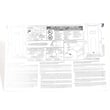
Installation guide
 Owner’s manual
 Error Codes

How to unlock a Kenmore stove top?
To unlock the cooktop on your Kenmore electric range model 79096213408, make sure all surface controls are OFF, then press and hold the Cooktop Lockout pad until you hear a beep (about 3 seconds). The “Cooktop Locked” indicator light should turn off; the burners will work normally again. See the steps in the owner's manual.
These are two different lock features on many Kenmore ranges:
| Feature | What it locks | What you’ll notice | Typical unlock action |
|---|---|---|---|
| Cooktop lockout | Surface elements only | “Cooktop Locked” light on | Hold Cooktop Lockout pad ~3 seconds |
| Oven lockout | Oven door and control pads | “LOC” in display, door lock motor runs | Hold Oven Lockout pad ~3 seconds |
- Turn all surface element knobs/controls to OFF.
- Press and hold the Cooktop Lockout pad.
- Keep holding until you hear one beep (about 3 seconds).
- Confirm the Cooktop Locked indicator light turns OFF.
- Test a burner on a low setting to confirm normal operation.
A triple beep usually means the range thinks something is still “on.”
- Recheck every surface control and set each one firmly to OFF.
- Wait 5 to 10 seconds, then try the lockout pad again.
- If the cooktop was locked during or after Self-Clean, wait for the cycle to finish and the oven door to fully unlock.
- After a power outage, unlock the cooktop lockout first before expecting surface elements to work.
Cooktop lockout prevents accidental burner activation, which helps avoid burns and protects cookware and the glass top from overheating.
Last updated: February 2026
How to read Kenmore model numbers?
Kenmore model numbers are easiest to read in two parts: the prefix (first 3 digits) identifies who built the appliance, and the remaining digits identify the specific design and features. For Kenmore electric range model 79096213408, the 790 prefix indicates a Frigidaire-built range.
On Kenmore range model 79096213408, the model and serial number are printed on the serial plate located on the right side of the oven front frame inside the storage drawer or warmer drawer compartment.
- Pull the storage drawer (or warmer drawer) open
- Look along the right side of the oven frame opening
- Write down the full model number and serial number exactly as shown
- Use the full model number when ordering parts to avoid mismatches
For the exact location illustration and product record section, use the owner's manual.
Most Kenmore model numbers follow this pattern:
| Section | Example (79096213408) | What it tells you |
|---|---|---|
| Manufacturer prefix | 790 | Who built the appliance line |
| Base model series | 9621 | Core platform and configuration |
| Variation digits | 3408 | Feature, color, or production variation |
The prefix helps because many Kenmore parts and service information align with the original manufacturer’s design.
- Helps match the correct wiring layout and control style
- Improves accuracy when selecting heating and control parts
- Helps when looking up range error code families and symptom patterns
If you are troubleshooting a display fault or beeping issue, the Kenmore 790 self-cleaning range error codes guide is a fast way to match the code to likely causes.
Last updated: February 2026
What was the size of the Kenmore 79096213408 oven?
For the Kenmore 79096213408 electric range, the installation dimensions show the range is about 29 7/8 inches wide, 25 3/4 inches deep (overall, with door handle), and about 44 5/8 inches tall. For the most accurate fit and clearance details, use the installation guide.
When you are measuring for a replacement range or verifying cabinet cutouts, we recommend checking both the overall size and the required clearances.
- Measure width at the widest point (usually the cooktop edge)
- Measure depth including the door handle (important for walkways)
- Measure height to the cooktop and to the backguard area
- Confirm side clearances to adjacent walls/cabinets
- Confirm overhead clearance to cabinets above the cooktop
| Measurement | What it represents | Approx. value |
|---|---|---|
| Width | Overall range width | 29 7/8 in |
| Depth | Overall depth with door handle | 25 3/4 in |
| Height | Overall height | 44 5/8 in |
Listings and auctions often describe a different Kenmore model family (for example, a dual-oven unit) or may include packaging, leveling leg settings, or a different handle style. For model 79096213408, the installation drawing is the best reference for “will it fit” measurements.
If you are using dimensions to match parts (like a bake element, broil element, or door seal), confirm the model and serial from the serial plate location described in the owner's manual.
Last updated: February 2026
Who makes Kenmore 79096213408?
Kenmore is the brand name on model 79096213408, but the range itself is manufactured for Sears by a third-party maker. For Kenmore models that start with the 790 prefix (like 79096213408), the manufacturer is Frigidaire (Electrolux/Frigidaire family).
Kenmore model numbers commonly use a prefix system; the first three digits often indicate the original manufacturer behind the Kenmore-branded appliance.
Typical identifiers you can use:
- Model prefix: Kenmore ranges starting with 790 are Frigidaire-built.
- Parts cross-branding: Many replacement parts for this model are listed as Frigidaire range parts.
- Manual family grouping: The owner's manual groups multiple 790.962x models together, which is consistent with a shared Frigidaire-built platform.
Knowing the original manufacturer helps you match the correct components (especially electrical and heating parts) and avoid look-alike parts that do not fit.
Here are common part types where the maker matters most:
- Bake and broil heating elements
- Surface element control switches
- Electronic control boards
- Oven temperature sensor/probe
- Door gasket and door hardware
| Part type | Example part on this model | What it affects |
|---|---|---|
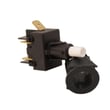
| Surface element control | Oven switch 316436000 | Burner heat control and cycling |
| Oven heating | Frigidaire range bake element 316413800 | Baking temperature and preheat |
| Oven heating | Frigidaire range broil element 316203301 | Broiling performance |
If you need to double-check your exact unit information, the serial plate is typically on the right side of the oven front frame inside the storage or warmer drawer area. The owner's manual shows where to find it.
Last updated: February 2026
How to take the top off a Kenmore range?
On the Kenmore 79096213408 electric range, the cooktop (top) is typically removed by shutting off power, lifting the front edge, and releasing the retaining clips or screws that secure the top to the frame. Use the steps in the installation guide for safe access and handling.
- Turn off the range at the circuit breaker; confirm the cooktop is cool.
- Pull the range forward slightly so you can reach the rear if needed.
- Protect the floor and the cooktop surface with a towel or cardboard.
- Have a container ready for screws so nothing gets lost.
- If you smell burning insulation or see melted wiring, stop and inspect before proceeding.
- Disconnect power at the breaker.
- Open the oven door and look under the front lip of the cooktop for mounting screws.
- If screws are present, remove them; if not, the top is usually held by spring clips.
- Lift the front of the cooktop (often 2 to 6 inches). Use a flat screwdriver only if needed to gently release clips.
- Support the top (some models use a prop rod; otherwise have a helper hold it).
- If you need the top fully off, label and disconnect any wire plugs you remove, then lift the cooktop away.
| Symptom | Common area under the cooktop | Part that may be involved (if equipped) |
|---|---|---|
| One surface element will not heat | Element terminals, wiring, switch | Oven switch 316436000 |
| Hot surface light stays on | Indicator circuit, control | Range indicator light 316022500 |
| Dual element not working correctly | Dual element wiring, control | Range dual radiant surface element 316555800 |
Removing the top the right way prevents cracked glass, stripped screws, and damaged wiring. It also makes troubleshooting surface element heating, indicator lights, and control issues much faster and safer.
Last updated: February 2026