Error Codes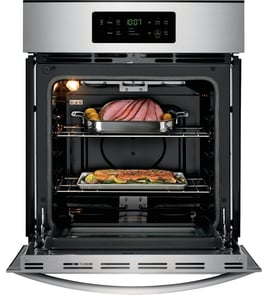

How do I reset my Whirlpool wall oven?
To reset your Whirlpool wall oven model RBD306PDQ12, press Cancel/Off on the control panel to stop the current cycle and clear many temporary control conditions. If the display stays unresponsive, reset power at the breaker for 1 minute, then restore power.
- Press Cancel/Off once to stop cooking and clear the display.
- If the oven is in a timed or delayed mode, press Cancel/Off to exit that mode.
- If the control is frozen, turn the oven circuit breaker OFF for 60 seconds, then turn it back ON.
- If the oven is overheating or showing an error repeatedly, let it cool with the door closed for 30 to 60 minutes.
A reset clears many temporary glitches, but it will not fix a failed sensor, thermostat, or wiring issue. These checks help narrow it down:
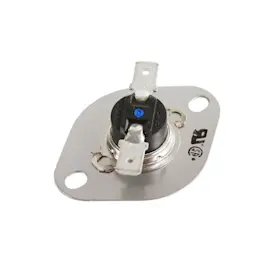
- If the oven heats erratically or shows temperature-related errors, check the wall oven temperature sensor WPW10131825.
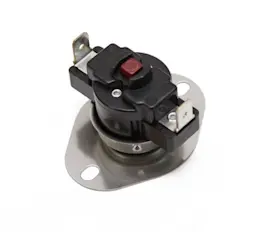
- If the oven shuts down after getting hot, a high-limit device may be opening; check the oven high-limit thermostat WP9759242.
- If the display is dead after a power reset, inspect the power connection and wiring at the terminal block.
| What you see | What a reset helps | What usually needs repair |
|---|---|---|
| Stuck key or frozen display | Power reset at breaker | Keypad/control issue or wiring |
| Oven not reaching set temp | Rarely | Temperature sensor or heating circuit |
| Oven stops when hot | Sometimes (after cool-down) | High-limit thermostat, cooling airflow |
Resetting the RBD306PDQ12 is a safe first step because it clears control logic and cancels modes without changing any permanent settings. When the same problem returns right away, it points to a component issue (sensor, thermostat, wiring) rather than a one-time glitch.
Last updated: January 2026
How long do Whirlpool wall ovens last?
Most Whirlpool electric wall ovens (including model RBD306PDQ12) typically last 13 to 15 years with normal use and basic maintenance. Keeping heat inside the cavity, avoiding overheating, and replacing worn parts promptly can help you reach the upper end of that range.
A wall oven’s life depends more on heat stress and usage than the cabinet itself.
- Heavy use (daily baking, frequent self-clean) shortens lifespan
- Poor door sealing makes components run hotter and longer
- Power issues (loose connections, surges) stress controls and wiring
- Cooling airflow restrictions can overheat internal parts
- Prompt repairs prevent small issues from damaging other components
If your oven is heating unevenly, taking longer to preheat, or showing temperature swings, these parts are often involved:
| Symptom | Most likely area | Example part for RBD306PDQ12 |
|---|---|---|
| Oven temperature is inaccurate | Temperature sensing | WPW10131825 |
| Oven shuts off or overheats | Safety limit control | WP9759242 |
| Cabinet gets very hot, fan noisy or not running | Cooling system | WPW10016550 |
- Keep the door gasket area clean so the door seals tightly
- Avoid running self-clean back-to-back; let the oven cool fully between cycles
- Do not block oven vents; maintain airflow around the wall oven
- Use an oven thermometer occasionally to catch temperature drift early
- Address burning smells, repeated shutdowns, or fan failures quickly
A wall oven that runs hotter or longer than it should puts extra stress on wiring, thermostats, and sensors. Fixing temperature control or cooling issues early often prevents more expensive failures later.
Last updated: January 2026
Are wall ovens hardwired or plug-in?
Most electric wall ovens, including Whirlpool model RBD306PDQ12, are designed to be hardwired (direct-wired) to a dedicated circuit through an approved junction box, not plugged into a standard receptacle. This supports the higher amperage needs and keeps the connection protected behind the cabinet.
In most installations, the oven’s flexible conduit routes into a junction box in the cabinet or wall cavity, and the house wiring is spliced to the oven leads with approved connectors.
- Use a dedicated circuit sized for the oven’s rating (commonly 240/208 VAC).
- Install an approved junction box in an accessible location (per local code).
- Keep the flexible conduit intact; do not cut it shorter.
- Use proper strain relief where the conduit enters the junction box.
- Turn off power at the breaker and verify power is off before touching wiring.
| Connection type | Typical for wall ovens | What it uses | Why it’s used |
|---|---|---|---|
| Hardwired (junction box) | Yes | Conduit to junction box | Secure, code-friendly for higher loads |
| Plug-in (cord and receptacle) | Uncommon | Range-style cord and outlet | Usually reserved for certain ranges or special installs |
A wall oven that is hardwired can still lose power or heat due to a failed safety or temperature component.
Common parts we see involved include:
- Wall oven temperature sensor WPW10131825 (helps the control regulate oven temperature)
- Oven high-limit thermostat WP9759242 (can open if the oven overheats)
- Terminal block WP8203546 (connection point that can overheat or loosen)
Hardwiring affects how you plan the install, what electrical parts you may need (junction box, strain relief, wire connectors), and how you safely diagnose “no power” or “not heating” symptoms on a Whirlpool wall oven.
Last updated: January 2026