Owner’s manual




How do I know what model my garage door opener is?
Your Craftsman garage door opener’s model number is printed on a label on the motor unit, typically under a light lens cover. For model identification and label locations specific to Craftsman 13953910D, use the owner's manual and match the label to the exact model format.
Where to look on the opener (most common spots)
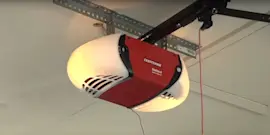
Check the motor unit (the power head mounted to the ceiling), not the door or the rail. On many Craftsman openers like model 13953910D, the model label is commonly found:
- Under the front light lens cover
- Under the left light lens cover (when you are facing the garage door)
- On the side opposite the antenna wire
- Near the logic board area behind the light lens
- On the same housing where the “LEARN” button and indicator light are located
What the model number should look like
For this opener, the model format in documentation appears as 139.53910D (with a dot) and is also commonly written as 13953910D (without punctuation). Either format points to the same Craftsman model family.
| Where you see it | Example you might read | What to use when searching parts |
|---|---|---|
| Motor unit label | 139.53910D | 13953910D |
| Manual cover | 139.53910D | 13953910D |
Tips to avoid mix-ups
Model labels can be hard to read or partially covered. These steps help you confirm you have the right number:
- Wipe dust off the label and use a flashlight
- Take a phone photo and zoom in to read small print
- Copy the full model number including any letters at the end (like the D)
- Do not use the remote control number as the opener model
- If you see multiple numbers, choose the one labeled “Model”
Why it matters
The correct model number ensures you get the right troubleshooting steps, programming instructions (such as using the “LEARN” button), and compatible replacement parts like safety reversing sensors, wall controls, and remotes.
If you need to search beyond the parts list for this model, use your full model number on Sears PartsDirect.
Last updated: February 2026
Is it worth repairing a 20 year old garage door opener?
For a 20-year-old garage door opener, replacement is usually the better long-term choice because typical opener lifespan is 10 to 15 years and newer units add meaningful safety and security upgrades. If your Craftsman 13953910D only needs a small, low-cost fix, repairing can make sense short-term.
When repair makes sense
A repair is worth it when the problem is simple and the door system is in good shape.
- The opener runs but needs limit/force adjustment and then passes the safety tests
- The issue is a remote, keypad, or wall control programming problem
- The door is properly balanced and moves smoothly by hand
- You are fixing a single accessory issue (lights, control console features)
- You can restore safe operation and complete the required monthly safety checks
For model-specific procedures like erasing remote codes, reprogramming remotes, and safety testing steps, use the owner's manual.
When replacement is the smarter investment
If any of these apply, we recommend putting money toward a new opener instead of repeated repairs.
- The opener fails the Safety Reverse Test after adjustments
- The safety sensors (Protector System) will not stop the door and the opener lights flash
- The door is out of balance or binds (this can overload the opener)
- You have recurring drive or motor issues that require major teardown
- You want modern features such as stronger rolling-code security and quieter operation
Quick decision guide
| What you’re seeing | Best next step | Why |
|---|---|---|
| Minor control or programming issue | Repair | Low cost, fast restore |
| Needs force/limit tweaks but passes tests | Repair | Safe once verified |
| Repeated failures, major mechanical wear | Replace | Better reliability |
| Safety reverse or sensor problems persist | Replace (and service door) | Safety risk if not corrected |
Why it matters (safety and reliability)
Your manual calls out that the safety reversal system must be tested every month and after any adjustment or repair; the door must reverse on contact with a 1-1/2 inch object (or a 2x4 laid flat). If an older opener cannot consistently pass these checks, replacement is the safer path.
Parts and support options
We list parts by model when available; if you decide to repair, search by model number 13953910D on Sears PartsDirect. For troubleshooting blink patterns and diagnostics, use Craftsman error codes.
Last updated: February 2026
Why is my garage door not responding to remotes and/or keypad?
If your Craftsman 13953910D garage door opener will not respond to remotes and/or the keypad, start with the wall control. If the wall control works, the problem is usually batteries, programming, or interference. If the wall control also fails, check power and the safety reversing sensors.
Quick checks (fastest fixes)
- Replace the batteries in the remote and keypad.
- Make sure the opener’s antenna wire is hanging down and not tucked up.
- Remove common interference sources near the opener (LED bulbs, chargers, Wi-Fi devices).
- Verify the wall control is not in “lock” mode (if your wall control has a lock feature).
Reprogram the remote or keypad
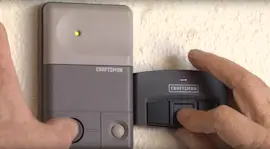
Your opener uses a LEARN button to add or reprogram Security+ remotes and keyless entry.
- Press and release the LEARN button; the indicator stays on for about 30 seconds.
- Within that time, press the remote button (or follow keypad steps).
- To remove old remotes, hold LEARN until the indicator light goes out (about 6 seconds), then reprogram the devices you want.
Programming steps and button locations are shown in the 13953910D owner's manual.
If the door will not close from a remote
On this model, the opener will not close from a remote if either safety sensor indicator light is off (misaligned or blocked). When the beam is blocked, the door may move about 1 inch and the opener lights can flash.
| Symptom | Most likely cause | What to do |
|---|---|---|
| Wall control works; remotes/keypad do not | Batteries, programming, interference | Replace batteries; reprogram; reduce interference |
| Won’t close from remote; lights flash | Safety sensor misalignment/obstruction | Clear beam; align sensors; confirm both lights on |
Why it matters
The safety reversing sensors prevent the door from closing when something is in the opening; keeping them aligned helps the opener operate normally and safely.
For diagnostic flash patterns and troubleshooting paths, use Craftsman error codes. To find replacement parts by model number, use the parts list for 13953910D or search on Sears PartsDirect.
Last updated: February 2026