Get free shipping on your order, with any water filter subscription. Find my filter

Open Hamburger Menu
Sears Parts Direct
Tips to find your model number

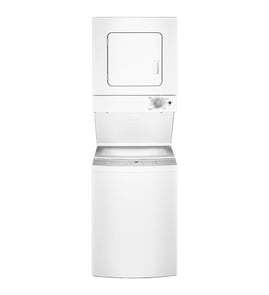
Whirlpool WET4024HW0 stacked laundry center Parts

Here are the diagrams and repair parts for Whirlpool WET4024HW0 stacked laundry center, as well as links to manuals and error code tables, if available.

Whirlpool WET4024HW0 stacked laundry center
By Schematic
By Part
SELECT DIAGRAM
?

This is the number corresponding to the part on the diagram / schematic

Browse Parts for WET4024HW0 Laundry Center

  • Nut for Whirlpool WET4024HW0 - Part WP692771

    Dryer cabinet and motor parts diagram

    Nut

    Part #692771

    Replaced by #WP692771

    Info Icon
    Manufacturer substitution
    This part replaces 692771. Substitute parts can look different from the original.
    In Stock
    $28.13
    Minus Item
    Qty
    Plus Item
  • Dryer Door for Whirlpool WET4024HW0 - Part 280077

    Dryer front panel and door parts diagram

    Door

    Part #695656

    Replaced by #280077

    Info Icon
    Manufacturer substitution
    This part replaces 695656. Substitute parts can look different from the original.
    In Stock
    $247.79
    Minus Item
    Qty
    Plus Item
  • Baffle-drum for Whirlpool WET4024HW0 - Part W11778255

    Dryer bulkhead parts diagram

    Sears Canada Dryer Drum Baffle

    Part #685207

    Replaced by #W11778255

    Info Icon
    Manufacturer substitution
    This part replaces 685207. Substitute parts can look different from the original.
    In Stock
    $50.70
    Minus Item
    Qty
    Plus Item
  • Washer Gear Case Shift Actuator for Whirlpool WET4024HW0 - Part W11614637

    Washer basket and gear parts diagram

    Washer Gear Case Shift Actuator

    Part #W11187717

    Replaced by #W11614637

    Info Icon
    Manufacturer substitution
    This part replaces W11187717. Substitute parts can look different from the original.
    In Stock
    $146.85
    Minus Item
    Qty
    Plus Item
  • Door for Whirlpool WET4024HW0 - Part WP348205

    Dryer front panel and door parts diagram

    Dryer Door (white)

    Part #348205

    Replaced by #WP348205

    Info Icon
    Manufacturer substitution
    This part replaces 348205. Substitute parts can look different from the original.
    In Stock
    $125.26
    Minus Item
    Qty
    Plus Item
  • Scroll for Whirlpool WET4024HW0 - Part WP696418

    Dryer bulkhead parts diagram

    Fan Scroll

    Part #696418

    Replaced by #WP696418

    Info Icon
    Manufacturer substitution
    This part replaces 696418. Substitute parts can look different from the original.
    In Stock
    $113.45
    Minus Item
    Qty
    Plus Item
  • Washer Drain Pump Hose Connector for Whirlpool WET4024HW0 - Part WP384496

    Optional parts (not included) diagram

    Washer Drain Hose Sleeve Connector

    Part #384496

    Replaced by #WP384496

    Info Icon
    Manufacturer substitution
    This part replaces 384496. Substitute parts can look different from the original.
    In Stock
    $98.26
    Minus Item
    Qty
    Plus Item
  • Laundry Center Washer Drain Hose for Whirlpool WET4024HW0 - Part W11727711

    Washer cabinet parts diagram

    Laundry Center Washer Drain Hose

    Part #W11178924

    Replaced by #W11727711

    Info Icon
    Manufacturer substitution
    This part replaces W11178924. Substitute parts can look different from the original.
    In Stock
    $52.30
    Minus Item
    Qty
    Plus Item
  • Panel W for Whirlpool WET4024HW0 - Part WP3402293

    Dryer cabinet and motor parts diagram

    Panel

    Part #3402293

    Replaced by #WP3402293

    Info Icon
    Manufacturer substitution
    This part replaces 3402293. Substitute parts can look different from the original.
    In Stock
    $272.73
    Minus Item
    Qty
    Plus Item
  • Dryer Bulkhead for Whirlpool WET4024HW0 - Part 279848

    Dryer bulkhead parts diagram

    Bulkhead

    Part #695931

    Replaced by #279848

    Info Icon
    Manufacturer substitution
    This part replaces 695931. Substitute parts can look different from the original.
    In Stock
    $233.40
    Minus Item
    Qty
    Plus Item

Whirlpool Laundry Center WET4024HW0 FAQs

For the Whirlpool WET4024HW0 stacked laundry center, we recommend loading clothes loosely, using only HE detergent, choosing the right cycle and temperature, then pressing Start/Pause. This model uses a low-water wash system and a lid lock, so it may look and sound different than older agitator washers.

Step-by-step: washing a typical load

  1. Sort laundry by color, fabric type, and soil level.
  2. Add a measured amount of HE (High Efficiency) detergent to the basket (or a single-dose packet first, then clothes).
  3. Load items in loose heaps evenly around the washplate (do not pack tightly).
  4. Add liquid chlorine bleach to the bleach dispenser (optional) and liquid fabric softener to the softener dispenser (optional).
  5. Close the lid, press Power On/Off, select a cycle, select Temp, then press Start/Pause.

For the exact cycle guide and control-panel details for this model, use the WET4024HW0 use and care guide.

Key settings to choose (and what they do)

  • Normal: everyday cottons and mixed loads.
  • Heavy Duty: sturdy fabrics, heavy soil, and loads using bleach.
  • Delicate: lingerie and loosely knit items.
  • Rinse: extra rinsing without a full wash.
  • Spin: removes excess water from wet items.
  • Clean Washer: run about every 30 loads with an empty tub to reduce odor and buildup.
What you’re washing Recommended cycle Typical temp choice
Mixed everyday clothes Normal Warm or Cool
Towels/jeans Heavy Duty Warm
Lingerie/knits Delicate Cool or Cold

Lid lock and “low water” behavior (normal for this model)

  • The lid must be closed for the washer to fill and start.
  • The lid locks before high-speed spin; unlocking can take about a minute after movement stops.
  • Clothes may not be fully submerged; the washer senses load size and adds the correct water level.

Why it matters

Using HE detergent, the right cycle, and proper loading helps the WET4024HW0 clean better, rinse better, and avoid issues like excess suds, long cycle times, and off-balance spinning.

Last updated: January 2026

For the Whirlpool WET4024HW0 stacked laundry center, the main downside is convenience and serviceability: you save floor space, but you typically give up easier access, flexible placement, and simpler repairs compared with separate, side-by-side machines. See the WET4024HW0 use and care guide for operating and maintenance details.

Common downsides (what most owners notice)

  • Harder access: controls and dryer door are higher; reaching the lint screen and loading/unloading can be tougher for shorter users.
  • Smaller, less flexible capacity: laundry centers often have less room than full-size separate washer and dryer sets.
  • More vibration sensitivity: stacked units can be more sensitive to leveling and load balance, which can increase noise.
  • Repairs can be more involved: service access is tighter; some repairs require removing panels and working in confined spaces.
  • Less upgrade flexibility: you cannot replace just the washer or just the dryer with any brand or size; you are tied to the combined platform.

Installation and venting considerations

A stacked laundry center like the WET4024HW0 depends heavily on correct venting and clearances. Poor airflow can increase dry times and heat stress.

Topic Why it matters on a laundry center What to do
Vent material Restricts airflow if incorrect Use 4-inch rigid or flexible metal vent (avoid plastic/foil)
Vent length/turns Too long or too many elbows slows drying Keep the run short with minimal bends
Leveling Reduces “walking” and vibration Level the unit and lock the feet

For step-by-step setup requirements, use the WET4024HW0 installation instructions.

Why it matters

With a stacked design, airflow, leveling, and access are bigger factors than they are with separate machines. Getting those basics right helps prevent long dry times, excess vibration, and avoidable service calls.

Last updated: January 2026

Yes for this model: the Whirlpool WET4024HW0 stacked laundry center uses a vented dryer, so it must be exhausted outdoors with proper metal ducting. For venting rules, clearances, and routing limits, follow the WET4024HW0 installation guide.

What “vented” means for WET4024HW0

This unit is not a ventless condenser or heat pump combo. The dryer section needs airflow to dry efficiently and safely, so you’ll install an exhaust duct from the dryer outlet to an exterior hood.

Key venting requirements to follow

  • Exhaust must go outdoors (not into an attic, wall, ceiling, chimney, or crawlspace)
  • Use 4-inch diameter venting
  • Use rigid metal vent when possible; flexible metal only if accessible for cleaning
  • Do not use plastic or foil vent
  • Keep the run as short and straight as possible; limit elbows to maintain airflow
  • Clean lint from the full vent system periodically (not just the lint screen)

Quick comparison: vented vs ventless (why your answer may differ by product)

Type of laundry unit Needs an exhaust duct to outdoors? Typical install flexibility
Vented laundry center (like WET4024HW0) Yes Needs access to an exterior vent path
Ventless condenser/heat pump combo No Can be placed where venting is not possible (still needs drain/condensate handling)

Why it matters

Correct venting helps your WET4024HW0 dry faster, reduces energy use, and helps prevent overheating and lint buildup. Poor airflow is one of the most common causes of long dry times.

If you’re planning a new install

Use the WET4024HW0 installation guide to confirm:

  • Venting requirements and allowed materials
  • Closet and clearance requirements
  • Electrical and drain hookup requirements

Last updated: January 2026
Most common symptoms to help you fix your laundry centers

Choose a symptom to see related laundry center repairs.

Main causes: broken dryer drive belt, weak drive motor, binding drum seals…

Main causes: door not fully shut, bad door switch, faulty push-to-start switch, wiring failure, bad drive motor, blown f…

Main causes: blocked exhaust vent, clogged lint screen, bad timer, moisture sensing problems, weak gas valve coils, bad …

Main causes: broken lid switch or lid lock, faulty drive motor, drain system problem, broken drive system components…

Main causes: bad lid switch or lid lock, drive motor failure, broken motor coupler, bad timer, faulty electronic control…

Main causes: clogged drain system, blocked drain hose, bad drain pump…

Main causes: control system failure, broken heating element, bad gas valve coils, gas supply failure, voltage supply pro…

Main causes: unbalanced load, broken suspension springs or shocks, worn snubber ring…

Main causes: lack of water supply, failed lid switch or lid lock, bad water level pressure switch, control system failur…

Most common repair guides to help fix your laundry centers

These step-by-step repair guides will help you safely fix what’s broken on your laundry center.

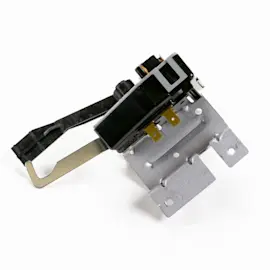
How to replace a laundry center washer lid lock switch

How to replace a laundry center washer lid lock switch

If the washer fills but won’t start the agitation cycle, the lid lock switch could be defective. …

Repair time and Difficulty

 15 minutes or less
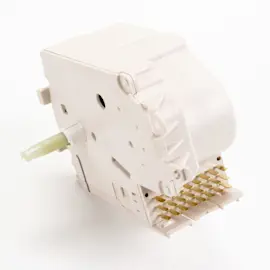
How to replace a laundry center washer timer

How to replace a laundry center washer timer

If the washer doesn't fill, spin or drain, the timer could be the problem. …

Repair time and Difficulty

 15 minutes or less
How to replace a laundry center washer snubber ring

How to replace a laundry center washer snubber ring

If the washer tub bangs the cabinet during the spin cycle even though the load is balanced, you might need to replace th…

Repair time and Difficulty

 15 minutes or less

Effective articles & videos to help repair your laundry centers

Use the advice and tips in these articles and videos to get the most out of your laundry center.

How to get cleaner clothes: 7 laundry tips for whiter whites and better results

How to get cleaner clothes: 7 laundry tips for whiter whites and better results

Tired of dull laundry? These 7 expert tips help you get cleaner clothes, brighten whites, and fix common washer mistakes…

Are DIY appliance repairs safe?

Are DIY appliance repairs safe?

Find out how to stay safe when repairing your appliances.…

Cleaning your appliances after a drinking water advisory

Cleaning your appliances after a drinking water advisory

Find out how to clean and flush household appliances once a boil water advisory is lifted.…

Parts & More

Dishwasher
Dryer
Electric Wall Oven
Front-Engine Lawn Tractor
Gas Chainsaw
Gas Range
Miter Saw
Others
Parts
Refrigerator
Snow Blade
Television
Top Pages
Treadmill
Vhs Players & Vcrs