Get free shipping on your order, with any water filter subscription. Find my filter

Open Hamburger Menu
Sears Parts Direct
Tips to find your model number

Whirlpool WED9550WR1 dryer Parts

Here are the diagrams and repair parts for Whirlpool WED9550WR1 dryer, as well as links to manuals and error code tables, if available.

Whirlpool WED9550WR1 dryer
By Schematic
By Part
SELECT DIAGRAM
?

This is the number corresponding to the part on the diagram / schematic

Browse Parts for WED9550WR1 Dryer

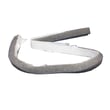
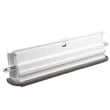
  • Dryer Lint Chute Seal for Whirlpool WED9550WR1 - Part WP697813

    Bulkhead parts diagram

    Seal

    Part #697814

    Replaced by #WP697813

    Info Icon
    Manufacturer substitution
    This part replaces 697814. Substitute parts can look different from the original.
    This item is not returnable
    In Stock
    $7.50
    12% OFF Phone Price : $8.50Info Icon
    Minus Item
    Qty
    Plus Item
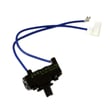
  • Dryer Belt Switch for Whirlpool WED9550WR1 - Part WPW10411937

    Cabinet parts diagram

    Switch

    Part #W10246525

    Replaced by #WPW10411937

    Info Icon
    Manufacturer substitution
    This part replaces W10246525. Substitute parts can look different from the original.
    This item is not returnable
    In Stock
    $28.44
    17% OFF Phone Price : $34.44Info Icon
    Minus Item
    Qty
    Plus Item
  • Dryer Terminal Block for Whirlpool WED9550WR1 - Part WP3397659

    Cabinet parts diagram

    Dryer Terminal Block

    Part #3397659

    Replaced by #WP3397659

    Info Icon
    Manufacturer substitution
    This part replaces 3397659. Substitute parts can look different from the original.
    In Stock
    $17.68
    10% OFF Phone Price : $19.68Info Icon
    Minus Item
    Qty
    Plus Item
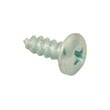
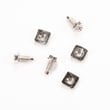
  • Whirlpool Appliance Screw for Whirlpool WED9550WR1 - Part WP488729

    Screw

    Part #3390647

    Replaced by #WP488729

    Info Icon
    Manufacturer substitution
    This part replaces 3390647. Substitute parts can look different from the original.
    This item is not returnable
    In Stock
    $4.93
    17% OFF Phone Price : $5.93Info Icon
    Minus Item
    Qty
    Plus Item
  • Whirlpool Appliance Screw for Whirlpool WED9550WR1 - Part WP488729

    Bulkhead parts diagram

    Screw

    Part #695240

    Replaced by #WP488729

    Info Icon
    Manufacturer substitution
    This part replaces 695240. Substitute parts can look different from the original.
    This item is not returnable
    In Stock
    $4.93
    17% OFF Phone Price : $5.93Info Icon
    Minus Item
    Qty
    Plus Item
  • Dryer Lint Screen Housing for Whirlpool WED9550WR1 - Part W11129408

    Bulkhead parts diagram

    Outer Housing

    Part #3394985

    Replaced by #W11129408

    Info Icon
    Manufacturer substitution
    This part replaces 3394985. Substitute parts can look different from the original.
    In Stock
    $40.41
    13% OFF Phone Price : $46.41Info Icon
    Minus Item
    Qty
    Plus Item
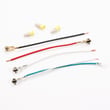
  • Dryer Terminal Block Wire Set for Whirlpool WED9550WR1 - Part 279318

    Cabinet parts diagram

    Dryer Terminal Block Wire Set

    In Stock
    $61.34
    9% OFF Phone Price : $67.34Info Icon
    Minus Item
    Qty
    Plus Item
  • Appliance Spray Paint (white) for Whirlpool WED9550WR1 - Part 350930

    Optional parts (not included) diagram

    Appliance Spray Paint (white)

    Part #350930
    This item is not returnable
    In Stock
    $26.00
    19% OFF Phone Price : $32.00Info Icon
    Minus Item
    Qty
    Plus Item
  • Dryer Terminal Block Screw And Nut Set for Whirlpool WED9550WR1 - Part 279393

    Cabinet parts diagram

    Dryer Terminal Block Screw And Nut Set

    In Stock
    $31.10
    16% OFF Phone Price : $37.10Info Icon
    Minus Item
    Qty
    Plus Item
  • Dryer Leveling Leg for Whirlpool WED9550WR1 - Part 49621

    Cabinet parts diagram

    Foot

    Part #3392100

    Replaced by #49621

    Info Icon
    Manufacturer substitution
    This part replaces 3392100. Substitute parts can look different from the original.
    In Stock
    $9.22
    10% OFF Phone Price : $10.22Info Icon
    Minus Item
    Qty
    Plus Item

Whirlpool Dryer WED9550WR1 FAQs

Common Whirlpool dryer problems on model WED9550WR1 include a dryer that will not start, runs but has no heat, makes unusual noises, or takes too long to dry. Many issues trace back to power supply, airflow restrictions, or normal wear parts like rollers, the idler pulley, and the heating circuit; see the WED9550WR1 owner’s manual for model-specific checks.

Most common symptoms and what they usually mean

  • Won’t start: door not fully closed, Start not pressed firmly, or a tripped breaker/blown fuse
  • Runs but no heat: one leg of 240V power missing (electric dryers often use two fuses/breakers), or a failed heating safety device
  • Not drying well: restricted venting, clogged lint screen, or weak airflow
  • Squealing, thumping, rumbling: worn drum support rollers, idler pulley, or debris caught at drum edges
  • Vibration/banging: dryer not level, load is balled up, or installation issue

Quick checks we recommend first (fast, high-impact)

  1. Confirm the dryer is plugged in and the door fully latches.
  2. Check the home electrical supply; electric dryers need 240 volts and often have two fuses/breakers.
  3. Clean the lint screen and inspect the vent path for restrictions.
  4. Listen for noise location (front, rear, or under drum) to narrow down wear parts.
  5. If the drum turns but heat is missing, inspect the heating circuit components.

Common parts tied to these problems (WED9550WR1)

Symptom Likely area Example part for this model
Squeal/rumble, drum support noise Drum support system Support WPW10314173
Squeal, belt slack, intermittent tumbling Belt tension system Dryer idler pulley 279640
No heat (after power and vent checks) Heating circuit Dryer heating element WP8544771
No heat, shuts off on high temp Safety cut-off Dryer thermal cut-off fuse kit 279973

Why it matters

A dryer that “runs but doesn’t heat” is often a power supply issue (one breaker tripped) or a safety shutdown caused by poor airflow. Fixing venting and worn drum/belt parts helps prevent repeat failures and improves drying time.

Last updated: February 2026

On a Whirlpool dryer like model WED9550WR1, F-01 indicates an electronic control problem, most often tied to the main control board (a control failure that can stop the dryer or cause it to act erratically). Use the diagnostic and reset steps in the WED9550WR1 owner's manual before replacing parts.

What to do first (quick checks)

  • Press Power/Cancel to clear the display, then restart the cycle.
  • If the dryer recently lost power, restart the cycle (power interruptions can trigger codes).
  • Unplug the dryer (or switch the breaker off) for 2 minutes, then restore power.
  • Confirm the dryer has correct power supply; electric dryers need two household fuses or breakers.
  • If the code returns immediately, plan to inspect wiring connections to the control.

Why power and airflow checks still matter

Even when you see an electronic code, basic conditions can create symptoms that look like a control failure.

What you notice What to check Why it matters
Drum turns but no heat Home power supply (2 fuses/breakers) Low/partial voltage can prevent heating and trigger faults
Code appears after outage Restart cycle and monitor Power events can interrupt the cycle and confuse the control
Long dry times Lint screen and venting Poor airflow can cause overheating and shutdown behavior

F-01 commonly points to the control not processing inputs correctly. If the dryer powers on but behaves unpredictably, we typically check these items in order:

  • Loose or oxidized wire connections at the control and user interface
  • Harness plugs not fully seated (take a photo before moving connectors)
  • Signs of heat damage at terminals
  • Repeated F-01 after a hard reset

Parts that are often involved (when symptoms match)

If you also have overheating, no-heat, or cycling issues alongside F-01, these parts are commonly checked during diagnosis:

Why it matters

An F-01 condition can stop the dryer mid-cycle or prevent it from starting; addressing power supply, connections, and temperature-sensing issues first helps avoid replacing the wrong part.

Last updated: February 2026

Your Whirlpool dryer’s complete model number and serial number are printed on the model and serial number label on the dryer. Use that exact model number (for example, WED9550WR1) when looking up parts, manuals, and service information in the owner's manual.

Where to look on the dryer

On Whirlpool dryers like the WED9550WR1, the model and serial number label is typically found in one of these spots:

  • Inside the door opening on the front panel
  • On the door frame area (around the opening)
  • Behind the lint screen housing area (depending on configuration)
  • On the rear panel (less common, but possible)

What to write down (and why)

The manual notes you should record the complete model number and serial number; this helps ensure you get the right diagrams, troubleshooting steps, and replacement parts.

  • Model number (example: WED9550WR1)
  • Serial number
  • Purchase date (helpful for your records)
Item What it’s used for Example
Model number Matching parts and diagrams to your exact dryer WED9550WR1
Serial number Identifying production details for service records (varies)
Purchase date Warranty and maintenance records (your date)

Tips to avoid common mix-ups

  • Copy the model number exactly as shown (letters and numbers).
  • Use the full model number, not just “Whirlpool Duet” or “Whirlpool dryer.”
  • If the label is hard to read, take a clear photo and zoom in.

Why it matters

Whirlpool often uses similar-looking designs across multiple dryers; the model number is what ensures parts like a heating element, thermistor, or lint screen match your exact configuration.

Last updated: March 2026
Most common symptoms to help you fix your dryers

Choose a symptom to see related dryer repairs.

Main causes: bad gas valve coils, broken heating element, tripped safety thermostat or fuse, bad operating thermostat, c…

Main causes: clogged exhaust system, heating system failure, deposits on moisture sensor, control system failure…

Main causes: clogged exhaust vent, bad motor relay, loose dryer door catch, bad door switch, control system failure, fau…

Main causes: door switch failure, lack of power, broken belt, blown thermal fuse, bad drive motor, control system failur…

Main causes: damaged door strike, worn door catch…

Main causes: lack of electrical power, bad power cord, wiring failure, bad control board, blown thermal fuse, bad door s…

Main causes: bad timer or electronic control board, door switch failure…

Main causes: bad drum support roller, damaged idler pulley, broken blower fan blade, worn drum glide bearing, bad drive …

Most common repair guides to help fix your dryers

These step-by-step repair guides will help you safely fix what’s broken on your dryer.

How to replace an electronic control board in an electric dryer

How to replace an electronic control board in an electric dryer

The electronic control board manages the components and controls the cycle times in your electric dryer. Follow these st…

Repair time and Difficulty

 45 minutes or less
How to replace an igniter in a gas dryer

How to replace an igniter in a gas dryer

The igniter in a gas dryer glows white hot during the to light the gas that heats the air in the dryer. If the dryer air…

Repair time and Difficulty

 60 minutes or less
How to replace a dryer thermistor

How to replace a dryer thermistor

The thermistor senses the air temperature in the dryer. If your dryer overheats or doesn't heat at all, the thermistor …

Repair time and Difficulty

 30 minutes or less

Effective articles & videos to help repair your dryers

Use the advice and tips in these articles and videos to get the most out of your dryer.

How to use your clothes dryer efficiently

How to use your clothes dryer efficiently

Get expert tips on using your dryer efficiently to save energy.…

Are DIY appliance repairs safe?

Are DIY appliance repairs safe?

Find out how to stay safe when repairing your appliances.…

Keeping your smart appliances secure from hackers

Keeping your smart appliances secure from hackers

Find out how to protect your smart appliances from malevolent invasions by hackers.…

Parts & More

Bottom-Mount Refrigerator
Chainsaw
Dishwasher
Electric Range
Front-Engine Lawn Tractor
Gas Range
Gas Water Heater
Lcd Television
Parts
Receiver
Room Air Conditioner
Stand Mixer
Top-Mount Refrigerator
Upright Vacuum