Installation guide
 Owner’s manual


What are the common problems with whirlpool dryers?
Common Whirlpool dryer problems on model WED9550WR1 include a dryer that will not start, runs but has no heat, makes unusual noises, or takes too long to dry. Many issues trace back to power supply, airflow restrictions, or normal wear parts like rollers, the idler pulley, and the heating circuit; see the WED9550WR1 owner’s manual for model-specific checks.
Most common symptoms and what they usually mean
- Won’t start: door not fully closed, Start not pressed firmly, or a tripped breaker/blown fuse
- Runs but no heat: one leg of 240V power missing (electric dryers often use two fuses/breakers), or a failed heating safety device
- Not drying well: restricted venting, clogged lint screen, or weak airflow
- Squealing, thumping, rumbling: worn drum support rollers, idler pulley, or debris caught at drum edges
- Vibration/banging: dryer not level, load is balled up, or installation issue
Quick checks we recommend first (fast, high-impact)
- Confirm the dryer is plugged in and the door fully latches.
- Check the home electrical supply; electric dryers need 240 volts and often have two fuses/breakers.
- Clean the lint screen and inspect the vent path for restrictions.
- Listen for noise location (front, rear, or under drum) to narrow down wear parts.
- If the drum turns but heat is missing, inspect the heating circuit components.
Common parts tied to these problems (WED9550WR1)
| Symptom | Likely area | Example part for this model |
|---|---|---|
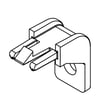
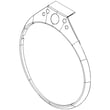
| Squeal/rumble, drum support noise | Drum support system | Support WPW10314173 |
| Squeal, belt slack, intermittent tumbling | Belt tension system | Dryer idler pulley 279640 |
| No heat (after power and vent checks) | Heating circuit | Dryer heating element WP8544771 |
| No heat, shuts off on high temp | Safety cut-off | Dryer thermal cut-off fuse kit 279973 |
Why it matters
A dryer that “runs but doesn’t heat” is often a power supply issue (one breaker tripped) or a safety shutdown caused by poor airflow. Fixing venting and worn drum/belt parts helps prevent repeat failures and improves drying time.
Last updated: February 2026
What does F-01 mean on a whirlpool dryer?
On a Whirlpool dryer like model WED9550WR1, F-01 indicates an electronic control problem, most often tied to the main control board (a control failure that can stop the dryer or cause it to act erratically). Use the diagnostic and reset steps in the WED9550WR1 owner's manual before replacing parts.
What to do first (quick checks)
- Press Power/Cancel to clear the display, then restart the cycle.
- If the dryer recently lost power, restart the cycle (power interruptions can trigger codes).
- Unplug the dryer (or switch the breaker off) for 2 minutes, then restore power.
- Confirm the dryer has correct power supply; electric dryers need two household fuses or breakers.
- If the code returns immediately, plan to inspect wiring connections to the control.
Why power and airflow checks still matter
Even when you see an electronic code, basic conditions can create symptoms that look like a control failure.
| What you notice | What to check | Why it matters |
|---|---|---|
| Drum turns but no heat | Home power supply (2 fuses/breakers) | Low/partial voltage can prevent heating and trigger faults |
| Code appears after outage | Restart cycle and monitor | Power events can interrupt the cycle and confuse the control |
| Long dry times | Lint screen and venting | Poor airflow can cause overheating and shutdown behavior |
When a control-related repair is likely
F-01 commonly points to the control not processing inputs correctly. If the dryer powers on but behaves unpredictably, we typically check these items in order:
- Loose or oxidized wire connections at the control and user interface
- Harness plugs not fully seated (take a photo before moving connectors)
- Signs of heat damage at terminals
- Repeated F-01 after a hard reset
Parts that are often involved (when symptoms match)
If you also have overheating, no-heat, or cycling issues alongside F-01, these parts are commonly checked during diagnosis:
- Dryer thermistor WP8577274 (temperature sensing)
- Dryer thermal cut-off fuse kit 279973 (overheat protection)
Why it matters
An F-01 condition can stop the dryer mid-cycle or prevent it from starting; addressing power supply, connections, and temperature-sensing issues first helps avoid replacing the wrong part.
Last updated: February 2026
How do I find the model number on my WED9550WR1?
Your Whirlpool dryer’s complete model number and serial number are printed on the model and serial number label on the dryer. Use that exact model number (for example, WED9550WR1) when looking up parts, manuals, and service information in the owner's manual.
Where to look on the dryer
On Whirlpool dryers like the WED9550WR1, the model and serial number label is typically found in one of these spots:
- Inside the door opening on the front panel
- On the door frame area (around the opening)
- Behind the lint screen housing area (depending on configuration)
- On the rear panel (less common, but possible)
What to write down (and why)
The manual notes you should record the complete model number and serial number; this helps ensure you get the right diagrams, troubleshooting steps, and replacement parts.
- Model number (example: WED9550WR1)
- Serial number
- Purchase date (helpful for your records)
| Item | What it’s used for | Example |
|---|---|---|
| Model number | Matching parts and diagrams to your exact dryer | WED9550WR1 |
| Serial number | Identifying production details for service records | (varies) |
| Purchase date | Warranty and maintenance records | (your date) |
Tips to avoid common mix-ups
- Copy the model number exactly as shown (letters and numbers).
- Use the full model number, not just “Whirlpool Duet” or “Whirlpool dryer.”
- If the label is hard to read, take a clear photo and zoom in.
Why it matters
Whirlpool often uses similar-looking designs across multiple dryers; the model number is what ensures parts like a heating element, thermistor, or lint screen match your exact configuration.
Last updated: March 2026