 Installation guide
 Owner’s manual




What is the downside of a ventless dryer?
For the Electrolux ELFE422CAW (a condensation, ventless dryer), the main downsides are longer dry times than many vented dryers, more maintenance around moisture handling (tank emptying or drain setup), and added sensitivity to airflow around the cabinet because it uses room air to condense moisture. See the owner's manual for the exact drying and care guidance for this model.
What makes ventless drying different (and why that creates tradeoffs)
This model dries in a closed-loop system: it heats process air, pulls moisture from clothes, then cools that moist air through a heat exchanger so water collects in a basin or tank.
Common tradeoffs you may notice:
- Longer cycle times, especially for bulky loads (towels, hoodies, bedding)
- More routine cleaning, because lint and residue reduce efficiency
- Moisture management, since water must go to a drain or into a tank you empty
- Room conditions matter, because ambient air is used to help condense moisture
- Higher parts complexity, with components like a condenser, pump, and float switch
Moisture handling: tank vs drain (quick comparison)
| Setup | What you do | Typical downside | Parts involved |
|---|---|---|---|
| Water tank | Empty the tank after cycles | Easy to forget; can stop drying if full | Tank, float/pump switch |
| Drain kit | Route water to a drain | Requires correct installation and routing | Drain tube, pump |
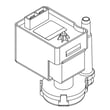
If your dryer is not removing water well, a failing dryer water pump 136402403 can cause poor draining and moisture-related interruptions.
Maintenance that reduces long dry times
We recommend these habits for ELFE422CAW performance:
- Clean the lint filter before or after every load
- Keep the area around the dryer clear; do not block ventilating airflow
- Avoid overloading; ventless dryers dry best with moderate load sizes
- Use the right cycle for fabric type; heavy items often need more time
- Periodically clean the condenser path; a restricted condenser reduces drying efficiency
For deeper troubleshooting, use Electrolux compact condensing dryer error codes.
Why it matters
Ventless dryers solve the “no exterior vent” problem, but the same closed-loop design that makes them apartment-friendly also means drying speed and efficiency depend heavily on cleanliness, load size, and proper water removal.
Last updated: February 2026
What is the life expectancy of an Electrolux dryer?
Electrolux dryers typically last 10 to 15 years. For the Electrolux ELFE422CAW (a compact ventless condensation dryer), consistent lint and condenser cleaning plus correct drain setup are the biggest factors in reaching that lifespan; details are in the owner's manual.
What affects dryer lifespan the most
A dryer’s service life is usually determined by heat, airflow, and moisture management. On a ventless condensation model like ELFE422CAW, keeping the closed-loop air path clean is especially important.
- Clean the lint filter every load (restricted airflow increases heat stress)
- Keep the condenser/heat exchanger area clean so moisture can condense efficiently
- Make sure collected water drains correctly (tank or drain kit) to prevent pump strain
- Avoid chronic overloading (extra weight stresses the drum support system)
- Use appropriate cycles and avoid repeated high-heat overdrying
Maintenance checklist (simple, high impact)
Use this schedule as a practical baseline; follow the exact steps and intervals in the owner's manual.
| Task | Best interval | Why it matters |
|---|---|---|
| Clean lint filter | Every load | Protects airflow and heating efficiency |
| Clean condenser area | Monthly (or sooner with heavy use) | Prevents long dry times and overheating |
| Verify water is draining properly | Monthly | Protects the pump and reduces moisture issues |
| Inspect door seal for gaps | Every 3 to 6 months | Helps maintain proper airflow and drying performance |
Parts that commonly relate to moisture and airflow issues
If your dryer starts taking longer to dry, shuts down mid-cycle, or leaves clothes damp, these model-specific parts are often involved in ventless condensation performance:
- Dryer condenser assembly 136701301 (helps remove moisture from process air)
- Dryer water pump 136402403 (moves collected water to the drain)
- Dryer pump float switch assembly 136614001 (helps control pump operation based on water level)
Why it matters
A ventless condensation dryer depends on a clean lint path, a working condenser, and reliable water removal. When any of those are restricted, the dryer runs hotter and longer, which shortens component life and increases wear on the drum, blower, and controls.
Last updated: February 2026
What is the best electric dryer to buy?
If you want the “best” electric dryer, we recommend choosing the one that matches your space, drying style, and maintenance preferences; for many homes, a sensor-dry electric model with strong fabric-care options is the best fit. If you’re considering the Electrolux ELFE422CAW specifically, it’s a compact ventless condensation dryer, so it’s ideal when you can’t vent outdoors and you’re comfortable emptying a water container or using a drain kit (details in the owner's manual).
Quick way to choose the right electric dryer
- Vented vs. ventless: Vented dryers exhaust moist air outside; ELFE422CAW is ventless (condensation) and does not require an exterior vent.
- Drying performance: Look for sensor drying to reduce overdrying and protect fabrics.
- Capacity and footprint: Match drum size to your household and confirm the dryer fits your laundry area.
- Electrical setup: Most electric dryers use a 240V supply; some can run on 208V with longer dry times.
- Maintenance effort: Ventless dryers need consistent lint-filter cleaning and water handling.
Feature comparison (what “best” usually means)
| What you care about | What to look for | Why it helps |
|---|---|---|
| Fast dry times | 240V supply, strong airflow, sensor dry | Less waiting, fewer damp loads |
| Fabric care | Multiple cycles, lower-heat options, sensor control | Less shrinkage and wear |
| Easy installation | Standard receptacle, simple venting plan (or ventless) | Fewer surprises on install day |
| Lower upkeep | Easy-to-clean lint filter, accessible condenser (ventless) | Better efficiency over time |
If you’re leaning toward a ventless model like ELFE422CAW
This Electrolux dryer uses a closed-loop condensation system: process air is heated, passes through clothes, then moisture is condensed and collected in a basin. Water is either collected in a container or pumped to a drain using the provided kit.
- Clean the lint filter after every load.
- Empty the water container after every load (or confirm the drain setup).
- Expect about 20% longer dry times on 208V compared to 240V.
Why it matters
Choosing the “best” electric dryer is really about matching the dryer type (vented vs. ventless), electrical supply (240V vs. 208V), and maintenance routine to your home. When those align, you get better drying results, fewer wrinkles, and lower operating headaches.
Last updated: February 2026
How to reset electrolux dryer error code?
To reset an error or alarm code on your Electrolux ELFE422CAW dryer, cancel the cycle with the control panel, then power the dryer off and back on. This clears many temporary control, load, or power-related faults and lets you restart a fresh cycle.
Reset steps (control panel method)
- Press Cancel (or Start/Pause, then Cancel) to stop the current cycle.
- Press Power to turn the dryer off.
- Wait 5 seconds.
- Press Power to turn the dryer on.
- Select a cycle and press Start/Pause.
For the exact button names and your console layout, follow the reset and cancel-cycle instructions in the ELFE422CAW owner's manual.
If the display shows an “AL” alarm code
The ELFE422CAW can show alarm codes such as AL 50 (motor overload), AL 97 (communication issue), or AL H0 (power supply issue). After the reset above, use these fixes to keep the code from returning:
- Remove some items and restart with a smaller load.
- Start the dryer empty first; then add a reduced load.
- Confirm the power cord is fully seated and the outlet is solid (no loose connection).
- Clean the lint filter and empty the water container when prompted.
Use our Electrolux iq-touch dryer error codes reference to match the exact code to the most likely cause and next steps.
What the reset does (and does not do)
| Action | What it accomplishes | Best time to use |
|---|---|---|
| Cancel the cycle | Stops the active program so you can restart cleanly | Code appears mid-cycle |
| Power off, then on | Reboots the control and clears many temporary faults | Code appears at startup or won’t clear |
Why it matters
Resetting correctly clears temporary faults and prevents repeated shutdowns. If the same code returns immediately after a reset, the dryer is detecting an active problem (load stress, power issue, or a component/control fault) that needs troubleshooting.
Last updated: February 2026
What does code 422 mean?
On an Electrolux ELFE422CAW dryer, a display reading like “422” is not the standard alarm-code format used in the manual. Electrolux alarm codes typically show as “AL” alternating with a two-character code; use the owner's manual to match what you see and follow the reset steps.
Confirm the exact code format first
Before troubleshooting, verify whether the display is showing a true alarm code or a different readout.
- Watch the display for “AL” alternating with another code (example format: AL H0).
- Note whether the code flashes and whether the dryer beeps.
- Write the code exactly as shown (letters and numbers matter).
- If “422” appears briefly, check if it is part of a scrolling message.
Reset steps Electrolux recommends for unexpected codes
The manual’s first step for many alarm-code events is a reset.
- Turn the cycle knob to the reset position (12 o’clock).
- Or power the dryer off, then back on.
- Restart a short cycle and see whether the code returns.
What to check next (based on symptoms)
Use the symptom you are seeing to decide what to inspect first.
| Symptom | What to check first | Parts that can be involved |
|---|---|---|
| Dryer stops and beeps | Power supply and reset | Power cord, outlet, breaker |
| Long dry times | Lint screen, condenser, airflow paths | Condenser components |
| Water-related warning or shutdown (ventless/condensing) | Drain path, pump area, float switch | Dryer water pump 136402403, dryer pump float switch assembly 136614001 |
Why it matters
Electrolux troubleshooting is code-specific; matching the exact “AL” code prevents wasted time and helps you focus on the correct system (power, airflow, or condensate drainage).
Last updated: February 2026





