Get free shipping on your order, with any water filter subscription. Find my filter

Open Hamburger Menu
Sears Parts Direct
Tips to find your model number

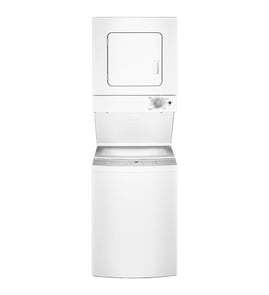
GE GTUP270EM4WW washer/dryer Parts

Here are the diagrams and repair parts for GE GTUP270EM4WW washer/dryer, as well as links to manuals and error code tables, if available.

GE GTUP270EM4WW washer/dryer
By Schematic
By Part
SELECT DIAGRAM
?

This is the number corresponding to the part on the diagram / schematic

Browse Parts for GTUP270EM4WW Washer/Dryer

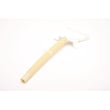
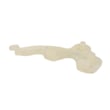
  • Laundry Center Washer Fabric Softener Dispenser Cup for GE GTUP270EM4WW - Part WH44X10287

    Cover

    Part #WH44X20435

    Replaced by #WH44X10287

    Info Icon
    Manufacturer substitution
    This part replaces WH44X20435. Substitute parts can look different from the original.
    In Stock
    $42.69
    12% OFF Phone Price : $48.69Info Icon
    Minus Item
    Qty
    Plus Item
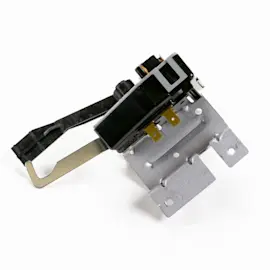
  • Dryer Operating Thermostat for GE GTUP270EM4WW - Part WE4M216

    Blower & motor assembly diagram

    T'stat Outle

    Part #WE4M317

    Replaced by #WE4M216

    Info Icon
    Manufacturer substitution
    This part replaces WE4M317. Substitute parts can look different from the original.
    In Stock
    $107.44
    10% OFF Phone Price : $119.44Info Icon
    Minus Item
    Qty
    Plus Item
  • Laundry Center Washer Suspension Rod Support for GE GTUP270EM4WW - Part WH01X10620

    Cabinet (4) diagram

    Laundry Center Washer Suspension Rod Support

    Part #WH01X10620

    The manufacturer no longer makes this part, and there's no substitute part

  • Installation Instructions for GE GTUP270EM4WW - Part 31-16652-4

    Installation Instructions

    Part #31-16652-4

    The manufacturer no longer makes this part, and there's no substitute part

  • Bracket Kit for GE GTUP270EM4WW - Part WH16X10157

    Bracket Kit

    Part #WH16X10157

    The manufacturer no longer makes this part, and there's no substitute part

  • Laundry Center Control Panel Bracket for GE GTUP270EM4WW - Part WE19M1773

    Laundry Center Control Panel Bracket

    Part #WE19M1773

    The manufacturer no longer makes this part, and there's no substitute part

  • Pm Use & Care for GE GTUP270EM4WW - Part 49-90417

    Pm Use & Care

    Part #49-90417

    The manufacturer no longer makes this part, and there's no substitute part

  • Pm Mini Manual for GE GTUP270EM4WW - Part 31-16656

    Pm Mini Manual

    Part #31-16656

    The manufacturer no longer makes this part, and there's no substitute part

  • Laundry Center Washer Top Panel for GE GTUP270EM4WW - Part WH44X10282

    Laundry Center Washer Top Panel

    Part #WH44X10282

    The manufacturer no longer makes this part, and there's no substitute part

  • Plug Seal for GE GTUP270EM4WW - Part WH08X10062

    Tub, basket & agitator diagram

    Plug Seal

    Part #WH08X10062

    The manufacturer no longer makes this part, and there's no substitute part

GE Washer/Dryer GTUP270EM4WW FAQs

GE top-load washers typically last 10 to 14 years with normal household use and basic maintenance. For your GE GTUP270EM4WW laundry center, lifespan depends most on load size, leveling, and keeping the washer and dryer venting and drain system in good shape; see the GTUP270EM4WW installation guide.

What affects washer lifespan the most
  • Overloading (stresses the drive system, tub, and suspension)
  • Out-of-balance loads (increases vibration and wear)
  • Hard water and detergent buildup (can affect valves, hoses, and wash performance)
  • Poor leveling (causes excessive vibration during spin)
  • Drain and hose restrictions (forces the pump to work harder)
Quick maintenance habits that help it reach 10 to 14 years
  • Keep loads evenly distributed; wash bulky items with a few towels to balance.
  • Use the right amount of HE detergent; too much can cause residue and odors.
  • Check fill hoses for bulges or cracking and replace as needed.
  • Make sure the unit is level and stable to reduce vibration.
  • If draining gets slow or noisy, inspect the pump and hoses; the compatible washer drain pump WH23X10040 is a common wear item on many top-load designs.
Typical lifespan: what to expect
Usage pattern Typical lifespan What usually shortens it
Light (1 to 3 loads/week) 12 to 16 years Long periods of non-use, hose aging
Average (4 to 7 loads/week) 10 to 14 years Overloading, poor leveling
Heavy (8+ loads/week) 7 to 10 years Constant high-speed spinning, frequent imbalance
Why it matters

Knowing the typical lifespan helps us decide whether a repair (like a drain pump, belt, or lid-lock related fix) is worth it versus planning for replacement, especially once the unit is past the 10-year mark.

Last updated: January 2026

No. For the GE GTUP270EM4WW laundry center, you should not place a washer on top of a dryer. Washers are heavier and create strong spin-cycle vibration; putting a washer above a dryer can make the stack unstable and can damage the dryer cabinet and controls.

What to do instead (safe setups)

Use one of these safer options for a laundry area:

  • Use a factory-built, unitized laundry center (like the GTUP270EM4WW) where the washer and dryer are designed as one stable unit.
  • If you have separate appliances, stack only if the manufacturer offers a compatible stacking kit for that exact washer and dryer.
  • Keep both units side-by-side on a solid, level floor when stacking is not approved.
  • Make sure the dryer exhaust vents outdoors using 4-inch metal ducting (rigid metal is best).
  • Avoid installing on soft flooring or thick rugs that can increase vibration.
Key safety checks for the GTUP270EM4WW

Even though this model is already a stacked laundry center, installation details still matter for stability and safe dryer airflow. We recommend following the clearances, leveling steps, and venting rules in the GTUP270EM4WW installation guide.

Quick checklist
  • Appliance sits level on all four legs (no rocking)
  • Dryer vent is 4-inch metal duct and not crushed or kinked
  • Exhaust terminates outdoors (not attic, wall cavity, or crawl space)
  • No extension cord or adapter plug is used
  • Adequate space is left for service access
Washer-over-dryer vs dryer-over-washer (general rule)

If you are stacking two separate appliances, the safe orientation is almost always dryer on top.

Setup Recommended? Why
Washer on top of dryer No Too much weight and vibration up high; stability risk
Dryer on top of washer Yes (only with approved kit) Dryer is lighter; stacking kits control movement
Why it matters

A washer’s high-speed spin can shift a top-heavy stack, leading to excessive vibration, noise, and cabinet damage. Proper leveling and correct venting also help prevent poor drying performance and overheating.

Last updated: January 2026

Yes, the GE GTUP270EM4WW stacked laundry center needs a dedicated 120/240V (or 120/208V) 30-amp electrical circuit, which is the same type of supply people commonly call a “220 outlet.” For safe installation, follow the wiring and grounding instructions in the GTUP270EM4WW installation guide.

What “220 outlet” means for this model

For GTUP270EM4WW, the dryer section is electric and requires a higher-voltage circuit than a standard 120V receptacle.

  • Use an individual (dedicated) branch circuit
  • 30-amp circuit breaker or time-delay fuse
  • 120/240V or 120/208V, 60 Hz supply
  • 3-wire or 4-wire connection depending on local code and installation type
  • Do not use an extension cord or adapter plug
3-prong vs 4-prong: quick comparison
Connection type Typical use case Notes
3-wire (3-prong) Older installations where allowed Not allowed in some locations and not used in Canada; restrictions can apply for mobile homes and new construction.
4-wire (4-prong) Common for newer installs Required for mobile/manufactured home installations and where neutral-ground bonding is prohibited.
Before you plug it in
  • Check the rating plate location noted in the installation instructions (top of the dryer front panel) to confirm the required voltage/frequency
  • Verify your home receptacle matches the cord type you plan to use
  • Turn off power at the breaker before any wiring work
  • Keep the terminal block cover installed after wiring
Why it matters

Using the correct 120/240V 30-amp circuit helps the dryer heat properly and reduces the risk of nuisance tripping, overheating wiring, or poor drying performance.

Last updated: January 2026
Most common symptoms to help you fix your laundry centers

Choose a symptom to see related laundry center repairs.

Main causes: broken dryer drive belt, weak drive motor, binding drum seals…

Main causes: door not fully shut, bad door switch, faulty push-to-start switch, wiring failure, bad drive motor, blown f…

Main causes: blocked exhaust vent, clogged lint screen, bad timer, moisture sensing problems, weak gas valve coils, bad …

Main causes: broken lid switch or lid lock, faulty drive motor, drain system problem, broken drive system components…

Main causes: bad lid switch or lid lock, drive motor failure, broken motor coupler, bad timer, faulty electronic control…

Main causes: clogged drain system, blocked drain hose, bad drain pump…

Main causes: control system failure, broken heating element, bad gas valve coils, gas supply failure, voltage supply pro…

Main causes: unbalanced load, broken suspension springs or shocks, worn snubber ring…

Main causes: lack of water supply, failed lid switch or lid lock, bad water level pressure switch, control system failur…

Most common repair guides to help fix your laundry centers

These step-by-step repair guides will help you safely fix what’s broken on your laundry center.

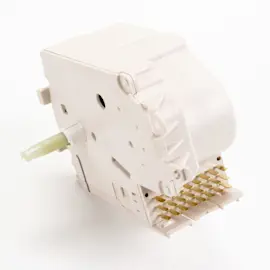
How to replace a laundry center washer lid lock switch

How to replace a laundry center washer lid lock switch

If the washer fills but won’t start the agitation cycle, the lid lock switch could be defective. …

Repair time and Difficulty

 15 minutes or less
How to replace a laundry center washer timer

How to replace a laundry center washer timer

If the washer doesn't fill, spin or drain, the timer could be the problem. …

Repair time and Difficulty

 15 minutes or less
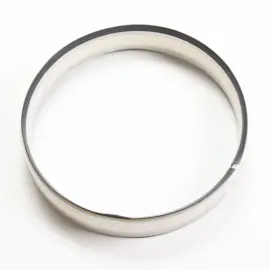
How to replace a laundry center washer snubber ring

How to replace a laundry center washer snubber ring

If the washer tub bangs the cabinet during the spin cycle even though the load is balanced, you might need to replace th…

Repair time and Difficulty

 15 minutes or less

Effective articles & videos to help repair your laundry centers

Use the advice and tips in these articles and videos to get the most out of your laundry center.

How to get cleaner clothes: 7 laundry tips for whiter whites and better results

How to get cleaner clothes: 7 laundry tips for whiter whites and better results

Tired of dull laundry? These 7 expert tips help you get cleaner clothes, brighten whites, and fix common washer mistakes…

Are DIY appliance repairs safe?

Are DIY appliance repairs safe?

Find out how to stay safe when repairing your appliances.…

Cleaning your appliances after a drinking water advisory

Cleaning your appliances after a drinking water advisory

Find out how to clean and flush household appliances once a boil water advisory is lifted.…

Parts & More

Audio Equipment
Bottom-Mount Refrigerator
Canister Vacuum
Electric Range
Engine & Drivetrain
Front-Engine Lawn Tractor
Generator
Painting Power Tool
Parts
Riding Mowers & Tractors
Side-By-Side Refrigerator
Television
Top-Mount Refrigerator
Toys & Games
Treadmill
Washer