Owner’s manual
 Error Codes

Can the top of a gas stove be replaced?
Yes, the top can be replaced on many gas ranges, but on Kenmore model 79075752103 the cooktop is not removable, so we treat “top replacement” as a parts repair (burner heads, caps, grates, or the main top) rather than lifting the cooktop for service. See the 79075752103 owner's manual for the exact design and safety notes.
On a gas range, customers often mean one of these items:
- The main top (the metal surface around the burners)
- Burner heads or burner caps (often corroded or clogged)
- Burner grates (chipped, warped, or broken)
- Orifice holder/igniter holder parts under the burner head
For this model, the manual specifically warns: do not attempt to remove or lift the cooktop.
If the surface is stained, rusted through, or physically damaged, replacing the main top is the typical fix. If flames are uneven or ignition is poor, cleaning or replacing burner components is more common.
- Main surface damage (dents, rust, deep pitting): consider range main top replacement
- Uneven flame or poor ignition: clean ports; replace the burner head if damaged
- Broken enamel or unstable cookware: replace grates or caps
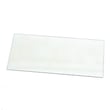
Example part for a full top replacement: Range main top (white) 316202332
- Turn off power to the range (and shut off the gas supply if you will disassemble burners).
- Remove grates, caps, and burner heads; clean and dry thoroughly.
- Inspect burner head ports for clogging; clear with a small-gauge wire if needed.
- Reinstall caps and heads correctly so the electrode is not damaged.
A damaged or misassembled cooktop area can cause delayed ignition, uneven flames, and harder cleanup. Keeping burner ports clean and using the correct replacement parts helps the Kenmore 79075752103 cook and ignite consistently.
| Symptom | Most likely fix | Typical part area |
|---|---|---|
| Rusted or dented surface | Replace main top | Main top panel |
| Clicking but weak/uneven flame | Clean ports; replace burner head if needed | Burner head/cap |
| Pan rocks or grate is broken | Replace grate | Grate |
Last updated: February 2026
How long should a Kenmore gas stove last?
A Kenmore gas range like model 79075752103 typically lasts 15 years with normal household use. Regular cleaning to prevent grease buildup, plus prompt repair of ignition and temperature issues, helps you reach that lifespan and keep cooking performance consistent.
Most gas ranges reach their full service life when heat, gas flow, and ignition stay stable.
- Daily heavy cooking shortens lifespan faster than light use
- Grease buildup under burner heads and inside the oven increases wear and safety risk
- Poor flame quality (yellow flames, soot) stresses burners and can affect baking results
- Repeated ignition failures strain igniters and controls
- Overheating from blocked vents or dirty components accelerates part failure
Use your 79075752103 owner's manual for model-specific cleaning steps and control settings.
- Clean spillovers quickly; baked-on grease is harder to remove and can smoke
- Keep the area under surface burners free of grease and debris
- Confirm burner caps and heads sit flat after cleaning
- Use the self-clean cycle only as directed; remove items not listed for self-cleaning
- If the oven temperature seems off, check the sensor and calibration instructions
| Symptom | Likely wear item | What it affects |
|---|---|---|
| Oven will not heat, no ignition glow | Frigidaire range oven burner igniter 5303935066 | Starts the oven burner flame |
| Food bakes unevenly or runs hot/cold | Oven probe 316233903 | Regulates oven temperature |
| Oven light does not work | Range oven light bulb | Visibility inside oven |
A 15-year gas range lifespan assumes safe operation and clean, efficient combustion. Keeping grease under control and fixing ignition or temperature problems early helps prevent bigger failures and keeps your Kenmore range reliable.
Last updated: February 2026
How to take the top off a Kenmore gas range?
On the Kenmore 79075752103 gas range, the cooktop (main top) typically lifts after you remove the grates and burner pieces, then release any front or burner-base mounting screws holding the top down. Always shut off gas and power first, and keep the anti-tip bracket engaged.
If you smell gas at any point, stop immediately and follow the gas-safety steps in the 79075752103 owner's manual.
- Turn all surface knobs to OFF
- Shut off the gas supply valve to the range
- Unplug the range (or switch off the breaker) to prevent electric shock from ignition circuits
- Let all parts cool completely
- Avoid pulling the range forward unless you can keep it stable (anti-tip protection matters)
- Remove burner grates.
- Lift off burner caps; then remove burner heads/bases if your version uses screws.
- Look for screws at the front lip (under the front edge) and around burner bases; remove them.
- Lift the cooktop from the front edge and prop it up (use a sturdy prop, not your hand).
- If the top will not lift, recheck for hidden screws and any brackets near the burner tubes.
| What you see | What it usually means | What to do |
|---|---|---|
| Burner caps only | Caps are just sitting in place | Lift off by hand |
| Burner heads/bases with screws | Cooktop is anchored at burners | Remove screws, then lift top |
| Cooktop lifts but stops short | Wiring or gas tubing limits travel | Prop carefully; do not strain wires |
Removing the top gives access to surface igniters, burner orifices, and spill cleanup areas. Doing it the right way prevents gas leaks, damaged wiring, and a tip hazard.
If you are lifting the top to fix ignition or uneven flames, these are common related parts for this model:
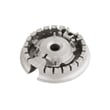
- Range surface burner head 316212400 (clogged ports can cause weak or delayed ignition)
- Igniter and orifice holder 316237805 (surface ignition and gas metering at the burner)
- Range pressure regulator 5304521339 (gas pressure control; replacement is a gas-service job)
Last updated: February 2026
What model is my Kenmore gas range?
Your Kenmore gas range model number is printed on the model and serial plate. On model 79075752103, the serial plate is located on the right side of the oven front frame inside the storage or warmer drawer compartment; open the drawer to view the label (then record it for future parts lookup).
- Pull the storage or warmer drawer fully open.
- Look on the right side of the range frame (oven front frame area).
- Find the model and serial plate (a printed label/plate).
- Write down the full model number and serial number exactly as shown.
- Use that exact model number when ordering parts like an igniter, oven light bulb, or oven probe.
The model number ensures we match the correct Kenmore gas range parts and diagrams, especially for components that vary by version.
| You need to identify | Where it’s used | Example part type |
|---|---|---|
| Model number | Correct parts list and diagrams | Burner head, control overlay |
| Serial number | Production run details | Wiring harness, panels |
Kenmore ranges often share similar styling across multiple model series (for example, 790.7575x families), but internal parts like igniters, burner caps, and sensors can differ. Using the exact model number from the plate prevents ordering the wrong replacement.
For the exact label location and other identification details, use the 79075752103 owner’s manual.
Last updated: February 2026