Installation guide
 Owner’s manual
 Error Codes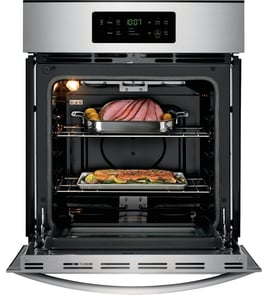



How do I clean my Fisher and Paykel oven?
For the Fisher & Paykel OD301 electric wall oven, clean it only when the oven is cool and the controls are OFF; use mild detergent and warm water for most surfaces, and use the Self Clean mode for the porcelain-enamel oven interior. Avoid abrasive cleaners and do not use commercial oven cleaners inside or around the oven.
Safe cleaning basics (OD301)
- Turn all oven controls OFF and let the oven cool completely.
- Wipe up excess grease and spills before running Self Clean.
- Remove oven shelves and the broiling system before Self Clean.
- Clean stainless surfaces with the grain (horizontal motion).
- Keep water and cleaners out of vents, switches, and control openings.
What to use (and what to avoid)
| Area | Use | Avoid |
|---|---|---|
| Control panel, door, handle | Damp cloth; dry with a lint-free cloth | Harsh or abrasive cleaners, waxes, polishes |
| Brushed stainless steel | Stainless steel cleaner (non-chlorine); wipe with grain | Abrasives; cleaners with chlorine compounds |
| Door glass (outside) | Mild detergent and warm water; glass cleaner for smears | Abrasive pads or powders |
| Oven interior (porcelain enamel) | Self Clean cycle | Any oven cleaners, oven cleaning products, abrasives |
| Oven shelves and broiling system | Hot soapy water; soak if heavily soiled | Leaving shelves in during Self Clean (permanent discoloration) |
Using Self Clean mode (quick steps)
- Remove the three-piece broiling system, cookware, and oven shelves.
- Remove excess grease and soil from the oven interior and door area.
- Select Self Clean using the oven mode dial.
- Set the maximum temperature; the door lock engages automatically.
- When the cycle ends and the door unlocks, turn the mode and temperature dials to OFF.
Important gasket and seal care
Do not clean the door or cavity seals (gaskets) and do not apply any oven-cleaning products to them. The seals are essential for proper sealing and efficient oven operation.
Why it matters
Using the wrong cleaner (especially abrasives or oven cleaners on porcelain enamel) can permanently damage finishes, discolor racks, and shorten the life of key components like door seals. Following the OD301 cleaning guidance keeps heating performance and door sealing consistent.
For model-specific cleaning details and control lock guidance, follow the OD301 owner's manual.
Last updated: February 2026
Are all 30 wall ovens the same size?
No. “30-inch” wall ovens are not all the same size; the label usually refers to a nominal class, and the actual cabinet cutout and oven dimensions vary by brand and model. For the Fisher & Paykel OD301, use the dimensions in the installation guide to confirm fit before ordering or installing.
What “30-inch” usually means
Most 30-inch wall ovens are designed to fit a 30-inch cabinet opening, but manufacturers use different:
- Overall width and height
- Required cabinet cutout width and cutout height
- Required clearances (side, top, and rear)
- Trim/face dimensions that affect how the oven covers the cutout
OD301 sizing details to check
For OD301 installations, we match the cabinet opening to the minimum cutout requirements and allow for small clearances.
Key points called out for this oven:
- Cabinet opening dimensions are minimums and allow up to about 1/4 inch (6 mm) clearance
- The support surface must be flat, level, and strong enough for the oven’s weight
- Junction box placement and cord routing need to match the installation layout
Quick comparison: what to measure before you buy
| Measurement | Where you measure | Why it matters |
|---|---|---|
| Cutout width | Inside the cabinet opening | Prevents side binding and trim gaps |
| Cutout height | Inside the cabinet opening | Ensures the oven slides in fully |
| Cutout depth | Front of cabinet to back wall | Avoids pinched wiring and poor fit |
| Clearance | Around cutout and behind oven | Prevents heat and installation issues |
Why it matters
A “30-inch” oven that is even slightly different in cutout height, depth, or trim coverage can fail to fit, sit proud of the cabinet, or leave visible gaps. Using the OD301 installation dimensions avoids rework and protects cabinetry.
Last updated: February 2026
What are common Fisher & Paykel oven problems?
Common problems on the Fisher & Paykel OD301 electric wall oven include no power or an unresponsive display (often after a power cut until the clock is reset), the oven not heating because the door is not fully closed, self-clean keeping the door locked until the oven cools, and a burned-out oven light. See the owner's manual troubleshooting section for model-specific checks.
Most common symptoms and what they usually mean
- Oven appears dead or shows “OFF”: power issue or the clock needs to be set after a power interruption.
- Oven will not heat or stops heating: door not fully closed; the door switch disables elements/fans when the door is open.
- Door will not unlock: the oven is still in self-clean; it unlocks after cooling to a safe temperature.
- Oven light not working: light bulb is blown.
- Uneven baking or poor results: preheat not complete, shelf position, pan size/spacing, or frequent door opening.
Quick checks we recommend first (safe, no tools)
- Confirm the oven has electrical power (check house breaker/fuses).
- If the display is unresponsive after an outage, set the clock so the oven can operate.
- Close the door firmly; avoid opening it repeatedly during baking.
- If you just ran self-clean, wait for the oven to cool fully before expecting the door to unlock.
- Remove any aluminum foil liners; they can reflect heat and create unsafe conditions.
Troubleshooting guide by symptom
| Symptom | Likely cause | What to do |
|---|---|---|
| Display unlit or “OFF” after outage | Clock not set | Reset the clock, then select a cooking mode |
| Oven not heating | Door switch disabling heat | Make sure the door is fully closed |
| Door locked | Self-clean cooldown | Wait until the oven cools |
| Light out | Bulb blown | Replace the oven light bulb |
Why it matters
Many “oven not working” complaints on the OD301 trace back to power restoration behavior (clock reset required), door-switch safety logic, or self-clean cooldown. Fixing those basics first prevents unnecessary parts replacement and service calls.
Last updated: February 2026
Why is my Fisher and Paykel oven not turning on?
If your Fisher & Paykel OD301 wall oven is not turning on, the most common causes are a tripped breaker or blown fuse, incorrect or loose power connections, the clock not being set after a power interruption, or the door not fully closed (the door switch disables the elements).
Quick checks that fix most “no power” situations
- Reset the house breaker for the oven circuit (turn it fully OFF, then ON).
- If your home uses fuses, check for a blown fuse and replace it.
- Confirm the oven has power; the clock should light up and blink when power is restored.
- Set the clock after any power cut; the oven can stay in a setup state until the clock is set.
- Make sure the oven door is fully closed; the door switch can disable heating when the door is open.
What the displays and symptoms usually mean
| What you see | What it points to | What to do |
|---|---|---|
| No lights, no clock | No power to the oven | Check breaker/fuse and electrical connections |
| Clock colon flashing or oven shows “OFF” after outage | Clock not set after power cut | Set the clock using the steps in the owner's manual |
| Lights work but no heat | Door switch open, mode not selected, or a control/heating issue | Close door firmly; select Bake and a temperature; then retest |
Safe troubleshooting steps (before checking internal parts)
- Turn the oven function to Bake and set 350°F; after a few minutes, you should feel warm air at the vent and heat building in the cavity.
- If nothing happens, shut the controls back to Off and recheck the breaker and wiring connections at the junction box (power OFF first).
- If the breaker trips repeatedly, stop and have the circuit and oven wiring inspected.
Why it matters
A wall oven that will not power up is usually a supply issue (breaker, fuse, wiring) or a required setup step (clock after a power cut). Fixing those first prevents unnecessary parts replacement and helps you confirm whether the problem is in the home circuit or the oven controls.
Last updated: February 2026