 Error Codes



How can I tell how old my Kenmore range is?
To tell how old your Kenmore range model 91193582990 is, we use the serial number (not the model number) to decode the manufacture date; the model number mainly identifies the design and parts family. Start by locating the model and serial tag, then decode the serial using the manufacturer tied to the Kenmore prefix.
Step 1: Find the model and serial number tag
On most 30-inch Kenmore electric ranges, the tag is typically found in one of these spots:
- On the oven frame behind the storage drawer
- On the oven frame behind the lower kick panel
- Along the door frame when you open the oven door
- On the back panel of the range
If the tag is missing or unreadable, use our guide: how to find your appliance model number (and what it means for parts).
Step 2: Use the Kenmore prefix to identify the manufacturer
Kenmore model numbers use a 3-digit prefix to indicate who built the appliance. For 91193582990, the prefix is 911.
| What you have | What it tells you | What to do next |
|---|---|---|
| Model number (91193582990) | Who built it (via prefix) and which parts fit | Identify the manufacturer for prefix 911 |
| Serial number | When it was made | Decode the serial date format for that manufacturer |
Step 3: Decode the serial number date
Once you know the manufacturer behind prefix 911, decode the serial number using that maker’s date code rules. When decoding, focus on:
- The first 2 to 4 characters of the serial number
- Any letter that represents the month
- Any digit pair that represents the year
- Whether the format changes by decade
- Matching the decoded year to the range’s styling and features
Why it matters
Knowing the manufacture date helps us choose the right repair approach and parts for your Kenmore range, especially for age-related issues like weak heating, worn wiring connections, or brittle insulation.
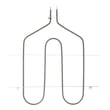
If you’re troubleshooting heat problems while you’re checking age, common related parts for this model include the g.e. range bake element WB44T10014 and the wall oven temperature sensor WB23X5340.
Last updated: February 2026
How to find Kenmore Range model number?
For your Kenmore range, the model number is printed on a rating label attached to the appliance body; on model 91193582990, it’s most often found around the oven door frame or behind the storage drawer so you can match the exact parts list and wiring layout.
Where to look on a Kenmore 30" electric range
Check these common label locations (in order):
- Open the oven door and look along the door frame (door jamb) on the front of the range
- Pull out the bottom storage drawer and look on the frame behind it
- Look on the back panel near the power cord entry/vent area
- Check the side panel edge near the front (less common)
What the label looks like (and what to write down)
The rating label usually includes several identifiers. Record these exactly:
- Model number (example format: 911.93582990 or 91193582990)
- Serial number (helps confirm production run)
- Electrical rating (volts/amps) for the 240V supply
- Sometimes a manufacturing code or date code
| Label item | Why it matters when ordering parts |
|---|---|
| Model number | Ensures diagrams and part fit are correct |
| Serial number | Helps confirm version changes within a model |
| Electrical rating | Helps match terminal block, elements, and wiring |
Why it matters
Kenmore ranges can look identical across multiple model numbers, but use different bake elements, surface element switches, or wiring connections. Using the exact model number helps us match the correct replacement part the first time.
Related parts you might see referenced after you find the model number
Once you confirm the model number, these are common parts customers replace on this style of range:
- Terminal block WB17T10006 (power cord connection point)
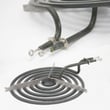
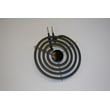
- Range coil surface element, 6-in WB30T10076 (small burner element)
- Range oven door gasket WB04T10086 (helps seal heat in the oven)
For additional help identifying the label location, use how to find your appliance model number (and what it means for parts).
Last updated: February 2026
How to replace Kenmore Range oven control board?
To replace the oven control board on your Kenmore range model 91193582990, we disconnect power, access the control area, move each wire to the matching terminal on the new board (including any ribbon connector), then reassemble and restore power to test bake and broil.
Safety first (before you touch anything)
- Turn OFF the range at the circuit breaker (240V); do not rely on the control knob.
- Confirm the display is dark and the oven light is off.
- Use work gloves; sheet-metal edges behind panels are sharp.
- Take a clear photo of the wiring before removing anything.
- If wiring looks burned or brittle, address that before installing the new board.
Basic replacement steps (typical for this style of range)
- Pull the range forward enough to access the rear (protect the floor).
- Remove the rear access panel to reach the control area.
- Label wires one-by-one and transfer them to the same locations on the new board.
- If your board uses a ribbon cable, fully seat it in the connector and lock the retainer.
- Reinstall the rear panel, restore power, then test Bake, Broil, and the clock/timer.
What to check if the board swap does not fix it
- No display or dead oven: verify the house breaker is not tripped; check for loose power connections at the terminal block WB17T10006.
- Oven temperature way off: test the oven sensor; a failed sensor can mimic a bad board (see wall oven temperature sensor WB23X5340).
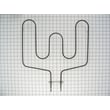
- Bake or broil still not heating: inspect the heating elements for visible damage; common failures are the g.e. range bake element WB44T10014 and range broil element WB44T10009.
Quick symptom-to-part guide
| Symptom | Most common cause | What we do next |
|---|---|---|
| Display works, oven will not heat | Failed element or wiring | Test bake/broil element for continuity |
| Oven overheats or underheats | Bad temperature sensor | Ohm-test sensor at room temp |
| Intermittent heat, melted connector | Loose/burned connection | Inspect and repair wiring at terminal block |
Why it matters
The control board is the “brain” for bake, broil, and temperature regulation. Installing it with a loose ribbon cable or miswired connector can cause no-heat symptoms that look like a bad new board.
Last updated: February 2026
What causes a Kenmore oven to stop working?
On the Kenmore 91193582990 electric range, an oven that stops working is usually caused by a failed heating component (bake or broil element), a bad temperature sensor, or a power supply problem such as a tripped breaker or loose terminal connections.
Quick checks first (no tools)
- Confirm the range has power; check for a tripped double-pole breaker (240V circuit).
- If the cooktop works but the oven does not, focus on oven heating parts (elements, sensor, wiring).
- If the display is dead and nothing works, suspect a power supply or connection issue.
- Look for obvious damage: burned wires, melted connectors, or a scorched smell.
Most common causes on an electric range
| Symptom | Most likely cause | What we check next |
|---|---|---|
| Oven will not heat at all | Failed bake element | Inspect and test the g.e. range bake element WB44T10014 |
| Broil does not work | Failed broil element | Inspect and test the range broil element WB44T10009 |
| Oven heats erratically or temperature is way off | Bad sensor | Test the wall oven temperature sensor WB23X5340 |
| Oven cuts out, won’t power on, or has intermittent power | Loose/burned power connection | Inspect the terminal block WB17T10006 and cord connections |
How we narrow it down (basic troubleshooting)
- Visual inspection: A blistered, cracked, or separated element typically means it is failed.
- Continuity testing (power off): Use a multimeter to check the bake element, broil element, and sensor.
- Wiring check: Look for overheated terminals at the terminal block and at element connections.
- Control symptoms: If elements and sensor test good, the issue often points to wiring or the electronic control.
Why it matters
A weak bake element or inaccurate temperature sensor can make the oven seem “dead” or unusable because it never reaches set temperature, bakes unevenly, or shuts down for safety. Catching a burned connection early also helps prevent repeat failures.
Last updated: February 2026




