Owner’s manual




How do I find the right GE part number?
For your GE dryer model GFD48ESPK0DG, the most reliable way to get the right GE part number is to match the model number and serial number from the label behind the door to the parts diagram and parts list in the GFD48ESPK0DG owner's manual. This prevents ordering a look-alike part that will not fit.
GE places the identification label on the front of the dryer behind the door.
- Open the dryer door and look along the front frame area
- Write down the full model number (example: GFD48ESPK0DG)
- Write down the serial number (helps confirm production run details)
- Keep both numbers handy when shopping or calling for service
Use your model number first, then confirm the part by location and description.
- Use the model number GFD48ESPK0DG to pull up the correct parts breakdown
- Find the part in the diagram by where it sits (drum area, heater housing, door, control panel)
- Match the part name and part ID/part number exactly
- Compare your old part to the listing (mounting holes, terminals, connectors)
- If multiple versions appear, use the serial number range notes shown with the diagram
These are examples of parts that are often replaced; always confirm by diagram position for your exact configuration.
| Symptom | Part type to check | Example part for GFD48ESPK0DG |
|---|---|---|
| Dryer tumbles but will not heat | Heating circuit component | Dryer heating element assembly WE11X10025 |
| Dryer overheats or shuts off | Safety thermostat | Dryer high-limit thermostat WE04X10187 |
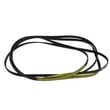
| Squealing or thumping noise | Belt and idler system | Dryer drum belt WE12X10020 |
GE can use different revisions of the same-looking component across a model series. Matching by model number, diagram location, and exact part ID helps ensure proper fit, safe operation, and correct electrical ratings.
Last updated: February 2026
How do you reset the heating on a GE dryer?
To reset heating-related issues on your GE dryer model GFD48ESPK0DG, we power-reset the control by turning the dryer off and removing power briefly, then restoring power and selecting a heated cycle with the correct temperature. This clears many control glitches and incorrect setting issues.
- Press Power to turn the dryer off (this does not disconnect power).
- Unplug the dryer (or switch the breaker off).
- Wait 1 minute.
- Restore power.
- Press Power, choose a cycle, set Temp to High/Medium/Low (not No Heat), then press Start/Pause.
- If the controls are locked, hold Lock Control for 3 seconds to unlock.
Many “no heat” complaints are actually a setting choice. Check these first:
| What you see | Likely cause | What we do |
|---|---|---|
| Drum tumbles but clothes stay cool | Temp set to No Heat or Air Fluff cycle | Select a heated cycle and set Temp to High/Medium/Low |
| Dryer runs but dries poorly | Exhaust vent restricted | Clean/inspect venting and outside hood flap |
| Buttons don’t respond | Control lock or service mode | Unlock (hold Lock Control 3 sec) or press Start/Pause |
If the dryer runs but never heats on any heated setting, we focus on airflow first, then heating safety parts.
- Clean the lint screen and confirm strong airflow at the outside vent
- Inspect the vent duct for lint buildup, kinks, or a stuck vent hood flap
- If airflow is good, a failed thermostat or heater circuit component is common
- For part replacement planning, see the GFD48ESPK0DG owner’s manual
- Dryer heating element assembly WE11X10025 (electric heat source)
- Dryer high-limit thermostat WE04X10187 (overheat safety cutoff)
- Dryer outlet backup thermostat WE04X10190 (temperature safety control)
A restricted exhaust system can make the dryer run cooler, dry slowly, and overheat internal components. Resetting the control helps with temporary glitches, but correcting airflow and failed heating parts restores normal drying performance.
Last updated: February 2026
How to remove front panel of GE front load dryer?
To remove the front panel on your GE GFD48ESPK0DG dryer, we unplug power first, then remove the top panel screws, lift the top, disconnect any front-panel wiring, and unthread the fasteners holding the front panel so it can lift off safely. See the GFD48ESPK0DG owner’s manual for access and safety details.
- Unplug the dryer (or switch off the breaker) before opening panels.
- If it is a gas dryer, shut off the gas supply valve before servicing.
- Wear gloves; sheet-metal edges can be sharp.
- Support the front panel as you remove the last screws so it does not drop.
- Disconnect power and pull the dryer forward enough to work comfortably.
- Remove the top panel fasteners (typically at the back edge), then lift the top panel up.
- Locate and remove the screws securing the front panel (often along the top inside edge and/or lower corners).
- Tilt the front panel forward slightly and disconnect the wire connectors you can reach (door switch, user interface harness, etc.).
- Lift the front panel up and off the lower retaining tabs/clips.
- Door switch connector
- Control panel or user interface harness connector
- Drum light connector (if equipped)
| What you see | What it usually means | What to do |
|---|---|---|
| Front panel feels stuck at the bottom | Panel is hooked on lower tabs | Lift up, then pull forward |
| Wires are too short to set panel aside | Harness is still connected | Unplug connectors before moving panel |
| Screws removed but panel will not release | Hidden fastener or top not fully lifted | Recheck top panel position and screw locations |
Removing the front panel is the starting point for many repairs on the GFD48ESPK0DG, such as replacing a belt, idler, drum support parts, or accessing the heating and airflow components. Doing it in the right order prevents broken tabs, pinched wiring, and door alignment issues.
Last updated: February 2026
What is the most common problem with a GE electric dryer?
The most common problem we see with a GE electric dryer like model GFD48ESPK0DG is poor drying or no heat, usually caused by restricted airflow (lint buildup or venting issues) or a failed heating component. A close second is the drum not tumbling due to a worn belt or idler.
Start with airflow and basic operation checks before replacing parts:
- Clean the lint filter before every load (running without it is unsafe and hurts drying). See the GFD48ESPK0DG owner's manual.
- Inspect the exhaust duct and hood; clean at least once a year and remove kinks or crushing.
- Confirm the outside damper flap moves freely while the dryer runs.
- Avoid overloading; heavy loads dry slower and can mimic a heating problem.
- If clothes take too long to dry, verify the venting setup matches the manual guidance.
Airflow problems are the most common root cause; overheating can also trip safety thermostats.
| Symptom | Most common cause | What to do next |
|---|---|---|
| Long dry times | Obstructed or incorrect venting | Clean/shorten vent run; remove restrictions |
| No heat | Failed heater or temperature control part | Test heater and thermostats with a meter |
| Shuts off or overheats | Lint buildup, restricted exhaust | Clean lint path, duct, and hood |
Parts that are commonly involved in heat complaints on this model include the dryer heating element assembly WE11X10025 and safety temperature controls such as the dryer high-limit thermostat WE04X10187.
A running motor with no drum movement usually points to a drive system issue.
- Check for a broken or slipped belt: dryer drum belt WE12X10020
- Check belt tension and pulley condition: idler asm (r WE12X10019
- Listen for motor hum with no movement (can indicate a jammed drum or drive issue)
Restricted airflow makes drying slow, wastes energy, and can overheat the dryer. Keeping the lint filter, lint duct, and exhaust duct clean is the single best way to prevent “no heat” symptoms and nuisance shutdowns.
Last updated: February 2026
What's the life expectancy of a GE dryer?
A GE dryer typically lasts about 10 years with normal household use. For your GE GFD48ESPK0DG, consistent airflow maintenance (lint filter and venting) is one of the biggest factors in reaching that lifespan; follow the cleaning intervals in the GFD48ESPK0DG owner's manual.
Most residential dryers land in this range when they are installed correctly and kept clean:
| Usage and care level | Typical life expectancy |
|---|---|
| Light use, excellent venting and cleaning | 10 to 13 years |
| Average family use, routine maintenance | About 10 years |
| Heavy use, restricted venting, skipped cleaning | 6 to 9 years |
These steps match common dryer best practices and align with the maintenance guidance in the manual:
- Clean the lint filter before every load; never run the dryer without it installed.
- Inspect and clean the exhaust duct at least yearly; restricted airflow increases heat stress and dry times.
- Have the dryer interior and duct cleaned yearly by qualified service personnel.
- Keep loads properly sized (overloading strains the drive system and reduces airflow).
- Stop using the dryer if you notice burning smells, repeated overheating, or shutdowns; address airflow and heating issues first.
A dryer’s heating system and safety thermostats rely on steady airflow. When lint builds up in the lint screen or exhaust duct, the dryer can run hotter and longer than designed, which shortens the life of components like the heating element, motor, and thermostats.
If your display shows a fault and the dryer stops or behaves oddly, use the GE gfd model series error codes reference to narrow down the issue before replacing parts.
Last updated: February 2026
Where to find part number on GE dryer?
On your GE dryer model GFD48ESPK0DG, the model and serial information (used to match the correct replacement parts) is on a label on the front of the dryer behind the door. Use that label info when ordering parts and checking specifications in the GFD48ESPK0DG owner's manual.
You will typically see several identifiers; the most important ones for parts lookup are:
- Model number (example: GFD48ESPK0DG)
- Serial number (helps confirm production details)
- Electrical ratings (useful for diagnosing power and heating issues)
- Manufacturing information (varies by unit)
Once you have the model number from the door-area label, match parts by model first, then by the specific symptom.
- No heat or overheating concerns: check heating and temperature-sensing parts
- Squealing or thumping: check belt and idler components
- Not tumbling: check drive motor and belt path
- Long dry times: check lint and airflow components
| Symptom | Example part to check | Part ID |
|---|---|---|
| Dryer overheats or shuts off | Outlet backup thermostat | WE04X10190 |
| Squeals or belt slips | Dryer drum belt | WE12X10020 |
| No heat (electric heat system) | Dryer heating element assembly | WE11X10025 |
GE often uses multiple similar-looking parts across different dryer series. Using the exact GFD48ESPK0DG label information helps ensure the thermostat, heating element, control board, or belt you order is the correct match for your dryer.
Last updated: February 2026