Get free shipping on your order, with any water filter subscription. Find my filter

Open Hamburger Menu
Sears Parts Direct
Tips to find your model number

Whirlpool WTW5100HW2 laundry, residential, washer Parts

Here are the diagrams and repair parts for Whirlpool WTW5100HW2 laundry, residential, washer, as well as links to manuals and error code tables, if available.

Whirlpool WTW5100HW2 laundry, residential, washer
By Schematic
By Part
SELECT DIAGRAM
?

This is the number corresponding to the part on the diagram / schematic

Browse Parts for WTW5100HW2 LAUNDRY, RESIDENTIAL, WASHER

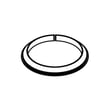
  • Washer Thrus for Whirlpool WTW5100HW2 - Part W11553312

    Gearcase, motor and pump parts diagram

    Washer Thrus

    Part #W11218170

    Replaced by #W11553312

    Info Icon
    Manufacturer substitution
    This part replaces W11218170. Substitute parts can look different from the original.
    In Stock
    $18.61
    10% OFF Phone Price : $20.61Info Icon
    Minus Item
    Qty
    Plus Item
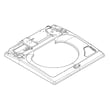
  • Tub Cover, V for Whirlpool WTW5100HW2 - Part W11662156

    Basket and tub parts diagram

    Tub Cover, V

    Part #W11094300

    Replaced by #W11662156

    Info Icon
    Manufacturer substitution
    This part replaces W11094300. Substitute parts can look different from the original.
    In Stock
    $80.47
    Minus Item
    Qty
    Plus Item
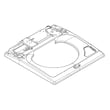
  • Top- 27, Std for Whirlpool WTW5100HW2 - Part W11423772

    Top and cabinet parts diagram

    Top- 27, Std

    Part #W11126901

    Replaced by #W11423772

    Info Icon
    Manufacturer substitution
    This part replaces W11126901. Substitute parts can look different from the original.
    In Stock
    $363.17
    Minus Item
    Qty
    Plus Item
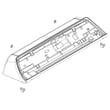
  • Washer Control Panel for Whirlpool WTW5100HW2 - Part W11413339

    Console parts diagram

    Console Shel

    Part #W11093764

    Replaced by #W11413339

    Info Icon
    Manufacturer substitution
    This part replaces W11093764. Substitute parts can look different from the original.
    In Stock
    $215.10
    Minus Item
    Qty
    Plus Item
  • Top- 27, Std for Whirlpool WTW5100HW2 - Part W11423770

    Top and cabinet parts diagram

    Top- 27, Std

    Part #W11126902

    Replaced by #W11423770

    Info Icon
    Manufacturer substitution
    This part replaces W11126902. Substitute parts can look different from the original.
    In Stock
    $363.17
    Minus Item
    Qty
    Plus Item
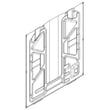
  • Rear Panel-v for Whirlpool WTW5100HW2 - Part W11486091

    Top and cabinet parts diagram

    Panel, Rear

    Part #W11417173

    Replaced by #W11486091

    Info Icon
    Manufacturer substitution
    This part replaces W11417173. Substitute parts can look different from the original.
    In Stock
    $339.02
    Minus Item
    Qty
    Plus Item
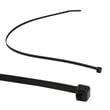
  • Appliance Cable Tie for Whirlpool WTW5100HW2 - Part WPW10339879

    Top and cabinet parts diagram

    Wire Tie

    Part #W10339879

    Replaced by #WPW10339879

    Info Icon
    Manufacturer substitution
    This part replaces W10339879. Substitute parts can look different from the original.
    This item is not returnable
    In Stock
    $4.88
    17% OFF Phone Price : $5.88Info Icon
    Minus Item
    Qty
    Plus Item
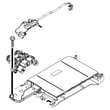
  • Dispenser As for Whirlpool WTW5100HW2 - Part W11400157

    Top and cabinet parts diagram

    Assembly, Dispenser Housing & Inlet Valve

    Part #W11198958

    Replaced by #W11400157

    Info Icon
    Manufacturer substitution
    This part replaces W11198958. Substitute parts can look different from the original.
    In Stock
    $63.14
    31% OFF Was : $91.86Info Icon
    Minus Item
    Qty
    Plus Item
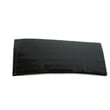
  • Washer Sound Dampening Pad for Whirlpool WTW5100HW2 - Part W11197416

    Top and cabinet parts diagram

    Impact Absorber

    Part #W10688364

    Replaced by #W11197416

    Info Icon
    Manufacturer substitution
    This part replaces W10688364. Substitute parts can look different from the original.
    This item is not returnable
    In Stock
    $22.33
    21% OFF Phone Price : $28.33Info Icon
    Minus Item
    Qty
    Plus Item
  • Laundry Appliance Screw, #8-18 X 1/2-in for Whirlpool WTW5100HW2 - Part W11568617

    Top and cabinet parts diagram

    Laundry Appliance Screw, #8-18 X 1/2-in

    Part #W10567155

    Replaced by #W11568617

    Info Icon
    Manufacturer substitution
    This part replaces W10567155. Substitute parts can look different from the original.
    In Stock
    $39.55
    Minus Item
    Qty
    Plus Item

Whirlpool LAUNDRY, RESIDENTIAL, WASHER WTW5100HW2 FAQs

No washer brand can be identified as having the “least problems” based on Whirlpool WTW5100HW2 model-specific information; the manual focuses on installation, care, and operating practices, not brand-to-brand reliability rankings. For fewer issues overall, we recommend choosing a brand with strong parts support and then following the setup and maintenance steps in the WTW5100HW2 installation & care manual.

What usually causes “problems” in real homes

Many service calls are driven by setup, water supply, and routine care rather than the brand name.

  • Washer not level; leads to vibration, noise, and “walking”
  • Old or kinked fill hoses; can cause slow fill or leaks
  • Drain hose installed incorrectly; can cause siphoning or drain errors
  • Too much detergent or non-HE detergent; causes residue and odor
  • Lid left closed between loads; traps moisture and can create odors
What the WTW5100HW2 manual specifically recommends

These are model-relevant practices called out in the WTW5100HW2 documentation.

Practice What to do Why it helps
Use HE detergent Use High Efficiency (HE) detergent and avoid overdosing Reduces residue buildup and odor risk
Monthly cleaning Run the Clean Washer cycle monthly or every 30 cycles Helps keep the tub fresh and performing well
Lid ventilation Leave the lid open between uses Helps the interior dry out
Hose replacement Replace inlet hoses every 5 years Reduces risk of hose failure and leaks
If you are shopping brands: what to compare (practical checklist)

We suggest comparing these factors because they directly affect how many problems you will deal with over time.

  • Local service coverage and parts availability for the brand
  • Warranty terms on major components (motor, control, transmission)
  • Washer type that fits your habits (top-load vs front-load, impeller vs agitator)
  • Simplicity vs features (more electronics can mean more diagnostics)
  • Proper installation requirements (space, drain height, electrical)
Parts that commonly relate to “problem” symptoms on this model

If your WTW5100HW2 is acting up, these are examples of components that often tie to common complaints.

Why it matters

“Least problems” usually comes down to two things: choosing a washer that is easy to service in your area and preventing the most common installation and care issues that trigger leaks, odors, vibration, and cycle interruptions.

Last updated: January 2026

Whirlpool washing machines, including model WTW5100HW2, typically last 10 to 14 years with normal household use. Consistent maintenance (especially cleaning and hose care) is what most often determines whether you land closer to 10 years or closer to 14.

What helps a Whirlpool washer reach the high end of its lifespan

We see these habits make the biggest difference over time:

  • Use HE detergent and avoid over-dosing (extra detergent can cause residue and odor)
  • Run the washer’s Clean Washer cycle regularly
  • Leave the lid open between loads so the tub can dry
  • Avoid chronic overloading (it strains the drive system and suspension)
  • Keep the washer level to reduce vibration and wear
  • Inspect hoses periodically and replace them on schedule

For the model-specific cleaning and care steps, follow the routine in the WTW5100HW2 installation & care manual.

Maintenance intervals to plan for

The WTW5100HW2 manual calls out a key preventive item: replacing inlet hoses every 5 years to reduce the risk of hose failure.

Item Recommended interval Why it matters
Water inlet hoses Every 5 years Helps prevent leaks and sudden hose failure
Clean Washer cycle Monthly or every 30 cycles Reduces odor and residue buildup
Level check As needed (after moving or vibration) Reduces noise and component wear

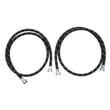
If you need new hoses, use a compatible set such as the washer fill hose set 8212545RP.

Why it matters

A washer that is kept clean, not overloaded, and protected from leaks usually avoids the most common early-life failures (odor issues, vibration wear, and water damage). That is the simplest path to getting a full 10 to 14 years from a Whirlpool top-load washer.

Last updated: January 2026

Your Whirlpool washer’s model number is printed on the appliance’s model and serial tag; for WTW5100HW2, check the tag on the washer cabinet opening area (around the lid opening) before ordering parts or using troubleshooting steps in the WTW5100HW2 owner's manual.

Where to look on a Whirlpool top-load washer

We typically see the model and serial tag in one of these spots:

  • Under the lid, along the top rim of the cabinet near the tub opening
  • On the underside of the lid
  • On the rear panel of the washer cabinet
  • Inside the cabinet opening near a corner (visible with the lid open)
How to read the tag (and why it matters)

The tag usually lists both a model number and a serial number. Use the model number to match diagrams and ensure parts fit your exact configuration.

Why it matters
  • Ensures the correct fit for parts like a lid lock, drain pump, or water inlet valve
  • Helps avoid ordering the wrong revision of a control or harness
  • Speeds up troubleshooting when you reference cycle and care information
Quick checklist before you order parts
  • Write the model number exactly as shown (letters and numbers)
  • Confirm the full model is WTW5100HW2 (not a similar WTW5100 series model)
  • Keep the serial number handy for reference
Common mix-ups
What you see What it is What to do
Model number Identifies the washer design Use this to select parts
Serial number Identifies your specific unit Keep for records
Series name (marketing) Not a parts identifier Do not use for ordering

If the tag is worn or hard to read, gently clean it with a damp cloth and good lighting; avoid abrasive cleaners that can remove the print.

Last updated: March 2026

Most common symptoms to help you fix your washers

Choose a symptom to see related washer repairs.

Main causes: clogged drain hose, house drain clogged, bad drain pump, water-level pressure switch failure, bad control b…

Main causes: broken lid switch or lid lock, bad pressure switch, broken shifter assembly, faulty control system…

Main causes: worn agitator dogs, bad clutch, broken motor coupler, shifter assembly failure, broken door lock, suspensio…

Main causes: water heater failure, bad water temperature switch, faulty control board, bad water valve, faulty water tem…

Main causes: lack of electrical power, wiring failure, bad power cord, electronic control board failure, bad user interf…

Main causes: no water supply, bad water valves, water-level pressure switch failure, control system failure, bad door lo…

Main causes: unbalanced load, loose spanner nut, worn drive block, broken shock absorber or suspension spring, debris in…

Main causes: leaky water inlet valve, faulty water-level pressure switch, bad electronic control board…

Main causes: bad lid switch or door lock, bad timer or electronic control board, wiring failure, bad water inlet valve a…

Repair guides for front-engine lawn tractors

How to replace a ground drive belt on a riding lawn mower

How to replace a ground drive belt on a riding lawn mower

Replace the ground drive belt if it's broken or too worn to spin the transaxle pulley.…

Repair time and Difficulty

 45 minutes or less
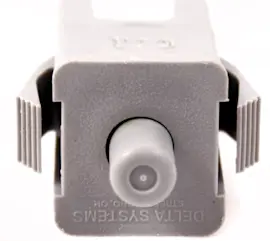
How to replace the brake interlock switch on a riding lawn mower

How to replace the brake interlock switch on a riding lawn mower

If the engine won’t start even though the brake is on, the brake interlock switch could be at fault. Here’s how to repla…

Repair time and Difficulty

 30 minutes or less
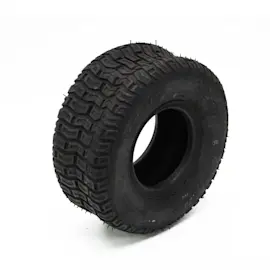
How to replace a riding lawn mower front tire

How to replace a riding lawn mower front tire

Get your mower moving again by using these instructions when replacing a damaged front tire.…

Repair time and Difficulty

 60 minutes or less

Effective articles & videos to help repair your washers

Use the advice and tips in these articles and videos to get the most out of your washer.

How auto-load sensing washers work (and when they don't)

How auto-load sensing washers work (and when they don't)

Your washer barely fills or seems stuck in sensing mode? Find out how auto-load sensing and Precise Fill features work, …

How to remove the main control board and user interface from a Maytag Epic Z front-load washer

How to remove the main control board and user interface from a Maytag Epic Z front-load washer

Get step-by-step instructions for removing the main electronic control board and the control panel from a Maytage Epic Z…

Using a wiring schematic to trace a current video

Using a wiring schematic to trace a current video

Find out what’s wrong with your appliance by following a circuit.…