Installation guide
 Owner’s manual
 Error Codes




How long should a Kenmore gas stove last?
A Kenmore gas range like model 79070502011 typically lasts 15 years with normal household use. Keeping burners clean, confirming proper ignition, and addressing weak igniter symptoms early helps you avoid no-heat problems and extends day-to-day reliability; see the 79070502011 installation guide for ignition checks.
- Cooking frequency and heat levels (daily high-heat use shortens life)
- Grease and spill cleanup around burner heads, caps, and igniters
- Ignition health (slow ignition strains components)
- Gas supply quality (proper pressure and steady flow)
- Ventilation habits (reduces heat and grease buildup in the kitchen)
- Wipe up boilovers quickly so ports do not clog.
- Keep burner caps seated correctly so flames stay even.
- If a burner clicks but lights slowly, clean and dry the burner base and cap.
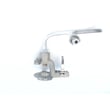
- For oven heat issues (slow to light, no bake), check the oven igniter performance; a weak igniter is a common cause. The correct replacement for this model is the range oven burner igniter 5304509706.
The installation instructions describe typical ignition behavior after air is purged from the gas line.
| Function | What you should see | Typical timing |
|---|---|---|
| Surface burner | Sparking, then steady flame | Lights within about 4 seconds |
| Oven bake/broil | Igniter glows, then burner lights | Flame within about 60 seconds |
A range can still “work” while running inefficiently. Slow ignition, uneven flames, or frequent clicking usually means the burner system needs cleaning or a part (like an igniter) is getting weak; fixing that early helps you reach the full 15-year lifespan.
Last updated: February 2026
How to remove the top of a Kenmore gas range?
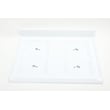
On the Kenmore gas range model 79070502011, the cooktop is not removable; we do not recommend attempting to lift or detach the top panel. For safe access, remove surface components (grates, burner caps) for cleaning and service access points described in the 79070502011 installation guide.
- Turn all burner knobs to OFF and let the range cool completely.
- Remove the grates.
- Lift off the burner caps and set them aside.
- If you are cleaning, wipe the cooktop surface and around the burner heads; keep liquids out of igniters.
- Reinstall caps and grates, then test burner ignition.
Many repairs on this style of range are done from the front, rear, or inside the oven cavity, not by removing the cooktop.
- Oven won’t heat or takes too long to ignite: check the oven igniter circuit and burner ignition.
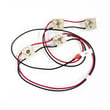
- Surface burners won’t spark/click: check the spark module, switch harness, and wiring.
- Gas smell or suspected leak: shut off gas and have a qualified technician check connections.
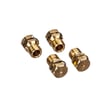
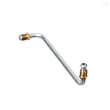
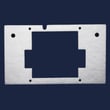
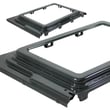
Helpful part examples for common ignition issues:
| Task | What to remove | What not to remove |
|---|---|---|
| Routine cleaning | Grates, burner caps | Cooktop/top panel |
| Burner ignition troubleshooting | Caps, grates; inspect igniters | Cooktop/top panel |
| Deep service access | Rear panel or oven access (as directed) | Cooktop/top panel |
Trying to force a non-removable cooktop can bend the main top, damage burner alignment, pinch wiring, or create a gas/ignition problem. Following the documented access method keeps the range stable and the gas system sealed.
Last updated: February 2026
Where to find Kenmore gas range model number?
On Kenmore gas range model 79070502011, the model and serial number plate is located on the right-hand surface of the oven front frame. You can reach it by opening the storage drawer, warmer drawer, or broiler drawer (depending on your configuration); the identification plate is on the frame behind that drawer opening. For a diagram and exact wording, check the installation guide.
- Turn the range light on and use a flashlight for easier reading.
- Pull out and open the bottom drawer (storage, warmer, or broiler drawer).
- Look at the right-hand side of the oven front frame (the vertical frame area).
- Write down the model number, serial number, and any lot number/letter.
- Take a clear photo; it helps when ordering parts like an igniter or sensor.
| Location | What you do | Most likely for 79070502011? |
|---|---|---|
| Oven front frame, right-hand side | Open the bottom drawer and look at the frame | Yes |
| Door jamb area | Open oven door and inspect the frame edges | Sometimes |
| Rear panel | Look on the back near the lower area | Sometimes |
We use the full model number and serial number to match the correct Kenmore gas range parts and specs. That prevents ordering a look-alike part that will not fit, such as the range oven burner igniter 5304509706 or a control overlay.
Last updated: February 2026