Owner’s manual
 View engine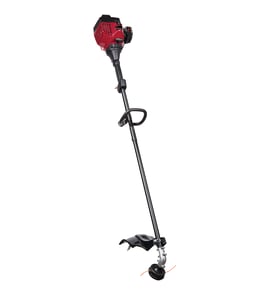





Can you replace a trimmer head?
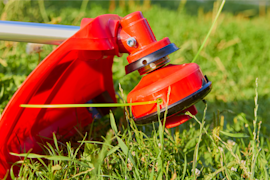
Yes. On the Craftsman 917773420 high wheel line trimmer, you can replace the trimmer head (cutting head) assembly; shut the engine off, disconnect the spark plug wire, and follow the step-by-step procedure in the 917773420 owner’s manual so the head and drive components are reinstalled correctly.
Safety and prep
- Turn the engine off and let the muffler cool.
- Disconnect the spark plug wire and keep it away from the plug.
- Work on a flat surface; block the wheels so the trimmer cannot roll.
- Clean grass and debris from the head area so fasteners are visible.
- If you tip the unit, keep the carburetor and fuel cap facing up.
What to replace: line vs. head vs. belt
On this model, many “head problems” are actually worn cutting line or a drive issue. The manual specifies .155-inch diameter trimmer line and 18-3/4-inch lengths for replacement line.
| What you’re fixing | Typical symptom | What to do |
|---|---|---|
| Cutting line | Poor trimming, uneven cut | Replace line with .155-in line cut to 18-3/4 in; keep both sides even |
| Trimmer head assembly | Wobble, damage, will not retain line | Inspect head components; replace the head assembly if cracked or worn |
| Head drive system | Head stops or slips under load | Inspect pulleys and belt; replace belt if worn or broken |
When a belt replacement is part of the job
If the head is not being driven, the manual’s “remove/replace trimmer head drive belt” procedure applies. A common replacement belt for this model is the high-wheel trimmer driveshaft belt 532185476.
Why it matters
A balanced, undamaged trimmer head cuts cleaner and reduces vibration; that protects the spindle, bearings, pulleys, and belt and helps the trimmer track smoothly through heavy weeds.
Last updated: February 2026
How to replace line on Craftsman gas trimmer?
To replace the cutting line on your Craftsman high wheel line trimmer model 917773420, install new 0.155-inch trimmer line cut to 18-3/4 inches per piece, then seat each folded line under the retainer clip so both sides match in length for smooth, low-vibration trimming. See the 917773420 owner's manual for diagrams and safety steps.
Before you start (safety and setup)
- Shut the engine off and let hot parts cool.
- Disconnect the spark plug wire and keep it away from the plug.
- Wear gloves and eye protection.
- Use only 0.155-inch trimmer line (never wire, rope, or string).
- Cut two new line pieces to 18-3/4 inches each.
Line replacement steps (carrier plate style head)
- Remove the worn line from the line carrier plate.
- Fold one new line piece in half.
- Insert the folded end through the carrier plate opening to the back side of the retainer clip.
- Pull the line outward until it is fully seated under the retainer clip.
- Repeat for the other side.
- Measure both sides; keep all lines the same length (they should not vary by more than 1 inch).
- Reconnect the spark plug wire.
Quick specs for this model
| Item | What to use on 917773420 | Why |
|---|---|---|
| Line diameter | 0.155 in | Fits the head correctly and retains properly |
| Line length (each piece) | 18-3/4 in | Helps balance the head |
| Replace when | Worn to half original length | Restores cutting performance |
If the trimmer head will not retain the line
- Reinstall the line and confirm it is seated under the retainer clip.
- Confirm you are using 0.155-inch line.
- If the retainer clip is broken or the head is damaged, replace the cutting head components; the high-wheel line trimmer spindle housing assembly 532174543 is a common related assembly for the head area.
Why it matters
Correct line size and equal line length keep the trimmer head balanced, which reduces vibration and improves trimming performance. Using the wrong material (like wire) creates a serious safety hazard.
Last updated: February 2026
What is the fuel mixture for a Craftsman trimmer?
The Craftsman 917773420 high wheel line trimmer uses a 2-cycle fuel mixture, not straight gas. Mix fresh unleaded gasoline with 2-stroke (2-cycle) engine oil at the ratio specified in the 917773420 owner's manual before filling the tank.
How to mix fuel correctly
- Use fresh, clean unleaded regular gasoline
- Use 2-stroke (2-cycle) oil labeled for air-cooled engines
- Mix fuel in an approved gas can; do not mix in the trimmer’s tank
- Shake the can well, then re-shake before each refuel
- Make only what you will use soon; old fuel causes hard starting and poor power
Common 2-cycle ratios (reference)
Use the ratio listed for your engine; these are the most common:
| Gas-to-oil ratio | Oil per 1 gallon gas | Oil per 1 quart gas |
|---|---|---|
| 40:1 | 3.2 oz | 0.8 oz |
| 50:1 | 2.6 oz | 0.64 oz |
Quick steps
- Pour about half the gasoline into the gas can.
- Add the measured 2-cycle oil.
- Add the remaining gasoline.
- Cap and shake thoroughly.
- Fill the trimmer with the mixed fuel.
Why it matters
A correct gas/oil mix lubricates a 2-cycle engine. Too little oil leads to rapid engine wear; too much oil causes heavy smoke, carbon buildup, and spark plug fouling.
Last updated: February 2026
What size is the fuel line on a Craftsman trimmer?
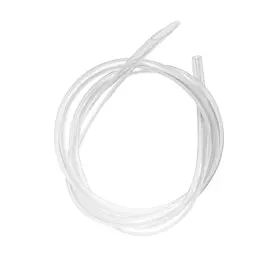
For the Craftsman high wheel line trimmer model 917773420, the manual focuses on fuel type and capacity, not the fuel hose dimensions. Most small-engine Craftsman trimmers use a small and a return fuel line sized to fit the tank grommet and carburetor fittings; confirm the exact routing and service notes in the 917773420 owner's manual.
Typical fuel line sizes you will see
These are common sizes used on many small 2-cycle and 4-cycle trimmers; match by inside diameter (ID) first, then outside diameter (OD):
- Small supply line: often 1/8 in. ID (sometimes 3/32 in. ID)
- Return line: often 3/32 in. ID
- Common OD range: about 3/16 in. to 1/4 in. OD depending on wall thickness
- If your trimmer uses a primer bulb, the return line is usually the smaller, more flexible line
- If the line is hard, cracked, or swollen, replace both lines at the same time
How we recommend confirming the correct size (fast and accurate)
- Remove the old line and cut a clean, square end.
- Measure the ID with a drill bit shank or calipers (best method).
- Check the tank pass-through/grommet fit; the OD must seal tightly.
- Verify the line is fuel-rated (Tygon or equivalent for small engines).
- Reinstall and test for leaks before running at full throttle.
Quick reference table (what to measure)
| What you’re fitting | What must match | What happens if it’s wrong |
|---|---|---|
| Carburetor inlet nipple | ID | Air leaks, hard starting, surging |
| Fuel tank grommet/pass-through | OD | Fuel seepage, line pulls out |
| Primer bulb ports (if equipped) | ID and flexibility | No prime, stalls after start |
Why it matters
Fuel line sizing is critical on small engines because even a tiny air leak can cause lean running, poor acceleration, or no-start. Using the correct ID and a tight tank seal prevents fuel starvation and protects the carburetor.
Last updated: February 2026
What size string does a Craftsman 917773420 use?
The Craftsman high wheel line trimmer model 917773420 uses 0.155-inch diameter trimmer line. Using the correct diameter helps the cutting head feed properly and prevents premature wear on the string carrier plate and spindle components; see the 917773420 owner's manual.
Recommended line size and what it means
For this model, the key spec is diameter:
- Diameter: 0.155 in (also written as .155)
- Common description: heavy-duty line for wheeled weed trimmers
- Why it matters: too-thin line can break quickly; too-thick line can bind and reduce cutting performance
Quick spec table
| Spec | What to use on 917773420 | What happens if wrong |
|---|---|---|
| Line diameter | 0.155 in | Feed issues, poor cut, extra vibration |
| Line type | Standard trimmer line (round or similar) | Aggressive shapes can increase drag and wear |
Tips for best cutting and fewer line problems
We recommend these setup and use habits to keep your Craftsman trimmer cutting cleanly:
- Cut replacement pieces to the same length as the original line set for your cutting head.
- Replace line in pairs (balanced) to reduce vibration.
- Clear wrapped grass from the spindle area after trimming.
- If the head is not cutting evenly, inspect the cutting head and spindle housing.
- If drive performance changes while trimming, inspect the belt and idler system.
When line size is correct but performance is still poor
If you are using 0.155-inch line and still see weak cutting or excessive vibration, check these common wear items:
- Cutting head and spindle housing for damage or wobble (see high-wheel line trimmer spindle housing assembly 532174543)
- Belt condition and tension (see high-wheel trimmer driveshaft belt 532185476)
- Debris shield condition and mounting hardware
Why it matters
This trimmer is designed around a heavier 0.155-inch line; matching that spec keeps the cutting head operating as intended and helps protect parts like the spindle housing, belt drive, and fasteners from extra stress.
Last updated: February 2026
Why is my Craftsman Weedeater not starting?
If your Craftsman high wheel line trimmer model 917773420 will not start, the most common causes are stale fuel, a dirty air filter or spark plug, or incorrect starting steps. Use the starting and troubleshooting steps in the 917773420 owner's manual to confirm choke and throttle settings before replacing parts.
Quick checks that fix most no-start problems
- Drain old gas and refill with fresh fuel (use the correct mix if your engine requires it).
- Move the throttle to FAST for starting (this is a common requirement on wheeled trimmers).
- Verify the stop switch is in the ON/RUN position.
- Remove and inspect the spark plug; clean or replace if fouled.
- Check the air filter; a clogged filter can flood the engine (too much fuel, not enough air).
- Confirm the cutting head is not jammed; heavy drag can make starting harder.
Step-by-step: a reliable start routine
- Set throttle to FAST.
- Set choke as directed for a cold start.
- Prime (if equipped) the recommended number of times.
- Pull the starter rope briskly; once it fires, reduce choke gradually.
Parts that commonly contribute to a no-start (and what to look for)
| Item | What you might notice | What to do |
|---|---|---|
| Fuel (gas) | Smells sour, dark color, won’t fire | Replace with fresh fuel |
| Spark plug | Wet, black, heavy deposits | Clean gap or replace |
| Air filter | Dirty, oily, restricted | Clean or replace |
| Drive system drag | Hard to pull, head binds | Clear debris, inspect belt and pulleys |
If you suspect the drive system is binding, inspect the belt and idlers; on this model that includes the high-wheel trimmer driveshaft belt 532185476 and idler pulleys.
Why it matters
A small airflow or ignition issue can prevent combustion entirely, and repeated pulls with a clogged filter or bad fuel can quickly flood the engine. Starting with fuel, air, and spark checks saves time and avoids unnecessary parts replacement.
Last updated: February 2026