- Kenmore refrigerator water filters
- Whirlpool refrigerator water filters
- Samsung refrigerator water filters
- GE refrigerator water filters
- LG refrigerator water filters
- Frigidaire refrigerator water filters
- KitchenAid refrigerator water filters
- Maytag refrigerator water filters
- Kenmore Elite refrigerator water filters
- Estate refrigerator water filters
- GE Profile refrigerator water filters
- Amana refrigerator water filters
- Bosch refrigerator water filters
- Dacor refrigerator water filters
- Electrolux refrigerator water filters
Top DIY repair help
View All Repair Categories
Appliances
Lawn & Garden
Power Tools
Home Improvement
Sports & Leisure
Heating & Cooling
Quick Links
How to replace a line trimmer carburetor
less than a minute readMay 20Lyle Weischwill
Repair time and Difficulty
15 minutes or less
Tools Required
- Allen wrench
- Needle-nose pliers
- Approved fuel container
- Rags
- Work gloves
- Safety glasses
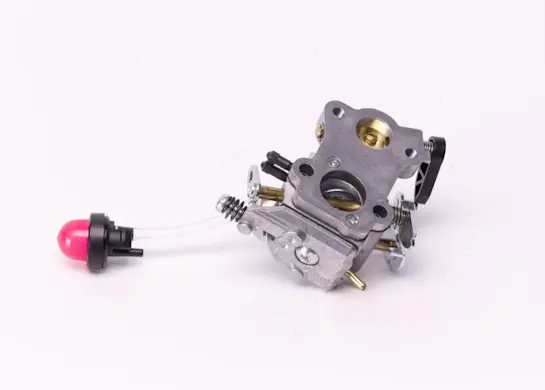
This step-by-step line trimmer repair guide explains how to replace a line trimmer carburetor. The carburetor combines air and gas into a combustible mixture that ignites in the cylinder to power the engine. If the gas tank is full of fresh fuel but the engine won’t start, test the carburetor by removing the air filter and adding about a teaspoon of fuel into the carburetor. If the engine starts and then quickly dies when you pull the starter cord, the problem is probably the carburetor. Install a manufacturer-approved line trimmer part when replacing the carburetor.
Use this weed eater carburetor replacement guide on common Craftsman, Weed Eater, MTD, Poulan, Toro, Troybilt, Cub Cadet and Husqvarna line trimmers.
Instead of replacing the carburetor, you can rebuild it, following the steps in How to Rebuild a Line Trimmer Carburetor.
Instructions
- 1. Disconnect the spark plug wire
Disconnect the wire from the spark plug.
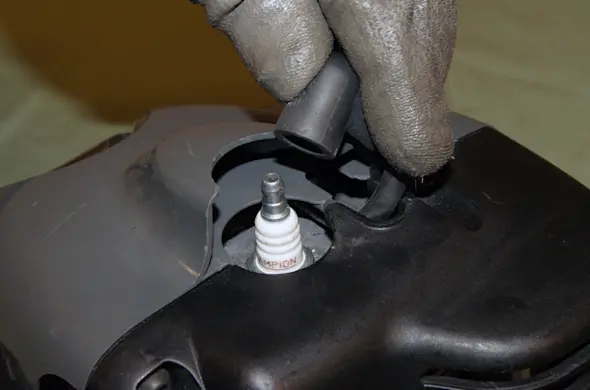
PHOTO: Disconnect the spark plug wire.
- 2. Drain the fuel tank
In a well-ventilated area, remove the fuel cap and the drain the tank into an approved storage container.
- 3. Disconnect the fuel lines
Take a digital photograph of configuration of the fuel lines attached to the carburetor, or make a diagram.
Pull the fuel lines off of the carburetor, using needle-nose pliers if necessary.
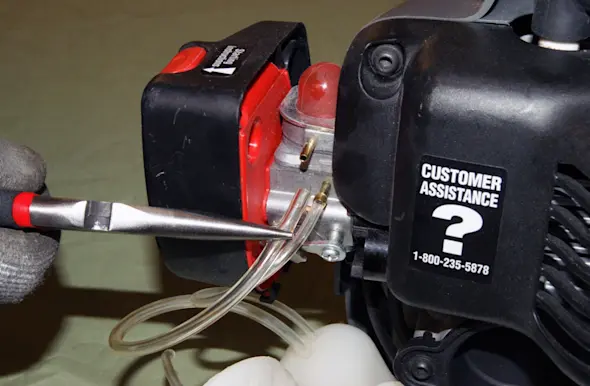
PHOTO: Disconnect the fuel lines from the carburetor.
- 4. Remove the air filter
Remove the cover from the air filter housing and then remove the air filter.
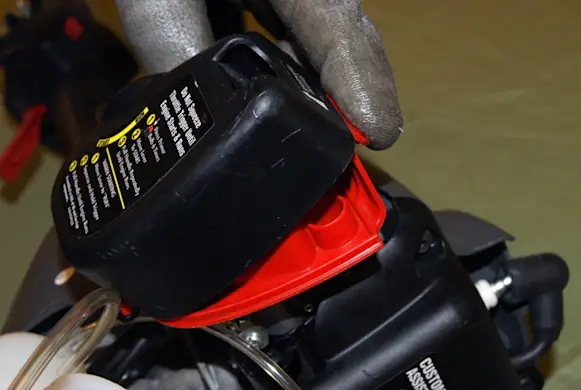
PHOTO: Remove the cover from the air filter. 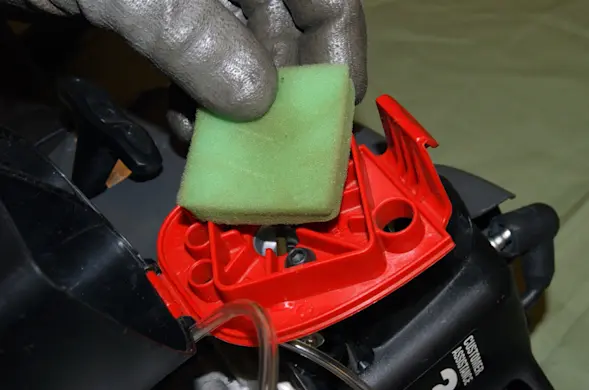
PHOTO: Remove the air filter from the line trimmer.
- 5. Remove the carburetor
Use an Allen wrench to remove the 2 mounting screws that secure the carburetor to the engine.
Pull the air filter housing off of the carburetor. Remove the carburetor from the side of the engine. The throttle cable is still attached to the carburetor.
Take a digital photograph of how the throttle cable control cable connects to the carburetor or make a diagram. Disconnect the throttle cable and remove the existing carburetor.
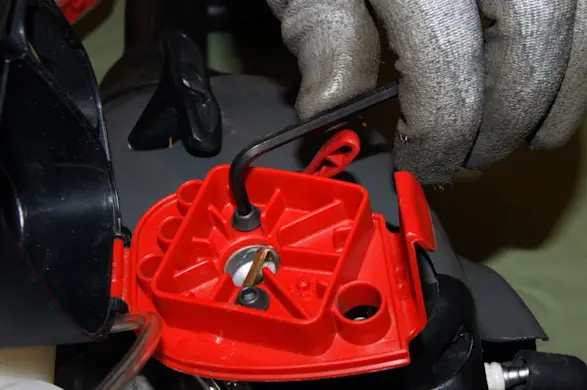
PHOTO: Remove the carburetor mounting screws. 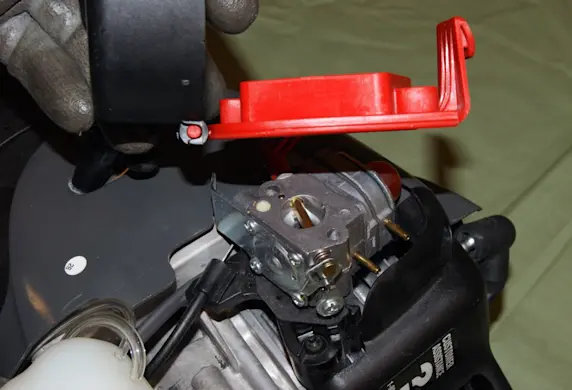
PHOTO: Remove the air filter housing. 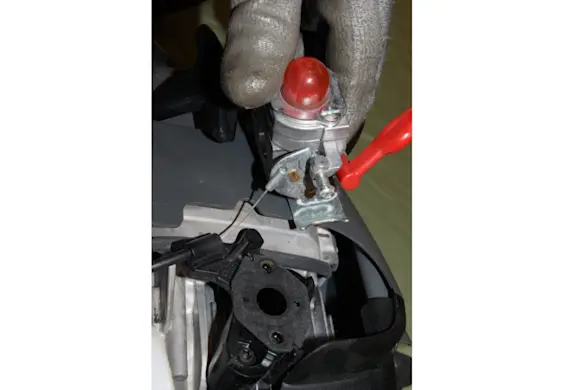
PHOTO: Lift the carburetor off. 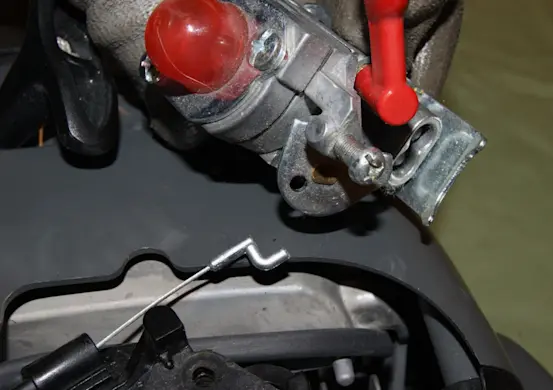
PHOTO: Disconnect the throttle control cable. Tip: Check the gasket on the side of the engine and replace it if it's damaged.
- 6. Install the new carburetor
Insert the throttle cable on the new carburetor the same way it was installed on the original carburetor.
Position the gasket on the nipples of the engine mount and hold the carburetor in place.
Install the filter housing and secure it with the 2 mounting screws. Using a torque wrench, tighten the screws to 25 in./lbs. of torque. If you don't have a torque wrench, tighten them reasonable tightly.
- 7. Reconnect the fuel lines
Referring to your digital photograph or diagram, connect the fuel lines to the new carburetor.
- 8. Reinstall the air filter and spark plug
Clean the air filter if necessary before installing it. Position the filter in place and close the cover on the filter housing.
Connect the spark plug wire on the spark plug.
- 9. Test the line trimmer
Fill the gas tank with the fuel mix and check that the line trimmer works.