How to rebuild a line trimmer carburetor
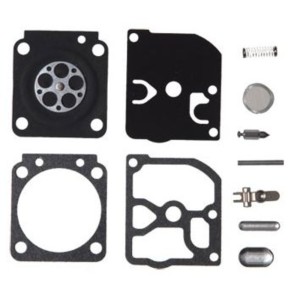
The line trimmer carburetor controls the air/fuel mixture that ignites in the cylinder to drive the engine.
If the gas tank has plenty of fresh gas but the engine won’t start, check the carburetor by following these steps:
Remove the air filter.
Pour about a teaspoon of fuel into the carburetor.
Pull the starter rope.
If the engine starts then dies, the carburetor is probably the problem.
You can rebuild the carburetor using the manufacturer-approved weed eater carburetor rebuild kit, following the steps in this line trimmer repair guide.
Use this basic procedure to rebuild the carburetor using a weed eater carburetor rebuild kit on Craftsman, MTD, Toro, Weed Eater, Troybilt, Snapper, Cub Cadet and Poulan line trimmers.
Another option is to install a new carburetor, following the steps in How to Replace a Line Trimmer Carburetor.
Instructions
- 01.
Disconnect the spark plug wire
Let the engine cool.
Wear work gloves to protect your hands.
Disconnect the wire from the spark plug.
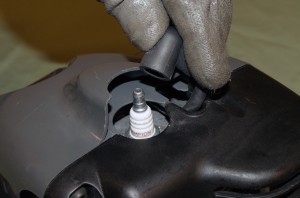
PHOTO: Disconnect the spark plug wire.
- 02.
Drain the fuel tank
In a well-ventilated area, remove the fuel cap and the drain the tank into an approved storage container.
- 03.
Remove the carburetor
Document the configuration of the fuel lines attached to the carburetor (taking a digital picture of the lines is an easy way to keep track of their location).
Pull the fuel lines off of the carburetor, using needle-nose pliers if necessary.
Remove the cover from the air filter housing and then remove the air filter.
Use an Allen wrench to remove the 2 mounting screws that secure the carburetor to the engine.
Pull the air filter housing off of the carburetor. Remove the carburetor from the side of the engine. The throttle cable is still attached to the carburetor.
Take a digital photograph of how the throttle cable control cable connects to the carburetor or make a diagram. Disconnect the throttle cable and remove the carburetor.
Tip: Check the gasket on the side of the engine and replace it if it's damaged.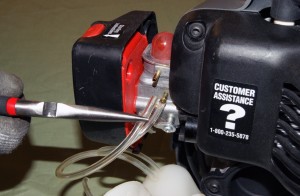
PHOTO: Disconnect the fuel lines from the carburetor.
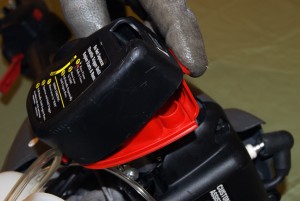
PHOTO: Remove the cover from the air filter.
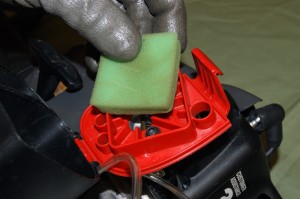
PHOTO: Remove the air filter from the line trimmer.
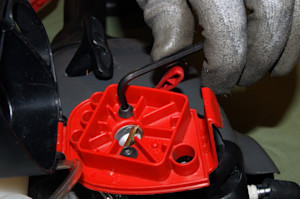
PHOTO: Remove the carburetor mounting screws.
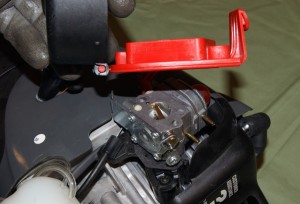
PHOTO: Remove the air filter housing.
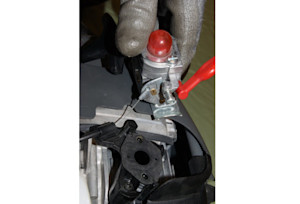
PHOTO: Lift the carburetor off.
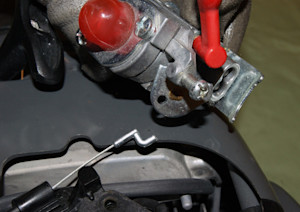
PHOTO: Disconnect the throttle control cable.
- 04.
Rebuild the carburetor
Place the carburetor on a clean work surface.
Use a Phillips screwdriver to remove the screws from the bottom cover of the carburetor.
Remove the cover and then pull off the diaphragm and gasket.
Remove the top cover with the primer bulb from the carburetor.
Replace the primer bulb.
On the bottom of the carburetor, note how the lever, spring and hinge pin fit together.
Remove the screw and pull those components out of the carburetor.
Clean all ports and jets in the body of the carburetor with aerosol carburetor cleaner and compressed air.
Allow the carburetor to dry for at least 10 minutes. Some carburetor cleaners can damage the diaphragms if you reassemble the carburetor when it’s still wet.
Install the needle and lever on the bottom of the carburetor.
Secure those components with the screw. Then install the gasket, diaphragm and cover.
Install the top cover and primer bulb.
Make sure you install all components in the same order and manner in which you removed them.
Tip: Line up the components on your work surface so that you can replace the parts in order.Tip: The kit might have parts not used on your carburetor; use only the parts that match your original carburetor components. Don't reuse old components.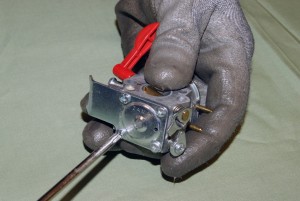
PHOTO: Remove the screws from the carburetor bottom cover.
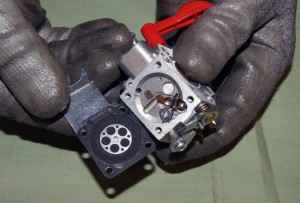
PHOTO: Remove the carburetor bottom cover.
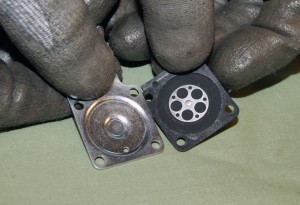
PHOTO: Remove the diaphragm and gasket.

PHOTO: Remove the screws from the carburetor top cover.
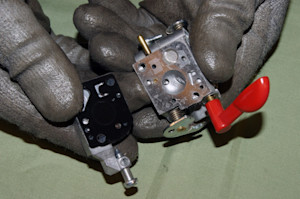
PHOTO: Remove the top cover and primer bulb.
- 05.
Reinstall the carburetor
Insert the throttle cable on the carburetor.
Position the carburetor on the engine and hold it in place.
Install the filter housing and secure it with the 2 mounting screws. Using a torque wrench, tighten the screws to 25 inch-pounds of torque.
If you don't have a torque wrench, tighten them reasonably tight.
Referring to your digital photograph or diagram, connect the fuel lines to the new carburetor.
- 06.
Reinstall the air filter and spark plug
Clean the air filter if necessary before installing it.
Position the filter in place and close the cover on the filter housing.
Connect the spark plug wire on the spark plug.
- 07.
Test the line trimmer
Fill the gas tank with the fuel mix and check that the line trimmer works.
Symptoms for gas line trimmers
Choose a symptom to see related grass line trimmer repairs.
Main causes: stale fuel, cracked fuel lines, dirty carburetor, bad spark plug, worn piston rings…
Main causes: stale fuel, clogged fuel filter, faulty spark plug, clogged air filter, cracked fuel lines, clogged carbure…
Main causes: cracked fuel lines, bad carburetor seals, leaky fuel tank cap, damaged fuel tank…
Repair guides for gas line trimmers
These step-by-step repair guides will help you safely fix what’s broken on your grass line trimmer.
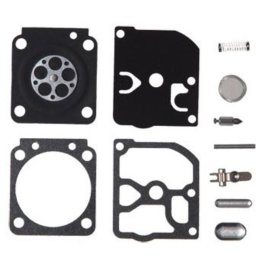
How to rebuild a line trimmer carburetor
If the line trimmer engine won't start even though there's fuel in the tank, the carburetor could be the problem. Follow…
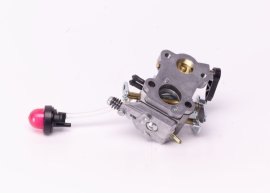
How to replace a line trimmer carburetor
If the line trimmer won't start even though there's fuel in the tank, the carburetor could be the problem. Follow these …

How to replace a line trimmer fuel line
The fuel line on a grass line trimmer deteriorates with time and eventually can split or crack. You can replace it yours…
Articles and videos for gas line trimmers
Use the advice and tips in these articles and videos to get the most out of your grass line trimmer.
Learn about the top 10 must-have electric lawn & garden tools for 2023…

Learn about all the convenient features on our Sears PartsDirect website that make your parts purchases easier.…

Find out how to take care of your grass line trimmer from the start of the trimming season until the end, with this help…