Owner’s manual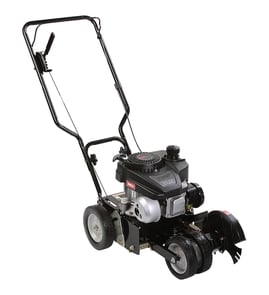

Are you supposed to sharpen edger blades?
For the Craftsman 358796480 edger, we do not treat the blade like a mower blade that gets repeatedly sharpened. Instead, keep the blade area clean and replace the blade if it becomes bent, warped, cracked, broken, or too worn to cut properly (see the maintenance guidance in the owner's manual).
What to do instead of sharpening
- Unplug the edger before inspecting the blade area.
- Clean packed grass and debris from the blade guard area.
- Check that the blade is not stuck or bound by debris.
- Inspect the blade for damage (bent, warped, cracked, broken).
- Replace worn or damaged parts before using the edger again.
Quick decision guide
| Blade condition | What we recommend | Why |
|---|---|---|
| Blade is straight and cuts cleanly | Keep using it | Normal wear is expected |
| Blade turns but will not cut | Replace the blade | A worn blade will not edge effectively |
| Blade is bent, warped, cracked, or broken | Replace the blade immediately | Damaged blades can be unsafe and cut poorly |
| Blade stalls or stops under load | Clean guard area; reduce cutting depth | Debris buildup and forcing the cut can overload the motor |
Why it matters
A lawn edger blade spins at high speed. Changing the cutting edge by aggressive sharpening can increase vibration and reduce control. A clean blade guard, correct cutting pace, and a blade in good condition give you straighter edging and help prevent stalling.
Related checks that improve cutting performance
| Symptom | Common cause | Fix |
|---|---|---|
| Edger drags or cuts too deep | Wheel depth set too low | Adjust wheel depth |
| Motor stalls in the cut | Cutting too fast or too deep | Slow down; make a shallower pass |
| Blade does not turn when switch is pressed | Blade bound by debris | Clear debris from blade/guard area |
Last updated: February 2026
How to replace the blade on an edger?
To replace (or flip) the blade on your Craftsman 358796480 electric edger, unplug the unit, lock the shaft with a wrench, then remove the hex nut and washers, swap the blade, and reinstall the washers in the correct order before tightening the nut securely. See the owner's manual for the exact washer orientation.
Safety first
- Unplug the edger before touching the blade area.
- Wait for the blade to stop completely after switching off.
- Wear protective gloves when handling the blade.
- Keep the blade guard installed and replace it if damaged.
Blade replacement steps (Craftsman 358796480)
- Disconnect power (unplug from the outlet).
- Hold the shaft: fit a wrench onto the shaft behind the blade to keep it from turning.
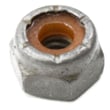
- Remove the hardware: use a second wrench to remove the hex nut, cup washer, and spring washer.
- Remove the blade.
- Clean and inspect: clean debris from the blade area; replace any damaged hardware.
- Install the blade (new blade or flip the reversible blade).
- Reinstall washers in order:
- Spring washer: outer notched edge contacts the blade.
- Cup washer: lip faces toward the spring washer.
- Tighten the hex nut securely, then verify the blade spins freely without rubbing the guard.
Washer orientation quick check
| Part | Correct position | What to look for |
|---|---|---|
| Spring washer | Against the blade | Notched outer edge touches blade |
| Cup washer | Between spring washer and hex nut | Washer lip faces spring washer |
| Hex nut | Outermost fastener | Tightened securely |
Why it matters
Correct washer orientation keeps the blade clamped tightly to the shaft. If the blade is loose or installed incorrectly, it can slip under load, cut poorly, or stop during edging.
Last updated: February 2026
What engine is on a Craftsman edger?
The Craftsman edger model 358796480 uses an electric motor, not a gas engine. Our owner's manual identifies it as a 3.0 H.P. electric edger, so there is no Briggs & Stratton (or other) engine on this specific model.
How to confirm what powers your edger
Check these model-specific identifiers:
- Look for the model number 358796480 on the nameplate
- Verify the manual cover says “3.0 H.P. electric edger”
- Confirm it uses an extension cord and 120 A.C. supply (as listed in the manual)
- If your unit has a fuel tank, primer bulb, or pull-start, it is a different Craftsman model
Electric motor vs gas engine: what changes for maintenance
| Item | Electric edger (358796480) | Gas edger |
|---|---|---|
| Power source | 120 V corded electric | Gasoline engine |
| Tune-ups | No carburetor or spark plug service | Carburetor, spark plug, air filter maintenance |
| Common wear items | Blade, fasteners, depth/height hardware | Belt/clutch (varies), engine parts, fuel system |
Parts that commonly relate to cutting performance
If the blade spins but does not cut well, the manual points to depth setting and blade condition. For this model, also make sure the height/depth hardware is secure.
- Set wheel depth correctly before edging
- Replace a worn blade when it will not cut cleanly
- Tighten loose fasteners on the handle/tube assembly
- If your height setting will not hold, replace the edger height adjuster knob 530402881
- Replace missing or stripped fasteners with the correct screw 530015814
Why it matters
Ordering the right parts depends on whether your Craftsman edger is electric or gas. Model 358796480 is corded electric, so engine-based parts and gas-engine specs do not apply.
Last updated: February 2026
What size blade is a Craftsman 358796480 edger?
For the Craftsman edger model 358796480, the blade is a replaceable edger blade (manual lists it as a customer serviceable part), but the blade diameter is not specified in the manual excerpt. For fit and safe operation, we match the replacement by model and blade mounting hardware shown in the 358796480 owner's manual.
How to identify the correct blade for 358796480
Use these model-specific checks before ordering or installing a blade:
- Confirm your edger’s model number is 358796480 on the nameplate
- Match the blade to the mounting stack shown in the manual (cup washer, spring washer, hex nut)
- Replace worn mounting hardware if it is rounded, stripped, or won’t tighten securely
- Inspect the blade guard and edge guide for damage that could affect clearance
- Tighten the blade hex nut securely and recheck after a short test run
Parts and hardware that matter (what the manual calls out)
The manual lists these related service parts for the blade area:
| Item (manual name) | What it does | Why it matters |
|---|---|---|
| Blade | Cuts the edge line | Wrong fit can wobble or contact the guard |
| Spring washer (blade) | Helps maintain clamp force | Reduces loosening during use |
| Hex nut (blade) | Secures blade to shaft | Prevents blade slip and vibration |
Why it matters
Edger blades spin at high speed; the correct blade and correct mounting hardware keep the blade centered and clamped. That reduces vibration, improves cut quality, and helps prevent damage to the guard, wheels, and axle components.
Last updated: February 2026