- Kenmore refrigerator water filters
- Whirlpool refrigerator water filters
- Samsung refrigerator water filters
- GE refrigerator water filters
- LG refrigerator water filters
- Frigidaire refrigerator water filters
- KitchenAid refrigerator water filters
- Maytag refrigerator water filters
- Kenmore Elite refrigerator water filters
- Estate refrigerator water filters
- GE Profile refrigerator water filters
- Amana refrigerator water filters
- Bosch refrigerator water filters
- Dacor refrigerator water filters
- Electrolux refrigerator water filters
Top DIY repair help
View All Repair Categories
Appliances
Lawn & Garden
Power Tools
Home Improvement
Sports & Leisure
Heating & Cooling
Quick Links
How to replace a treadmill walking board
less than a minute readMay 20Lyle Weischwill
Repair time and Difficulty
30 minutes or less
Tools Required
- Work gloves
- Phillips screwdriver
- Wrench set
- Allen wrench set
This DIY repair guide explains how to replace the walking board on a treadmill. The walking board–also called a deck–provides a sturdy platform for walking and a smooth surface for the walking belt. If the walking board wears out, friction between the board and the belt increases, and the treadmill will feel sluggish or will stick. Replace a worn or damaged walking board with the manufacturer-approved replacement part.
Follow the steps in this repair guide and video to replace the walking board on Weslo, Proform, Weider, Lifestyler and Horizon treadmills.
Instructions
- 1. Shut off the electricity
Remove the key and unplug the treadmill's power cord from the wall outlet.
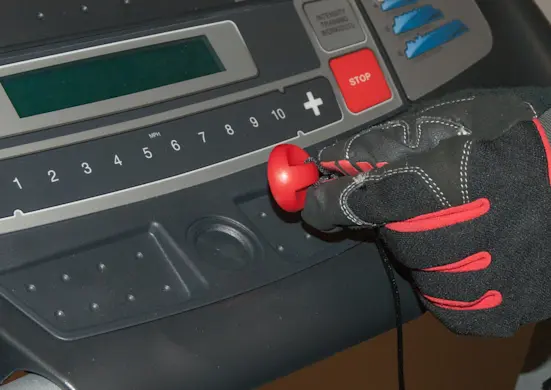
PHOTO: Remove the key.
- 2. Remove the motor hood
Remove the screws that fasten the motor hood to the belly pan.
Pull the motor hood forward and remove it from the treadmill frame.

PHOTO: Remove the motor hood screws. 
PHOTO: Remove the hood.
- 3. Remove the side foot rails
Fold the treadmill up and engage the latch.
Remove the screws from under the walking platform that fasten the side foot rails to the walking platform.
Fold down the walking board and lift the side foot rails up and off the treadmill.
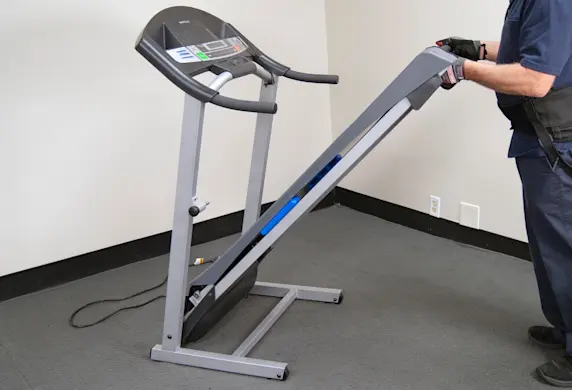
PHOTO: Fold the treadmill up. 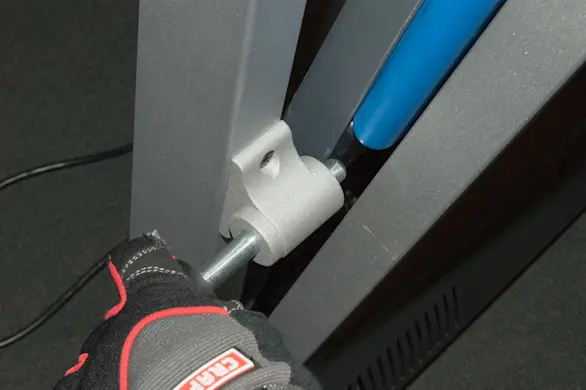
PHOTO: Engage the latch. 
PHOTO: Remove the foot rail screws. 
PHOTO: Fold the treadmill down. 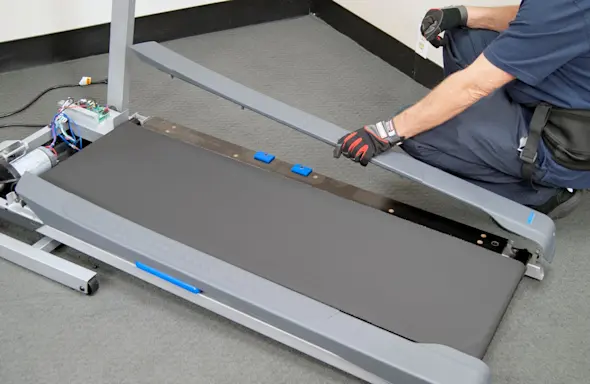
PHOTO: Remove the side foot rails.
- 4. Remove the walking board
Have a helper hold the treadmill up in the folded position because the latch will not hold the treadmill up after you remove the 2 left-side mounting nuts.
Remove the 4 corner nuts and screws that fasten the walking board to the frame.
Lower the treadmill and then slide the walking board out.
Remove the cushions from the walking board.

PHOTO: Remove the corner screws from the board. 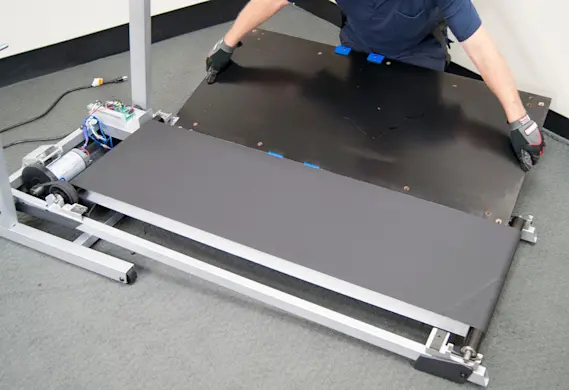
PHOTO: Pull the walking board out. 
PHOTO: Remove the cushions.
- 5. Install the new walking board
Reinstall the cushions on the new walking board.
Position the new walking board inside the walking belt and slide the walking board onto the treadmill frame.
Reinstall the 4 corner mounting screws in the walking board to help stabilize the walking board as you fold it upright.
Fold the treadmill up and have your assistant hold it in the up position.
Reinstall the corner mounting nuts and tighten them securely.
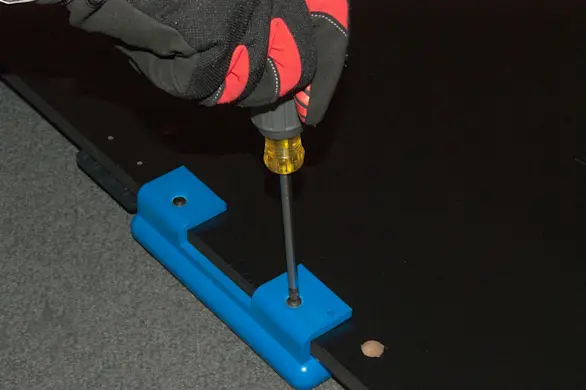
PHOTO: Install the cushions on the new walking board. 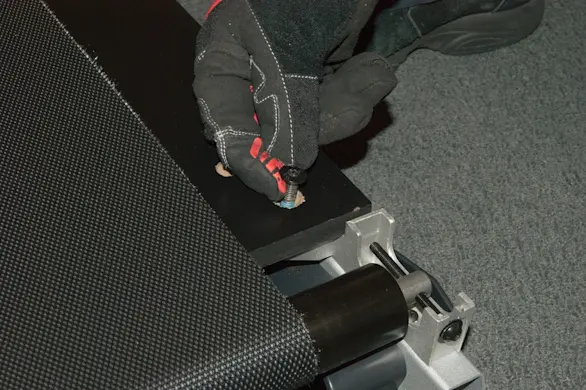
PHOTO: Reinstall the corner mounting screws. 
PHOTO: Reinstall the corner mounting nuts.
- 6. Reinstall the foot rails
Lower the walking board and reinstall the side foot rails and mounting screws.

PHOTO: Reinstall the side foot rails.
- 7. Reinstall the motor hood
Slide the motor hood onto the frame.
Reinstall the motor hood mounting screws.

PHOTO: Reinstall the motor hood. 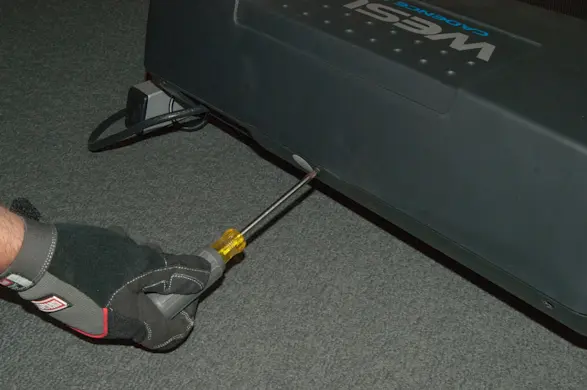
PHOTO: Reinstall the hood mounting screws.
- 8. Restore power
Plug the treadmill into the electrical outlet.
- 9. Check belt tracking
Do not walk on the treadmill while checking and adjusting the belt tracking.
Put the key in and start the treadmill. Set the speed to the slowest setting and let it run for a minute or so.
If the belt is not tracking in the center, remove the key and unplug the power cord.
Use the Allen wrench supplied with the treadmill and adjust the rear rollers as needed to center the walking belt.
If the belt is tracking to the left of center, turn the left roller adjustment screw clockwise 1/2 of a turn.
If the belt is tracking to the right of center, turn the left roller adjustment screw counter clock-wise 1/2 of a turn.
After adjustment, restore power and recheck the tracking.
Repeat until belt is tracking in the center.
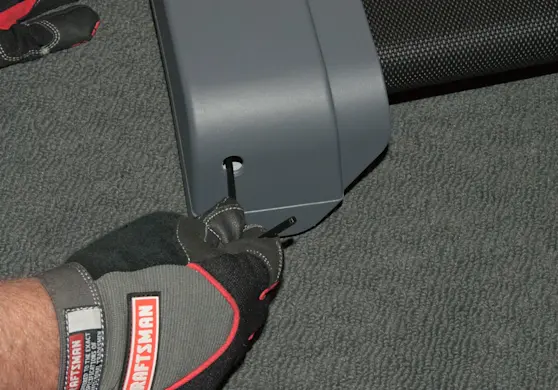
PHOTO: Adjust the belt tracking.
- 10. Shut off the electricity
Remove the key and unplug the treadmill's power cord from the wall outlet.
- 11. Lubricate the walking board
Lift the sides of the treadmill belt and evenly apply silicone lubricant to the walking board.
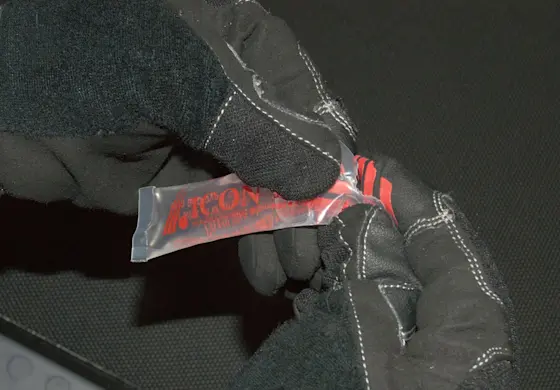
PHOTO: Apply silicone lubricant to the walking board. Spread the silicone with a wood paint stirrer or similar flat item.
- 12. Restore power and disperse the lubricant
Plug the treadmill into the electrical outlet.
Run the treadmill for several minutes on medium speed to disperse the lubricant evenly over the walking board.
Walk on the belt for a few minutes to evenly spread the silicone lubricant across the walking board.
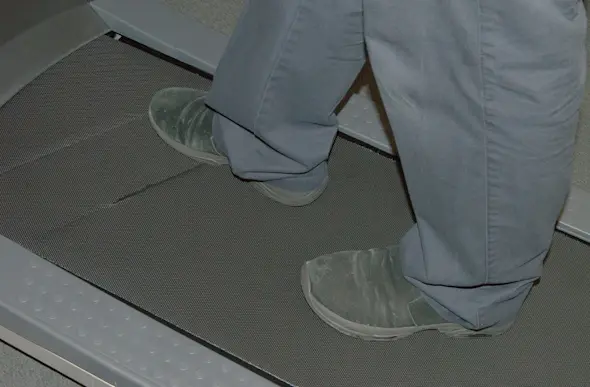
PHOTO: Walk on the treadmill to spread the lubricant.