Installation guide
 Owner’s manual
 Error Codes


How do I get my Kenmore oven out of lock mode?
To take your Kenmore electric range model 66595022101 out of lock mode, press and hold the OVEN keypad for 5 seconds. You should see “Loc OFF” on the display and the lock icon will disappear; the control panel will work normally again (see the 66595022101 owner's manual).
What you should see on the display
When the lockout is working correctly, the display typically shows one of these:
- “Loc” with a lock icon (locked)
- “Loc on” briefly when locking
- “Loc OFF” when unlocking
If you press other pads while locked, the range may beep and ignore most commands.
Step-by-step: unlock the control panel
- Make sure the oven is not running (no Bake, Broil, or Self-Clean active).
- Press and hold OVEN for 5 seconds.
- Confirm “Loc OFF” appears and the lock icon turns off.
If it still will not unlock
Try these quick checks:
- Press and hold OVEN a full 5 seconds (a short press will not change lockout).
- Press OFF/CANCEL, then try the 5-second hold again.
- If Self-Clean was recently used, wait for the oven to cool; the door lock can stay engaged until temperatures drop.
- If the display shows an error code, use the Kenmore 665 error codes guide to identify what is preventing normal operation.
Lock mode vs. self-clean door lock (what’s different)
| Situation | What it affects | Typical clue | What to do |
|---|---|---|---|
| Control lockout | Keypads (control panel) | “Loc” and lock icon | Hold OVEN 5 seconds |
| Self-clean lock | Oven door latch | “LOCKED” during/after clean | Wait for cool-down; then unlock clears automatically |
Why it matters
Lock mode is designed to prevent unintended keypad presses. Unlocking restores normal Bake and Broil operation and helps you avoid confusing beeps and “Loc” messages when you are trying to cook.
Last updated: February 2026
How do I reset a Kenmore electric oven?
To reset the electronic control on your Kenmore electric range model 66595022101, press OFF/CANCEL to clear the display and cancel any active cooking function. If you see “PF” (power failure), pressing OFF/CANCEL also clears it and lets you reset the clock; see the 66595022101 owner's manual.
Quick reset options (most common)
- Cancel a cycle or clear an error display: Press OFF/CANCEL once.
- After a power outage (“PF” on the display): Press OFF/CANCEL, then set the clock.
- If “START?” appears: Re-enter the cooking function and press START/ENTER within 5 seconds.
- If the control seems unresponsive: Turn off the range breaker for 1 minute, then restore power and press OFF/CANCEL.
What the display messages mean
| Display message | What it indicates | What to do |
|---|---|---|
| PF | Power failure occurred | Press OFF/CANCEL, then reset the clock |
| START? | Start was not confirmed | Press START/ENTER (or re-enter the function) |
| Letter + number | A fault code is present | Press OFF/CANCEL; if it returns, troubleshoot the code |
If the oven still will not heat after resetting
A reset clears the control, but it will not fix a failed heating or sensing part. Check these common causes:
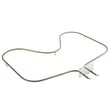
- Bake element not heating (inspect for blisters or breaks); consider bake element WPW10308477
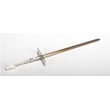
- Temperature sensing problem; consider oven sensor WPW10181986
- Door lock issue after self-clean (some models); consider latch motor WPW10107820
- House breaker tripped or a blown fuse (restore power first)
Why it matters
Resetting with OFF/CANCEL is the fastest way to clear a stuck command, remove “PF” after a power interruption, and get the control ready to accept a new bake or broil setting. It also helps you confirm whether the issue is control-related or a part failure.
Last updated: February 2026
How do I tell what model Kenmore stove I have?
Your Kenmore stove’s model number is printed on the model and serial number plate. On Kenmore model 66595022101, the manual shows the plate is behind the left side of the storage drawer, so pulling the drawer out is usually the fastest way to confirm the exact model.
Where to look on a Kenmore range
Check these common locations in this order:
- Behind the left side of the storage drawer (pull the drawer out and look along the frame)
- Oven door frame (open the door and look around the front frame)
- Under the cooktop (if your cooktop lifts, look underneath near the frame)
- Back panel (rear of the range, near the power cord entry)
- Warming drawer area (on models with a warming drawer)
For pictures and the exact callout for your range, use the 66595022101 owner's manual.
What the model number looks like (and why it matters)
The model number is typically a long number string (for example, 66595022101) and it is used to match the correct Kenmore electric range parts, diagrams, and troubleshooting steps.
Quick ID tips
- Write down the full model number exactly as shown
- Also record the serial number (helps with production date and part revisions)
- If the tag is greasy or faded, take a photo with flash and zoom in
Common label wording to scan for
Look for any of these on the plate:
| Label text you may see | What it indicates |
|---|---|
| Model / Model No. | The full model number you need |
| Serial / S/N | The unit’s serial number |
| MOD | Another way “model” may be abbreviated |
Why it matters
Kenmore ranges can look similar across different series, but parts like a bake element, oven sensor, or door gasket can vary by model. Using the exact model number helps ensure the right fit and avoids returns.
Last updated: February 2026
How do you reset the F1 code on a Kenmore stove?
On the Kenmore 66595022101 electric range, an F1 error points to a problem the electronic oven control is detecting. We reset it by doing a full power reset first; if the code returns, the next step is checking the oven temperature sensor circuit and related wiring.
Quick reset steps (safe first checks)
- Press OFF/CANCEL once to clear the display.
- Turn OFF power to the range at the house breaker (or unplug the cord if accessible).
- Leave power off for 3 to 5 minutes.
- Restore power; if PF appears, press OFF/CANCEL to clear it.
- Set the clock if needed using the steps in the 66595022101 owner's manual.
If F1 comes back: what it usually means
F1 is commonly triggered by the electronic oven control sensing an internal fault or a bad input (often from the oven temperature sensor or its wiring). Use this checklist before replacing parts:
- Make sure the keypad is not stuck (press each pad once; it should click and release).
- Check for heat damage or loose connections at the sensor harness.
- Inspect wiring for pinched, burned, or corroded terminals.
- If the oven overheats or bakes erratically, suspect the sensor first.
Common symptoms and likely causes
| Symptom | Most likely area to check | What to do next |
|---|---|---|
| F1 appears during preheat or baking | Oven temperature sensor circuit | Test/inspect sensor and harness; replace sensor if out of spec |
| F1 appears immediately at power-up | Control or keypad issue | Power reset; if persistent, inspect control/keypad connections |
| Oven temperature swings widely | Sensor or control | Verify sensor first, then control |
Parts that often solve F1-related problems
If troubleshooting points to the sensor, the correct replacement for this model is the oven sensor WPW10181986.
Why it matters
Ignoring an F1 code can lead to unreliable temperature control, canceled bake cycles, or overheating. Resetting power is a good first step, but repeated F1 errors mean we should correct the underlying control or sensor input problem.
Last updated: February 2026
Why is my Kenmore electric oven not working?
If your Kenmore electric range model 66595022101 has a dead or non-heating oven, the most common causes are a tripped breaker/power issue, a control lockout, a failed bake circuit (bake element or wiring), or a temperature sensing/control problem. Start with the quick checks in the 66595022101 owner's manual.
Quick checks we recommend first
- Confirm the range has full power; reset the household circuit breaker (many electric ranges use a 2-pole breaker).
- Make sure the oven is not in Oven Lockout mode; the manual shows how to lock and unlock the control.
- If the display shows a letter followed by a number, clear the display; if it returns, use the Kenmore 665 error codes reference.
- Verify you are selecting BAKE and pressing START/ENTER (some models will not heat until Start is pressed).
- If the oven was just in Self-Clean, wait for cooling and for LOCKED to clear; the door stays locked until the oven cools.
Parts that commonly stop an electric oven from heating
On model 66595022101, these parts are frequent culprits when the oven will not heat or heats poorly:
| Symptom | Most likely cause | What to check next |
|---|---|---|
| Oven will not heat at all | Failed bake element | Inspect for blisters/breaks; test element continuity; replace bake element WPW10308477 if open |
| Oven temperature is erratic | Bad oven sensor | Check sensor resistance at room temp; replace oven sensor WPW10181986 if out of range |
| Oven seems “locked out” | Control lockout enabled | Follow the lockout steps in the manual |
Why it matters
An electric oven can appear “not working” even when the cooktop still operates because the oven uses separate heating components and safety/control logic. Checking power, lockout status, and the bake and sensor circuits helps you avoid replacing the wrong part.
Safety notes before troubleshooting
- Turn off power at the breaker before removing panels or testing continuity.
- Let the oven cool completely after Self-Clean before touching interior surfaces or the door glass.
- Use a multimeter for electrical checks; do not rely on a standalone oven thermometer for diagnosing control accuracy.
Last updated: February 2026