 Owner’s manual
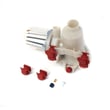


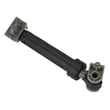
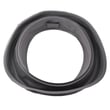
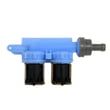
Are Whirlpool washer parts interchangeable?
Whirlpool washer parts are only interchangeable when the replacement part is listed as compatible with your exact washer model, such as Whirlpool GHW9100LW1. Even within Whirlpool, similar-looking parts can have different connectors, mounting points, or control logic, so we match parts by model to prevent leaks, noise, or no-start problems.
What “interchangeable” really means for GHW9100LW1
Parts interchange when they are the correct OEM replacement for this model, not just the same brand or a close model number. The safest approach is to confirm the part is specified for GHW9100LW1 in the GHW9100LW1 owner's manual.
Common examples
- A drain pump that fits one Whirlpool front-load platform may not align with your hoses or wiring.
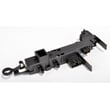
- A door lock can look identical but use a different switch circuit.
- A water inlet valve may have different flow characteristics or coil ratings.
Quick checklist before you buy or install a part
- Match the model number: GHW9100LW1 (not just “Whirlpool washer”).
- Compare the part ID and description, not only the photo.
- Confirm electrical parts have the same plug style and wire count.
- Confirm hose ports and mounting tabs match your original part.
- If you are replacing a leak-related part, inspect clamps and hoses at the same time.
Parts on this model that are often confused with “similar” versions
| Part type | What must match | Example for this model |
|---|---|---|
| Drain system | Hose port size, mounting, wiring | Water pump 280187 |
| Door/latch system | Strike alignment, switch circuit | Door lock WP8182634 |
| Fill system | Connector style, inlet/outlet ports | Washer water inlet valve WP8181694 |
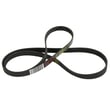
| Drive system | Belt length/profile, pulley fit | Washer drive belt WPW10388414 |
Why it matters
Using a non-matching part can cause repeat failures (leaks, vibration, fill errors, door won’t lock) and can also create unsafe conditions during operation. Matching by model keeps performance and fit consistent with how Whirlpool designed the GHW9100LW1.
Last updated: February 2026
What does E01 F09 mean on a Whirlpool Duet washer?
On the Whirlpool GHW9100LW1 (Whirlpool Duet-style front-load washer), E01 F09 means the washer is not draining properly. The fix is usually a drain restriction (clogged hose or pump path), excessive suds, or a failing drain pump; start with basic drain checks in the GHW9100LW1 owner's manual.
What to check first (fast, common fixes)
- Press PAUSE/CANCEL twice to stop the cycle.
- Unplug the washer (or shut off the breaker) before inspecting hoses or the pump area.
- Check the drain hose for kinks, crushing, or freezing.
- Check for a clog in the drain hose or standpipe.
- Confirm the drain hose is not installed too high; many Whirlpool front-loaders flag drain faults when the hose is routed excessively high.
- If you also see SUD/SUDS, reduce detergent and use HE detergent; heavy suds can slow draining.
Parts that commonly cause a drain error on this model
If the hose and drain path are clear, the drain pump or a related hose is often the next suspect.
| Symptom | Most likely cause | What we recommend |
|---|---|---|
| Hums but won’t drain | Pump impeller jammed or pump failing | Inspect and replace the water pump 280187 if needed |
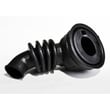
| Drains slowly, intermittent | Partial blockage in pump path | Check the washer tub-to-pump hose WPW10467168 for debris |
| Drains, then errors again | Suds routine repeatedly triggered | Reduce detergent, run a rinse/spin, clean out drain path |
Why it matters
A no-drain condition can leave water in the tub, prevent the door from unlocking, and cause repeated cycle interruptions. Clearing the restriction early also helps protect the pump from overheating and premature failure.
Quick safety and setup notes
- Keep towels and a shallow pan ready; trapped water can spill when hoses are opened.
- After any repair, run a rinse/spin cycle and watch for leaks at clamps and hose connections.
- If the washer still will not drain after clearing restrictions, replacing the drain pump is the most direct next step.
Last updated: February 2026
What is the capacity of the Whirlpool model GHW9100LW1?
The Whirlpool GHW9100LW1 is a 27-inch Duet-style front-load washer with a typical capacity of about 3.8 cu. ft. For the exact rated capacity and cycle details for your specific unit, we recommend confirming it in the GHW9100LW1 owner's manual.
How to confirm capacity on your washer
Use these quick checks to verify the exact spec for your Whirlpool direct-drive washer:
- Look up the “Capacity” or “Specifications” section in the GHW9100LW1 owner's manual
- Check the model and serial label to ensure the model is GHW9100LW1 (not a close variant)
- Compare the listed tub volume (if shown) to the stated cu. ft. capacity
- If you are matching a replacement washer, measure the cabinet width (most are 27 inches)
- Use capacity to choose proper load size and detergent amount (especially HE detergent)
Capacity quick guide (what it means in real use)
Capacity affects how much laundry you can wash per load and how well the washer tumbles and rinses.
| Capacity range (cu. ft.) | Typical load size | Common examples |
|---|---|---|
| 3.0 to 3.5 | Medium | Mixed daily loads |
| 3.6 to 4.0 | Large | Towels, jeans, larger mixed loads |
| 4.1+ | Extra-large | Bulky items, larger households |
Why it matters
Using the right load size for the washer’s capacity helps prevent poor cleaning, excess vibration, and long drain times. Overloading can also increase wear on drive components such as the washer drive belt WPW10388414 and the drain system.
Last updated: February 2026
What is the most common problem with Whirlpool washers?
The most common Whirlpool washer problems are not draining, not spinning, or not starting. On the Whirlpool GHW9100LW1 (a front-load style), the most frequent real-world cause is a drainage restriction (coins, lint, small socks) that makes the washer stop mid-cycle or leave water in the tub; use the GHW9100LW1 owner’s manual for the correct access and cleanup steps.
Most common symptoms and what they usually mean
- Washer won’t drain / water left in tub: drain pump or hose restriction, or a failing pump
- Washer won’t spin or stops with a wet load: door lock not engaging, drain issue, or load imbalance
- Door won’t lock / cycle won’t start: door lock or door strike problem
- Loud rumbling or grinding during drain: debris in the pump
- Shaking or banging: load distribution, leveling, or suspension wear
Quick checks we recommend first (5 to 10 minutes)
- Unplug the washer; then check the tub for standing water.
- Verify the drain hose is not kinked and the standpipe is not backing up.
- Confirm the door closes firmly and the strike lines up with the lock.
- Run a rinse and spin with an empty drum to see if it drains consistently.
- If you hear the pump hum but water does not move, plan on inspecting the pump and tub-to-pump hose.
Parts that commonly fix “won’t drain” and “won’t start” on GHW9100LW1
| Symptom | Most likely area | Common replacement part for this model |
|---|---|---|
| Won’t drain, pump noisy | Drain pump | Water pump 280187 |
| Slow drain, intermittent drain | Hose between tub and pump | Washer tub-to-pump hose WPW10467168 |
| Won’t start or won’t spin (door won’t lock) | Door lock system | Door lock WP8182634 |
| Door closes but won’t latch reliably | Door strike | Washer door strike WP8181651 |
Why it matters
Drain and door-lock problems can stop the washer from advancing through the cycle. Fixing the root cause prevents repeat clogs, reduces strain on the drive system, and helps protect electronic control boards.
Last updated: February 2026
Where is the drain filter on a Whirlpool front load washer?
On the Whirlpool GHW9100LW1 front-load washer, the drain filter is part of the drain pump cleanout and is accessed from the lower front of the washer behind the lower toe or kick panel. Set towels and a shallow pan first because water drains out when you open it.
How to access and clean the drain filter
- Unplug the washer.
- Remove the lower front access (toe/kick) panel.
- Place a shallow pan under the pump cleanout area.
- Turn the cleanout cap slowly counterclockwise to control the water flow.
- Remove debris (coins, lint, buttons), then reinstall the cap snugly.
- Run a short Drain/Spin or Rinse/Drain and check for leaks.
Tips that prevent a mess
- Open the cap in small increments; pause to let water drain.
- Use multiple towels; a small amount of trapped water is normal.
- Clean the cap O-ring and sealing surface so it seats evenly.
If it still will not drain or spin
Use these checks to narrow down a restriction versus a pump problem:
- Check the drain hose for kinks, clogs, or crushing behind the washer.
- Keep the drain hose end at or below 96 inches (2.4 m) above the floor.
- Inspect the tub-to-pump hose for trapped items.
- If the pump is noisy, leaking, or not moving water, replace the pump.
| What you notice | Most likely cause | What we recommend |
|---|---|---|
| Slow drain, debris in cleanout | Clogged pump cleanout | Clean and retest |
| Pump hums but little water moves | Blocked hose or failing pump | Check hoses; replace pump if needed |
| Leak at cap | Dirty seal or cross-threaded cap | Clean seal; reinstall cap straight |
Why it matters
A clogged pump cleanout causes long drain times, can stop the cycle before spin, and leaves water in the drum. Keeping it clear helps protect the drain pump and reduces drain noise.
For model-specific panel access and operating guidance, use the GHW9100LW1 owner’s manual. If the pump needs replacement, match it to the water pump 280187.
Last updated: February 2026
Why is my Whirlpool front load washer leaking from underneath?
A leak from underneath on your Whirlpool GHW9100LW1 front-load washer usually comes from the drain system (pump or hoses), a loose clamp, or a household plumbing leak that runs down the cabinet. Start by checking for plumbing drips, then inspect the pump and tub-to-pump hose area for seepage.
Quick checks we recommend first
- Unplug the washer and turn off both water supply valves.
- Pull the washer forward and look for water trails on the floor and cabinet base.
- Check household plumbing for leaks (fill hoses, standpipe, drain connection).
- Run a Rinse/Drain/Spin cycle and watch where the first drops appear.
- Look for detergent or softener overflow from the dispenser area (it can run down and look like an “underneath” leak).
Most common underneath leak points on GHW9100LW1
Drain pump and hoses
If the leak shows up during drain or spin, focus here:
- Pump housing crack or worn seal: replace the water pump 280187.
- Hose split or pinhole: inspect the washer tub-to-pump hose WPW10467168.
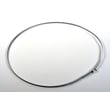
- Loose or weak clamp: tighten or replace the clamp WP285655.
Door boot and front leaks that travel downward
A torn or debris-filled door boot can drip down the front frame and end up underneath:
- Check for small tears at the bottom of the boot
- Remove coins, hair, and detergent buildup from the sealing lip
- Replace the washer door boot WP8182119 if it is torn or deformed
Symptom-to-cause guide
| When you see water | Most likely area | What to do next |
|---|---|---|
| During fill | Inlet hoses, inlet valve area | Check hose connections and screens; inspect valve area |
| During wash/tumble | Door boot, dispenser overflow | Clean boot and dispenser; check for tears |
| During drain/spin | Pump, tub-to-pump hose, clamps | Inspect for drips; replace leaking part |
Why it matters
Under-cabinet leaks can damage flooring and can also lead to electrical issues if water reaches wiring or the motor area. Fixing a small seep at the pump, hose, or clamp early prevents bigger repairs later.
Model-specific reference
For leak troubleshooting steps and operating tips for the Whirlpool GHW9100LW1, follow the guidance in the GHW9100LW1 owner's manual.
Last updated: February 2026





