Get free shipping on your order, with any water filter subscription. Find my filter

Open Hamburger Menu
Sears Parts Direct
Tips to find your model number

Dacor CPD230 oven Parts

Here are the diagrams and repair parts for Dacor CPD230 oven, as well as links to manuals and error code tables, if available.

Dacor CPD230 oven
By Schematic
By Part
SELECT DIAGRAM
?

This is the number corresponding to the part on the diagram / schematic

Browse Parts for CPD230 Wall Ovens

  • Screw Phil W for Dacor CPD230 - Part DE81-02331A

    Dacor Screw

    Part #83571

    Replaced by #DE81-02331A

    Info Icon
    Manufacturer substitution
    This part replaces 83571. Substitute parts can look different from the original.
    This item is not returnable
    In Stock
    $2.16
    Minus Item
    Qty
    Plus Item
  • Screw Phil T for Dacor CPD230 - Part DE81-02247A

    Dacor Screw

    Part #83024

    Replaced by #DE81-02247A

    Info Icon
    Manufacturer substitution
    This part replaces 83024. Substitute parts can look different from the original.
    This item is not returnable
    In Stock
    $2.16
    Minus Item
    Qty
    Plus Item
  • Fiber Washer for Dacor CPD230 - Part DE81-04335A

    Cabinet parts diagram

    Dacor Fiber Washer

    Part #83555

    Replaced by #DE81-04335A

    Info Icon
    Manufacturer substitution
    This part replaces 83555. Substitute parts can look different from the original.
    In Stock
    $34.77
    Minus Item
    Qty
    Plus Item
  • Svc Exhaust for Dacor CPD230 - Part DE81-09441A

    Cabinet parts diagram

    Dacor Plate

    Part #26637

    Replaced by #DE81-09441A

    Info Icon
    Manufacturer substitution
    This part replaces 26637. Substitute parts can look different from the original.
    In Stock
    $27.31
    Minus Item
    Qty
    Plus Item
  • Screw Truss for Dacor CPD230 - Part DE81-02249A

    Cabinet parts diagram

    Dacor Screw

    Part #83570

    Replaced by #DE81-02249A

    Info Icon
    Manufacturer substitution
    This part replaces 83570. Substitute parts can look different from the original.
    This item is not returnable
    In Stock
    $2.16
    Minus Item
    Qty
    Plus Item
  • Svc Door Hea for Dacor CPD230 - Part DE81-08084A

    Dacor Heat Shield

    Part #26574B

    Replaced by #DE81-08084A

    Info Icon
    Manufacturer substitution
    This part replaces 26574B. Substitute parts can look different from the original.
    In Stock
    $27.31
    Minus Item
    Qty
    Plus Item
  • Case Bottom for Dacor CPD230 - Part DE81-09979A

    Dacor Case

    Part #26633

    Replaced by #DE81-09979A

    Info Icon
    Manufacturer substitution
    This part replaces 26633. Substitute parts can look different from the original.
    In Stock
    $215.23
    Minus Item
    Qty
    Plus Item
  • Screw Slot H for Dacor CPD230 - Part DE81-02248A

    Dacor Screw

    Part #83019

    Replaced by #DE81-02248A

    Info Icon
    Manufacturer substitution
    This part replaces 83019. Substitute parts can look different from the original.
    This item is not returnable
    In Stock
    $2.16
    Minus Item
    Qty
    Plus Item
  • Filter Conv for Dacor CPD230 - Part DE81-05647A

    Dacor Wall Oven Convection Fan Cover

    Part #82891

    Replaced by #DE81-05647A

    Info Icon
    Manufacturer substitution
    This part replaces 82891. Substitute parts can look different from the original.
    In Stock
    $61.87
    Minus Item
    Qty
    Plus Item
  • Bushing Heyc for Dacor CPD230 - Part DE81-04655A

    Cabinet parts diagram

    Dacor Bushing

    Part #83056

    Replaced by #DE81-04655A

    Info Icon
    Manufacturer substitution
    This part replaces 83056. Substitute parts can look different from the original.
    In Stock
    $26.46
    Minus Item
    Qty
    Plus Item

Dacor Oven CPD230 FAQs

On a Dacor wall oven, the model number is usually on the oven frame around the door opening (often along the left or right side) or on a label visible when you open the door. For your Dacor CPD230, check these spots first so we can match the correct wall oven parts.

Most common places to check
  • Open the oven door and look along the front frame (the rim around the opening).
  • Check the left side of the door opening near the hinge area.
  • Check the right side of the door opening near the hinge area.
  • Look along the bottom edge of the opening (near the door gasket).
  • If your unit has a lower drawer or access panel, check behind it for a rating label.
What the label looks like

The tag is typically a small sticker or metal plate that includes:

  • Model number (example: CPD230)
  • Serial number
  • Electrical ratings (volts/amps)
  • Brand name (Dacor)
Where you looked What you should see Next step
Door frame (left/right) Model and serial tag Write down model and serial
Bottom edge of opening Smaller rating label Take a clear photo
Behind lower panel/drawer Rating plate Use flashlight, then photo
Why it matters

Dacor wall ovens can use different racks, trim pieces, and electrical components depending on the exact model and production run. Using the full model number and serial helps us match the correct replacement part the first time.

Related part you may shop by model

If you are replacing missing or bent racks after confirming the model, start with the Dacor screw 83022 or other mounting hardware only when you know exactly what is missing.

Last updated: February 2026

Most Dacor wall ovens, including model CPD230, typically last 15 years with normal use and basic care. Keeping airflow clear, avoiding harsh cleaners on controls, and fixing small issues early helps you get the full life out of the heating and electrical systems.

Typical lifespan and what affects it

A wall oven’s service life depends more on heat stress and electrical health than on cosmetics.

  • Typical lifespan: about 15 years
  • Heavier use (daily high-heat baking, frequent self-clean) can shorten life
  • Power issues (surges, loose connections) can damage controls and wiring
  • Ventilation problems can overheat components
  • Door seal wear can force longer heat times and strain parts
What usually fails first (and what to check)

These are common wear points on electric wall ovens.

Area Common symptom What we recommend
Power protection Oven dead or intermittent Check house breaker; inspect and test the fuse box 12401
Wiring/connectors Burning smell, random shutoffs Look for heat-damaged terminals; repair safely using guidance like how to repair broken or damaged wires video
Airflow/trim Hot cabinet face, uneven temps Make sure venting and trim are seated correctly; replace damaged trim if needed
Racks/fit Rack won’t slide or sits uneven Replace bent racks to prevent spills and heat damage
Maintenance that extends oven life
  • Keep the door gasket clean and intact; replace if torn or flattened
  • Use self-clean sparingly; high heat accelerates wear on wiring and electronics
  • Wipe spills after the oven cools to protect porcelain and reduce smoke
  • Confirm the oven is level so heat and airflow behave normally
  • If you suspect an electrical issue, test safely with a meter using how to use a multimeter to test electrical parts video
Why it matters

A 15-year wall oven lifespan assumes stable temperatures and safe electrical operation. Simple upkeep reduces overheating and electrical stress, which are the main reasons wall ovens fail early.

Last updated: February 2026

Most Dacor ovens, including model CPD230, do not have a single external “reset button.” When people say “reset,” they usually mean resetting power at the breaker or resetting a safety device such as a high-limit thermostat or thermal fuse inside the oven.

Quick ways to “reset” a Dacor CPD230 wall oven
  • Power reset (most common): turn the oven circuit breaker OFF for 1 to 2 minutes, then turn it back ON.
  • Control reset: if the display is responsive, cancel the cooking mode and reselect Bake or Broil.
  • After self-clean issues: allow the oven to cool fully; some lock and heat-limit conditions clear only after cooldown.
  • If the oven is dead (no display): check the home breaker first, then check internal fusing and wiring.
  • If it trips repeatedly: stop resetting and troubleshoot the cause (overheating, failed fan motor, shorted wiring).
Where a “reset” device is typically located

On many wall ovens, the high-limit thermostat or thermal cutoff is mounted behind an upper rear access panel or behind the control panel area. Access usually requires removing screws and panels, so we recommend disconnecting power first.

What you are trying to fix What “reset” usually means What to check next
Display frozen or acting odd Breaker power cycle Loose connections, control issues
Oven will not heat but has power Safety limit opened or sensor issue Temperature sensor, wiring, cooling fan
No power at all Blown fuse or open thermal device Fuse box, harness connections
Parts that commonly relate to “no heat” or “dead oven” symptoms

If you are diagnosing a power or heat problem on CPD230, these model-matched parts are often involved:

Why it matters

Repeatedly “resetting” an oven that is overheating or shorting can lead to more damage. A quick breaker reset is fine for a one-time control glitch, but recurring shutdowns point to an electrical or airflow problem that needs repair.

Last updated: February 2026
Most common symptoms to help you fix your wall oven

Choose a symptom to see related wall oven repairs.

Main causes: bad oven door lock assembly, faulty electronic control board, wiring failure…

Main causes: faulty oven temperature sensor, control system problem, weak burner igniter, damaged oven element…

Main causes: lack of gas supply, broken igniter, tripped circuit breaker, broken oven element, tripped thermal fuse, con…

Main causes: lack of electrical power, bad electronic control board, faulty oven control thermostat…

Main causes: broken broil element, faulty broil burner igniter, control system failure…

Main causes: broken bake element, bad bake burner igniter, tripped thermal switch, control system failure…

Most common repair guides to help fix your wall oven

These step-by-step repair guides will help you safely fix what’s broken on your wall oven.

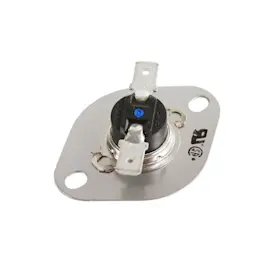
How to replace the thermal switch in a wall oven

How to replace the thermal switch in a wall oven

If the oven won't heat after resetting the thermal switch, replace the thermal switch.…

Repair time and Difficulty

 60 minutes or less
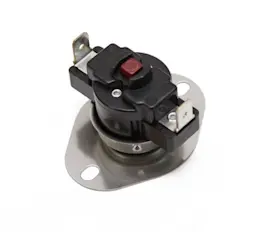
How to replace a wall oven thermal fuse

How to replace a wall oven thermal fuse

The thermal fuse trips to prevent the over from excessively overheating. The oven won't heat again until you replace the…

Repair time and Difficulty

 60 minutes or less
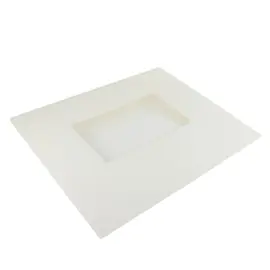
How to replace a wall oven door outer glass panel

How to replace a wall oven door outer glass panel

Learn how to replace a damaged outer window panel on your wall oven door with these step-by-step instructions. …

Repair time and Difficulty

 45 minutes or less

Effective articles & videos to help repair your wall oven

Use the advice and tips in these articles and videos to get the most out of your wall oven.

How to remove grease from your oven

How to remove grease from your oven

Oven looking grimy? Discover how to clean a greasy oven using safe, effective methods like baking soda and more.…

How to read a wiring schematic video

How to read a wiring schematic video

Learn how to decipher symbols so you can buy the right part for your problem.…

How to correct an oven's temperature setting

How to correct an oven's temperature setting

If your oven consistently undercooks or overcooks, it might need recalibration. You can reset it yourself.…

Parts & More

Blender
Dishwasher
Drill Press
Dryer
Electric Range
Front-Engine Lawn Tractor
Parts
Range
Refrigerator
Snowblower
Tool Storage
Top-Mount Refrigerator
Treadmill
Washer