Owner’s manual
 Error Codes



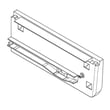
How to remove bottom grill from KitchenAid refrigerator?
To remove the bottom grille (base grille) on your KitchenAid refrigerator model KRFF300ESS01, grasp the grille firmly and pull it straight toward you. It releases from clips and tabs at the bottom front of the cabinet, just below the freezer drawer (toe-kick area). See the KRFF300ESS01 owner's manual for the exact clip locations.
Steps to remove the base grille
- Pull open the freezer drawer for better access.
- Place both hands near the left and right ends of the grille.
- Pull the grille straight out toward you with steady pressure.
- If one side releases first, keep pulling evenly until all clips disengage.
- Set the grille aside where it will not get stepped on or bent.
How to reinstall it (so it snaps in correctly)
The base grille uses tabs on the refrigerator and clips on the grille.
- Pull open the freezer drawer.
- Align the three clips on the back of the grille with the three tabs at the base of the refrigerator.
- Push the grille in toward the refrigerator until it is firmly in place.
- Confirm the grille sits flush and does not rub the freezer drawer.
| What you see | What it means | What to do |
|---|---|---|
| Grille feels stuck | Clips are still engaged | Pull straight out; avoid twisting |
| Grille won’t sit flush | Clips not aligned with tabs | Re-align clips to tabs, then push in |
| Drawer rubs after reinstall | Grille not fully seated | Push firmly until it clicks into place |
Why it matters
We remove the base grille to access the leveling screws and roller assemblies for door closing and alignment, and it is also a common first step before some service tasks. Removing it correctly prevents broken clips and keeps the grille fitting tight.
Last updated: February 2026
What is the advantage of a bottom mount fridge?
A bottom-mount refrigerator like the KitchenAid KRFF300ESS01 puts the fresh-food compartment at eye level and the freezer in a lower drawer. That layout makes everyday items easier to see and reach, and it reduces bending compared with top-freezer designs.
Key advantages in day-to-day use
- Fresh food is easier to access: shelves and crisper drawers sit higher, so you reach less.
- Better visibility: you can scan refrigerator contents faster, which helps reduce food waste.
- Freezer organization: the lower drawer style often supports baskets and dividers for sorting.
- More comfortable ergonomics: less frequent bending if you use the refrigerator section most.
- Door closing and alignment adjustments are straightforward: many bottom-mount designs use front leveling screws to fine-tune door closing.
What to expect: bottom mount vs top freezer
| Feature | Bottom mount (like KRFF300ESS01) | Top freezer |
|---|---|---|
| Most-used items | At eye/waist level | Lower shelves require more bending |
| Freezer access | Lower pull-out drawer | Upper swing door |
| Organization style | Drawer baskets, stacked zones | Shelves and door bins |
| Ergonomics | Better for fresh-food heavy households | Better if you use freezer most |
Why it matters
Most households open the refrigerator compartment far more often than the freezer. With a bottom-mount layout, we get faster access to fresh foods (produce, dairy, leftovers) and less strain during daily cooking and cleanup.
Helpful owner tips for this style
- Keep frequently used items on the middle shelves for quickest access.
- Avoid blocking door bins and shelves so doors close fully.
- If doors do not self-close well, adjust the front leveling screws as outlined in the KRFF300ESS01 owner’s manual.
Last updated: February 2026
What is the most common problem with a KitchenAid refrigerator?
The most common issues we see on KitchenAid refrigerators like model KRFF300ESS01 are cooling complaints (warm fridge or inconsistent temperatures) and ice maker or water supply problems. These typically trace back to airflow (evaporator fan or damper), a restricted water system, or basic maintenance items.
Most common symptoms and what they usually point to
- Fridge section warm, freezer OK: airflow problem (damper stuck, evaporator fan issue, blocked vents)
- Temps swing up and down: sensor/control issue (thermistor, control board) or airflow restriction
- Ice maker not making ice: water supply issue, inlet valve problem, or ice maker assembly failure
- Water leaking or puddles: clogged/iced drain, loose water line, or valve seepage
- Noises (buzzing, rattling, clicking): fan blade hitting ice, fan motor wear, or compressor start components
Quick checks we recommend first (no tools)
- Confirm the unit has power and is plugged into a grounded outlet (no extension cord).
- Make sure food packages are not blocking air vents in the refrigerator compartment.
- Verify doors close and seal fully; a poor seal causes warm temps and frost.
- If you have an ice maker, confirm the household water supply valve is fully open.
- Replace consumables on schedule (air filter and water filter) to keep airflow and water flow steady.
Parts that commonly solve these problems on KRFF300ESS01
| Symptom | Common part to check | What it does |
|---|---|---|
| Ice maker not filling | Refrigerator inlet valve WPW10238100 | Opens to send water to the ice maker |
| Ice maker dead or inconsistent | Refrigerator ice maker assembly 4317943 | Harvests and cycles ice production |
| Warm fridge, poor airflow | Refrigerator electronic damper W11087463 | Regulates cold air into fresh food section |
| Temp swings | Refrigerator thermistor WPW10383615 | Senses temperature for control logic |
| Odors, stale air | Refrigerator air filter W10311524 | Reduces odors and improves air freshness |
Why it matters
Cooling and ice maker complaints often share the same root causes: restricted airflow, a weak water supply, or a sensor reading that is off. Catching the cause early helps prevent food spoilage, frost buildup, and repeat service calls.
Helpful model-specific resources
- Use the troubleshooting charts in the KRFF300ESS01 owner's manual to match your exact symptom to the most likely cause.
- For water filter-related issues (slow water, hollow ice, small cubes), follow how to replace the water filter in a KitchenAid refrigerator.
Last updated: February 2026
What is the bottom part of a refrigerator called?
On a KitchenAid KRFF300ESS01 bottom-mount refrigerator, the “bottom part” most people mean is the base area under the fresh food doors and above the floor. That lower section typically houses the leveling/roller assembly and base grille, and the compressor is commonly located in the lower rear area.
What you will see at the bottom (KRFF300ESS01)
These are the most common “bottom” components customers refer to:
- Base grille: the front cover at the very bottom; it hides the leveling screws and rollers.
- Leveling screws and roller assemblies: used to raise the front and help doors close properly.
- Freezer drawer and slide system: on bottom-mount models, the freezer compartment is the lower drawer.
- Lower rear machine compartment: where the compressor and condenser area are typically located.
For diagrams and model-specific access steps (like removing the base grille), use the KRFF300ESS01 owner's manual.
Quick identification guide
| If you mean... | Common name | Where it is |
|---|---|---|
| The front cover at floor level | Base grille (toe grille) | Front, bottom of cabinet |
| The adjustable feet/rollers | Leveling/roller assembly | Behind the base grille |
| The cold storage section at the bottom | Freezer drawer | Bottom front |
| The “motor” that runs cooling | Compressor | Usually lower rear |
Why it matters
Knowing the right name helps you find the correct instructions and parts. For example, door closing and alignment issues are often fixed by adjusting the leveling screws behind the base grille, not by replacing a door or gasket.
Helpful tips before you work near the bottom
- Unplug the refrigerator before removing covers or reaching into the base area.
- Pull the base grille straight toward you to remove it (then reinstall by aligning clips and tabs).
- Raise or lower the front using the leveling screws so doors close smoothly.
- Keep the freezer drawer clear if you are removing the drawer front or adjusting rollers.
- Use the tool sizes listed in the manual to avoid stripping screws.
Last updated: February 2026
How to replace filter in KitchenAid refrigerator?
To replace the water filter in your KitchenAid refrigerator model KRFF300ESS01, open the filter cover in the top-right of the fresh food compartment, pull the old filter straight out, and push the new one in until it seats. Then reset the filter status on the control panel. See the KRFF300ESS01 owner's manual.
Water filter replacement steps (KRFF300ESS01)
- Locate the water filter in the top-right corner of the refrigerator compartment.
- Lift open the filter cover door; the filter releases and ejects as the door opens.
- Pull the filter straight out (keep a towel handy for minor spills).
- Insert the new filter fully into the housing.
- Close the filter cover door.
- Reset the filter status: press and hold WATER FILTER for 3 seconds.
When to replace the water filter
Most households replace the disposable water filter every 6 months. Replace sooner if you notice reduced water flow to the dispenser or ice maker.
| Indicator on control | What it means | What to do |
|---|---|---|
| Yellow | Order a replacement | Get a new filter ready |
| Red + “Replace Filter” | Replace now | Install a new filter and reset |
| Red flashing “Replace Filter” | Expired | Replace immediately and reset |
After you install the new filter
Air in the water line can cause dripping or sputtering right after a filter change. Flushing the water system clears air and helps restore normal flow.
- Dispense water in intervals until the flow is steady.
- Discard the first ice batches after a filter change (if your unit is making ice).
- Check the filter area for leaks after the first few minutes of use.
Why it matters
A fresh water filter helps maintain water taste and flow, and it prevents low flow issues that can affect the ice maker and dispenser performance.
Last updated: February 2026
What is the average lifespan of a KitchenAid refrigerator?
Most KitchenAid refrigerators last about 14 to 17 years with normal household use and basic upkeep. For your KitchenAid KRFF300ESS01 bottom-mount refrigerator, regular maintenance (cleaning coils, keeping door seals tight, and replacing filters on schedule) helps you reach the high end of that range; see the KRFF300ESS01 owner's manual for model-specific care guidance.
Typical lifespan and what affects it
A refrigerator’s life depends more on operating conditions than brand name alone.
- Maintenance: clean condenser coils, keep vents clear, replace filters
- Door seal condition: torn or warped gaskets force longer run times
- Room temperature and airflow: hot garages and tight cabinets shorten life
- Water quality (if you have ice/water): mineral buildup stresses valves and ice maker
- Usage habits: frequent door openings and overpacking reduce efficiency
Quick maintenance schedule (good for longevity)
| Task | How often | What it helps prevent |
|---|---|---|
| Clean condenser coils | Every 6 to 12 months | Overheating, compressor strain |
| Check/clean door gaskets | Every 3 to 6 months | Warm air leaks, frost, long run times |
| Replace air filter | About every 6 months | Odors, stale air circulation |
| Replace water filter (if equipped) | About every 6 months | Slow flow, ice maker issues |
If you need the correct filter for this model, use the refrigerator air filter W10311524 and follow the steps in how to install refrigerator air filter.
Why it matters
A refrigerator that runs longer to hold temperature wears out key components sooner, especially in the sealed system (compressor, evaporator, condenser). Simple airflow and sealing checks reduce run time, energy use, and temperature swings.
Last updated: February 2026
Why is my KitchenAid refrigerator leaking water underneath?
On KitchenAid model KRFF300ESS01, water leaking underneath is usually caused by defrost water not draining correctly (a clogged or frozen defrost drain) or by a water supply connection that is dripping and running down to the floor. Use the steps below to pinpoint the source before replacing parts.
Quick checks to find the leak source
- Look for water inside the fresh food section (especially under crisper drawers). This often points to a defrost drain issue.
- Check the back of the refrigerator for moisture at the water line connection; the manual notes leaks can happen when connections are not fully tightened.
- Watch the dispenser after use; a few drops are normal, but ongoing dripping can happen after installation or after a filter change until the water system is flushed.
- Inspect the freezer floor for a thin sheet of ice; that commonly indicates a drain problem.
- Check the drain pan (behind the lower rear cover) for cracks or overflow.
Step-by-step troubleshooting (safe DIY)
- Unplug the refrigerator and pull it out enough to inspect the rear lower area.
- Check the water line fittings at the back; tighten gently if you see seepage.
- If the leak seems tied to the dispenser or recent filter work, flush the water system (5 seconds on, 5 seconds off) until about 4 gallons (15 L) has been dispensed; this clears air that can cause dripping.
- If you see ice or water pooling inside, thaw and clear the defrost drain using warm water (a turkey baster works well) and remove any debris.
- If the refrigerator is not making ice correctly or you suspect fill issues, test the water inlet valve for slow seepage or inconsistent fill.
Parts that commonly relate to leaks on this model
| Symptom | Most likely area | Part to consider |
|---|---|---|
| Water under crisper drawers | Defrost drain/ice blockage | (Drain clearing first; no part usually needed) |
| Water behind unit | Water line connection or valve | Refrigerator inlet valve WPW10238100 |
| Drips after filter change | Air in water system | Flush water system per KRFF300ESS01 owner's manual |
Why it matters
A small leak can turn into floor damage and can also lead to ice buildup that restricts airflow, which makes the refrigerator work harder and cool less evenly.
Last updated: February 2026
How do I reset my KitchenAid refrigerator after power failure?
After a power failure, we reset the KitchenAid KRFF300ESS01 by restoring power, then letting the controls reboot and the cooling system restart. If the refrigerator was in Sabbath mode, cooling can take about 10 minutes to resume after power is restored; confirm settings in the KRFF300ESS01 owner's manual.
Quick reset steps (safe, model-friendly)
- Make sure the outlet has power; plug in a lamp to confirm.
- If a breaker tripped, reset it; replace blown fuses if applicable.
- Unplug the refrigerator for 5 minutes, then plug it back in.
- Wait 10 minutes for the compressor and fans to restart normally.
- Check that the fridge and freezer temperature settings are where you want them.
- If the control panel is unresponsive, open and close the doors once to wake the display.
Resetting specific indicators (common after outages)
Power outages do not usually require a full “factory reset”, but you may need to reset status lights after maintenance.
| What you want to reset | What to do | What you should see |
|---|---|---|
| Water filter status | Press and hold WATER FILTER for 3 seconds | Status returns to Good (icon turns blue) |
| Sabbath mode (if enabled) | Press and hold FREEZER TEMP and FRIDGE TEMP together for 3 seconds | Icons flash, then normal screen returns |
Why it matters
A brief outage can leave the control board mid-cycle; giving KRFF300ESS01 a clean power reboot and a short restart window helps the compressor, evaporator fan, and temperature sensors (thermistor) resume normal cooling without chasing false “no cool” symptoms.
When a part may be involved
If power is stable but cooling or water functions do not recover after the reset steps, a failed component is more likely than a “reset” issue.
- No cooling and repeated clicking: start components may be involved.
- Warm fridge but freezer cold: airflow or damper issues are common.
- No ice or no water after power returns: check the water supply and valve operation.
Relevant parts for this model include the refrigerator electronic control board W11035836 and refrigerator inlet valve WPW10238100.
Last updated: February 2026
What causes a KitchenAid refrigerator to stop cooling?
For KitchenAid model KRFF300ESS01, the most common reasons it stops cooling are loss of power, airflow problems (dirty condenser coils or a door left ajar), or a failed cooling component such as the evaporator fan motor, thermistor, or compressor. Use the KRFF300ESS01 owner's manual troubleshooting steps to narrow it down.
Quick checks we recommend first
- Confirm the unit has power; plug into a grounded 3-prong outlet and reset any tripped breaker.
- Make sure the temperature controls were not accidentally changed (setting “coldest” will not cool faster).
- Verify both doors and the freezer drawer close fully and are not blocked by food packages.
- Clean the condenser coils (dust buildup makes the system run hot and cool poorly).
- Listen for the evaporator fan in the freezer; no fan sound often points to an airflow or fan issue.
Most likely causes and what you’ll notice
| What’s happening | Common cause | Typical symptom |
|---|---|---|
| No lights, no sound | Power supply issue | Completely dead unit |
| Runs a lot but still warm | Dirty coils or door seal leak | Warm temps, long run times |
| Freezer cold, fridge warm | Airflow/damper issue | Little to no cold air in fresh food section |
| Warm everywhere, fan noise changes | Evaporator fan problem | Weak airflow, uneven temps |
| Temps swing up and down | Sensor issue | Food freezing then warming |
Parts that commonly fix “not cooling” symptoms
If your diagnosis points to a failed part, these are common on KRFF300ESS01:
- Refrigerator evaporator motor WPW10464673 (moves cold air through the compartments)
- Refrigerator thermistor WPW10383615 (reports temperature to the control)
- Refrigerator compressor W10233960 (drives the sealed cooling system)
Why it matters
A refrigerator that is running too much or not closing tightly can overwork the compressor and fans. Catching airflow issues early (coils, gaskets, blocked vents) often restores cooling without major repairs.
Last updated: February 2026