Owner’s manual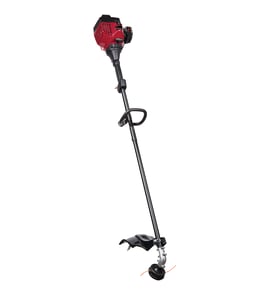


What size trimmer line for Craftsman?
For Craftsman gas line trimmer model 358791170, the operator’s manual does not specify a single trimmer line diameter; it directs you to use Craftsman replacement line and choose the line size best suited for the job (grass and small weeds vs. larger weeds and light brush). See the 358791170 operator's manual.
What the manual says for model 358791170
In the line replacement section, the manual identifies two Craftsman line options by color and use:
- Red line (#71-85908): designed for cutting grass and small weeds
- Black line (#71-85909): designed for cutting larger weeds and light brush
- Use only trimmer line; never use wire, rope, or string
How to choose the right line (practical guidance)
Because the manual focuses on application rather than diameter, we recommend choosing based on what you cut most often:
| What you’re trimming | Recommended line type (per manual) | Why it matters |
|---|---|---|
| Grass, light weeds | Red line (#71-85908) | Cleaner cuts with less load on the engine |
| Thicker weeds, light brush | Black line (#71-85909) | Better durability and less breakage |
Why it matters
Using the correct line type helps your 2-cycle engine maintain RPM, reduces stalling, and limits wear on the trimmer head and line glide plate. Oversized or non-approved line can also reduce cutting performance and increase vibration.
Last updated: January 2026
Do trimmer plus attachments work with Craftsman?
Yes, TrimmerPlus-style attachments can work with the Craftsman gas trimmer model 358791170 as long as your attachment is made for a coupler-based “universal” attachment system and it locks into the coupler correctly. Our 358791170 operator's manual explains how the coupler and locking/release button must engage before use.
What to check on your 358791170 before buying an attachment
Use these quick fit checks so you do not end up with an attachment that will not lock in or will wobble:
- Confirm your trimmer has the coupler and a locking/release button (this model does).
- Make sure the attachment shaft slides fully into the coupler and the button snaps into the primary hole.
- Tighten the coupler knob securely; the attachment should not rotate or pull out.
- Use the attachment only in the primary hole unless the attachment manual specifically says otherwise.
- If the attachment will not lock, inspect the coupler area for damage or wear in the upper shaft.
Compatibility notes (what “works with Craftsman” usually means)
Many TrimmerPlus-compatible attachments are designed to fit multiple brands (including Craftsman) when the powerhead accepts that attachment style. For model 358791170, the key is the coupler connection, not the brand name printed on the attachment.
Quick compatibility table
| What you have | What it should do | Result |
|---|---|---|
| Attachment labeled TrimmerPlus-compatible | Locks into coupler primary hole | Typically compatible |
| Attachment with a different shaft/coupler design | Will not lock or seats loosely | Not compatible |
| Attachment locks but wobbles | Indicates wear or incomplete seating | Recheck fit and coupler |
Why it matters
A coupler that is not fully locked can let the attachment separate or spin unexpectedly, which can damage the drive shaft and create a safety hazard. Following the coupler locking steps in the 358791170 operator's manual helps prevent improper installation.
Last updated: January 2026
What size is the Weedeater fuel line?
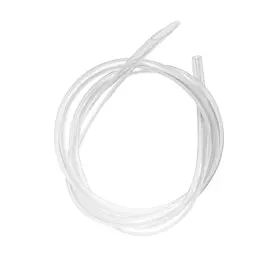
For the Craftsman 358791170 gas line trimmer, the exact fuel line inside diameter and outside diameter are not specified in the model-specific information we have; this model can use different line sizes depending on which section you’re replacing (supply vs. return) and the tank grommet/fittings. Use the 358791170 operator’s manual to confirm routing, then match the new line to the original.
How we recommend sizing the fuel line (works for this model)
- Remove the old line and cut a short sample from a straight section.
- Measure inside diameter (ID) first; that’s what must seal on the carburetor and fuel filter nipples.
- Match outside diameter (OD) so it seals tightly in the fuel tank opening/grommet.
- If the old line is swollen or brittle, size by the fitting/nipple OD instead of the old line.
- Replace both lines if one is hardened; mixed stiffness often causes air leaks.
Parts that commonly relate to fuel line service
If you’re replacing fuel line because of fuel starvation, hard starting, or cracked tubing, these model-compatible parts are often involved:
- Craftsman lawn & garden equipment engine fuel filter 530095646 (in-tank filter that can clog)
- Lawn & garden equipment engine fuel return line 530069599 (return line used on many small-engine setups)
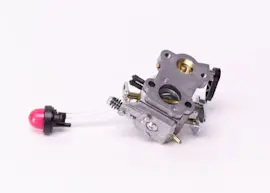
- Primer bulb and carburetor fittings should also be inspected for leaks and loose connections
Quick symptoms guide
| Symptom | Often points to | What to check |
|---|---|---|
| Starts then dies | Fuel restriction or air leak | Cracked line, loose fit, clogged filter |
| Won’t prime | Split line or bad primer circuit | Line connections, primer bulb, tank pickup |
| Runs only on choke | Lean condition | Air leak at line, carb adapter, fuel delivery |
Why it matters
Fuel line size is critical because a slightly loose ID can pull air (lean running, stalling), and a slightly oversized OD can leak at the tank. Correct sizing helps protect the carburetor, improves starting, and prevents fuel leaks.
Last updated: January 2026
How to replace trimmer head on Craftsman Weedwacker?
To replace the trimmer head on your Craftsman model 358791170, lock the shaft with a small screwdriver, unthread the old head clockwise (viewed from the bottom), then thread the new head on counterclockwise and tighten hand-tight only. See the 358791170 operator's manual for the exact steps.
Tools and safety prep
- Stop the engine and let it cool
- Disconnect the spark plug boot to prevent accidental starting
- Wear gloves and eye protection
- Work on a flat surface so the trimmer is stable
- Use a small screwdriver (or similar pin) to lock the shaft
Step-by-step: replacing the trimmer head (358791170)
- Disconnect the spark plug boot.
- Align the locking holes: rotate the arbor shaft until the hole in the dust cup lines up with the hole in the side of the gearbox.
- Lock the shaft: insert a small screwdriver through the aligned holes.
- Remove the old head: while holding the screwdriver in place, turn the trimmer head clockwise (looking from the bottom of the unit) to unthread it.
- Install the new head: thread the replacement head onto the shaft counterclockwise.
- Tighten correctly: tighten hand tight only, then remove the screwdriver.
Direction check (common confusion)
| Task | Turn direction (viewed from bottom) | Why it matters |
|---|---|---|
| Remove old trimmer head | Clockwise | Prevents stripping threads by forcing the wrong way |
| Install new trimmer head | Counterclockwise | Ensures the head seats correctly on the shaft |
| Final tightening | Hand-tight only | Over-tightening can damage threads and make future removal difficult |
Why it matters
The 358791170 uses a threaded head that can be damaged by cross-threading or over-tightening. Locking the shaft and using the correct direction helps protect the gearbox and keeps the cutting attachment secure during operation.
Last updated: January 2026
Why is my Craftsman Weedeater not starting?
If your Craftsman gas line trimmer model 358791170 will not start, the most common causes are stale or incorrect 40:1 fuel mix, a flooded engine, or a fuel delivery/ignition issue (dirty filter, bad primer bulb, or weak spark). Use the start steps in the 358791170 operator's manual first, then check fuel and spark basics.
Quick checks (fastest fixes first)
- Confirm fresh unleaded gas mixed 40:1 with 2-cycle air-cooled oil; dump old fuel if it is more than 30 days old.
- For a cold start: press the primer bulb 6 times, set the start lever to START, then pull with a steady motion.
- If you smell fuel or the plug is wet, treat it as flooded: set start lever to RUN, hold throttle wide open, and pull until it starts.
- Make sure the ON/STOP switch is in the ON position (it resets after stopping).
- Inspect the air filter; clean it if dirty (a restricted filter can cause hard starting and poor running).
Parts that commonly cause a no-start on this model
If fuel is not reaching the carburetor or priming feels weak, these model-compatible parts are good suspects:
- Craftsman lawn & garden equipment engine fuel filter 530095646 (clogged filter blocks fuel flow)
- Ayp lawn & garden equipment engine carburetor primer bulb 530047721 (cracked bulb will not prime)
- Lawn & garden equipment engine fuel return line 530069599 (split line can pull air instead of fuel)
What to check and what it usually means
| Symptom | Most likely cause | What we recommend |
|---|---|---|
| Primer bulb will not fill or stays collapsed | Air leak or restriction in fuel system | Check fuel lines and replace the fuel filter |
| Starts briefly then dies | Fuel restriction or carburetor issue | Verify fresh 40:1 mix; check filter and primer bulb |
| Strong fuel smell, wet plug | Flooded engine | Use flooded-start procedure (start lever RUN, throttle open) |
| No pop at all when pulling | Ignition/spark issue | Inspect spark plug condition and boot connection |
Why it matters
A 2-cycle trimmer like the Craftsman 358791170 depends on the correct fuel mix and airtight fuel delivery. A small air leak, clogged filter, or failed primer bulb can prevent the carburetor from pulling fuel, so the engine will not fire.
Last updated: January 2026