Owner’s manual
 Error Codes



What is the most common problem with a GE refrigerator?
Cooling problems are the most common issue we see with GE refrigerators, including the GE GNE29GGKBBB. The usual root causes are restricted airflow (dirty condenser coils or blocked vents), defrost system trouble that leads to frost buildup, or a failed fan, sensor, or control board. For model-specific checks and settings, use the GNE29GGKBBB owner's manual.
Most common causes of “not cooling”
Start with the simplest, highest-impact checks first:
- Dirty condenser coils: reduces heat removal and can cause warm temps.
- Door not sealing: warm air leaks in, causing long run times and frost.
- Evaporator fan not running: little or no cold air circulation to the fresh food section.
- Defrost system problem: frost blocks airflow across the evaporator.
- Temperature sensing/control issue: incorrect readings can cause poor cooling.
Quick troubleshooting steps (in order)
- Confirm temperature settings and allow 24 hours after any adjustment.
- Clean condenser coils and make sure the condenser fan area is clear.
- Check that interior vents are not blocked by food packages.
- Inspect door gaskets for gaps, tears, or debris; clean and reseat.
- Listen for the evaporator fan in the freezer; if it is silent with the door switch held, suspect a fan or defrost issue.
Parts that commonly relate to cooling symptoms
If basic checks do not fix the issue, these parts are frequent suspects on bottom-mount designs:
| Symptom | Commonly involved part | Example for this model |
|---|---|---|
| Warm fresh food, freezer OK | Temperature sensing/airflow control | Refrigerator temperature sensor WR55X10025 |
| Frost buildup, weak airflow | Defrost protection/control | Refrigerator defrost bi-metal thermostat WR50X10108 |
| No airflow from freezer | Evaporator fan | Refrigerator evaporator fan motor WR60X25858 |
| Random temps, intermittent operation | Electronic control | Refrigerator main board assembly WR55X46805 |
Why it matters
Cooling issues can spoil food quickly and also force the compressor to run longer than normal. Catching airflow, defrost, or sensor problems early helps stabilize temperatures and can prevent secondary damage.
Related help: GE refrigerator error codes.
Last updated: January 2026
How to remove the bottom drawer of a GE refrigerator?
On the GE GNE29GGKBBB bottom-mount refrigerator, you typically remove the bottom freezer drawer by pulling it fully open to the stop position, then lifting the drawer up and out of the slide tracks. This lets you access the basket, rails, and evaporator area for cleaning or service.
Steps to remove the bottom freezer drawer (GNE29GGKBBB)
- Open the freezer door to the stop position.
- Pull the lower basket and slide mechanism to full extension using both hands.
- Remove the top freezer drawer by fully extending it, then lifting up and out.
- Lift straight up to clear the drawer wheels from the track, then pull the drawer out.
- Push the bottom basket slides back until the slide mechanism self-retracts (this helps keep the rails from sticking out).
For diagrams and model-specific drawer and basket details, use the GNE29GGKBBB owner's manual.
Reinstalling the drawer (quick checklist)
- Pull the left and right slides out evenly.
- Set the drawer wheels onto the top of the track mounted to the freezer side walls.
- Confirm the drawer wheels sit correctly on the track before pushing closed.
- If your model has an ice bucket in the freezer, make sure it does not interfere with the icemaker arm.
Common issues that make the drawer hard to remove
- Ice buildup on the rails: Defrost and dry the slide tracks before lifting the drawer out.
- Overloaded basket: Remove heavy items first so the drawer lifts straight up.
- Uneven pull-out: Extend both sides evenly; twisting can bind the wheels in the track.
Why it matters
Removing the freezer drawer the right way prevents bent slide rails, broken wheel mounts, and misalignment that can cause poor door sealing and temperature swings.
| Task | What you remove | Why you do it |
|---|---|---|
| Basic cleaning | Top freezer drawer | Access crumbs, spills, and the basket |
| Deep cleaning/service access | Drawer plus basket | Access rails, drain area, and rear panel |
Last updated: January 2026
Does GE GNE29GGKBBB filter remove microplastics?
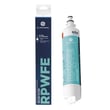
Yes. The GE GNE29GGKBBB bottom-mount refrigerator uses the RPWFE water filter cartridge, and GE’s filtration claims include microplastics reduction. For the exact contaminant list and test results for your cartridge, use the performance data sheet in the GNE29GGKBBB owner's manual.
What to check to confirm microplastics reduction
Microplastics claims depend on the specific filter model and its certified performance data. We recommend verifying these details:
- Confirm the installed cartridge is RPWFE (not a different GE or third-party filter)
- Review the Performance Data Sheet for the exact reduction claims and test conditions
- Check the NSF/ANSI standard(s) listed for the cartridge (the standard determines what was tested)
- Replace the filter on schedule; an overdue filter can reduce flow and filtration performance
- Flush the new filter after installation to clear carbon fines and trapped air
Correct replacement filter for this model
For GE GNE29GGKBBB, the correct replacement is:
Quick reference
| Item | What it means for you |
|---|---|
| Filter type | RPWFE cartridge used in the refrigerator |
| Microplastics | Included in GE’s stated filtration claims for this cartridge line |
| Proof | Performance Data Sheet in the owner’s manual (test-based details) |
Why it matters
Microplastics are not something you can see or taste reliably. Using the correct RPWFE cartridge and following the replacement interval helps keep water quality consistent and helps prevent slow dispensing, ice maker fill issues, and off-tastes.
Last updated: January 2026
How to remove bottom grille on GE refrigerator?
On the GE GNE29GGKBBB bottom-mount refrigerator, the bottom grille (toe kick or base grille) is removed from the front lower edge so you can clean the condenser area and check for debris. Use the GNE29GGKBBB owner’s manual for the exact fastener and clip locations for your configuration.
Before you start
- Unplug the refrigerator or switch off the breaker.
- Protect the floor with cardboard or a towel.
- Use a flashlight to see the grille edges and any screws.
- Pull evenly; do not bend the grille.
Removal steps (works for most GE bottom grilles)
- Open the fresh food doors for clearance.
- Look along the top edge and both ends of the grille for screws.
- If screws are present, remove them with a Phillips screwdriver.
- Grip the grille near both ends.
- Pull the grille straight outward to release the retaining clips or tabs.
- If it resists, recheck for hidden screws and pull again with even pressure.
Reinstalling the grille
- Align the grille tabs with the slots in the cabinet frame.
- Push straight in until it seats flush.
- Reinstall any screws after the grille is fully seated.
| What you notice | Most likely cause | What to do |
|---|---|---|
| Grille will not move | A screw is still installed | Recheck both ends and the top edge for screws |
| One side releases, other stays stuck | Clips are releasing unevenly | Push the loose side back in, then pull from both ends evenly |
| Grille feels loose after reinstall | Tabs not fully seated | Remove and reinstall, pressing until flush |
Why it matters
Dust buildup behind the base grille restricts airflow across the condenser, which makes a GE refrigerator run longer and can reduce cooling performance. Removing the grille lets you vacuum the area safely and restore airflow.
Last updated: January 2026