Installation guide
 Owner’s manual
 Error Codes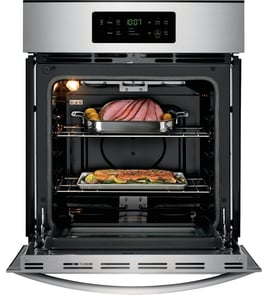




How long do GE Profile ovens last?
GE Profile ovens typically last 12 to 15 years. For a built-in electric wall oven like the GE PTD7000BN1TS, lifespan depends most on heat exposure, how often self-clean is used, and whether small issues (like overheating or temperature swings) get fixed quickly using the PTD7000BN1TS owner's manual.
Typical lifespan and what affects it
Most wall ovens reach the 12 to 15 year range when the door seal stays tight, cooling airflow is good, and the oven temperature stays stable.
Common factors that shorten life:
- Frequent high-heat cooking (broil, pizza modes, long bakes)
- Heavy use of self-clean cycles (extra heat stress on controls and wiring)
- Running with a damaged door gasket (heat leaks into the cabinet)
- Ignoring cooling fan noise or weak airflow
- Power issues (loose connections, repeated breaker trips)
Maintenance habits that extend oven life
The PTD7000BN1TS manual recommends removing non-enameled racks and wiping grease/soil before starting self-clean; that reduces smoke and helps the cycle work efficiently.
We recommend these habits:
- Keep the door closing firmly; replace a worn seal early
- Use self-clean only when needed; choose the shortest cycle that gets results
- Vent the kitchen during the first self-clean cycle (window, hood, or fan)
- Wipe ash after the oven cools and the door unlocks
- Address overheating symptoms quickly (fan running constantly, hot cabinet, error beeps)
Parts that commonly impact “end of life” symptoms
When an oven feels unreliable, it is often one of these serviceable parts:
| Symptom | Often involved part | Example for PTD7000BN1TS |
|---|---|---|
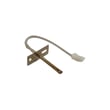
| Food underbakes or overbakes | Temperature sensing | Wall oven temperature sensor WB21X10165 |
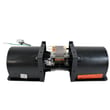
| Cabinet gets unusually hot, fan loud | Cooling airflow | Wall oven cooling fan WB26X35089 |
| Heat leaking around door | Door sealing | Wall oven door seal WB35X32825 |
Why it matters
A wall oven that holds temperature and manages heat with its cooling fan puts less stress on the control boards and wiring; that is the difference between a 10-year oven and a 15-year oven.
Last updated: February 2026
How to order GE appliance parts?
To order parts for your GE PTD7000BN1TS electric wall oven, use the complete model number and serial number to match the correct replacement part, then order from the parts list for this model. Use the PTD7000BN1TS owner's manual for model identification and basic guidance.
Best way to order the right part (and avoid returns)
- Confirm the full model number is PTD7000BN1TS (use the rating label on the oven frame).
- Write down the serial number; it can affect part revisions.
- Identify the failed part by symptom (no heat, overheating, door won’t unlock, no display).
- Match the part by part ID/part number, not just description.
- Compare your original part to the listing (connectors, mounting points, and notes).
Common PTD7000BN1TS parts customers order
If you are troubleshooting, these are frequently replaced items for this model:
| Symptom | Common part to check | Example part ID |
|---|---|---|
| Oven temperature seems inaccurate | Temperature sensor | Wall oven temperature sensor WB21X10165 |
| Oven runs hot, cabinet gets too warm, fan issues | Cooling fan | Wall oven cooling fan WB26X35089 |
| Door won’t lock or unlock (often after self-clean) | Door lock assembly | Wall oven door lock assembly WB10X28391 |
Before you place the order
- Turn off power at the breaker before inspecting wiring or components.
- Verify whether the issue is in the upper or lower oven (if applicable).
- Check for loose wire connections at the sensor, fan, or control.
Why it matters
Wall ovens like the GE PTD7000BN1TS can use different part revisions over time. Using the exact model and serial number helps ensure the replacement part fits, connects correctly, and restores safe operation.
Last updated: March 2026
How to replace the control panel on a GE oven?
On the GE PTD7000BN1TS electric wall oven, replacing the control panel typically means shutting off power, removing the trim or mounting screws that secure the panel, transferring any wiring connectors one at a time, and reinstalling the panel so it sits flush and secure per the PTD7000BN1TS owner’s manual.
Safety first (do this before touching the panel)
- Turn off power at the main circuit breaker or fuse panel; wall ovens are hard-wired.
- Confirm the display is dark and the oven light will not turn on.
- Let the oven cool completely; nearby metal and glass can stay hot.
- Avoid pulling on wires; always pull on connector bodies.
- Keep screws organized by location so the panel aligns correctly during reassembly.
Basic replacement steps (typical for GE wall ovens)
- Disconnect power at the breaker.
- Access the control panel fasteners (often along the underside or behind a trim piece).
- Support the panel as you loosen screws so it does not drop and strain wiring.
- Tilt the bottom outward, then lift or slide the panel to release tabs (common mounting style).
- Move connectors one at a time from the old panel to the new panel (match positions exactly).
- Reinstall the panel, tighten screws snugly (do not over-tighten), then restore power and test.
What part is usually involved?
On this model, the user interface is commonly part of a control panel assembly. If your symptoms include a dead display, unresponsive touch controls, or random beeping, the issue can also be the main control board. One model-listed option is the ui lcd control panel asm WB56X40086.
| Symptom | Most likely area | What we check first |
|---|---|---|
| Touchscreen dead but oven has power | Control panel / UI | Loose connector, pin fit, damaged ribbon |
| Oven won’t start and display is blank | Control board or power supply | Breaker, junction box connections, harness |
| Fan runs oddly after use | Cooling fan controls | Sensor board and fan operation |
Why it matters
A control panel that is not seated correctly or has a miswired connector can cause no-heat conditions, error tones, or intermittent operation. Taking photos and moving connectors one at a time prevents crossed connections and repeat failures.
Last updated: February 2026
How to reset GE wall oven?
To reset your GE PTD7000BN1TS electric wall oven, we recommend doing a full power reset: cancel any active cooking mode, turn power off at the circuit breaker for about 1 minute, then restore power and set the clock. This clears many control and display glitches.
Quick reset steps (power cycle)
- Press Cancel to stop any bake, broil, convection, or clean cycle.
- Turn OFF the wall oven circuit breaker (or remove the fuse if applicable).
- Wait 60 seconds.
- Turn the breaker ON (reset/closed position).
- Set the clock, then reselect your cooking mode.
If the display or touch controls still act up
Some control issues are resolved by cycling power and confirming the oven is on the most current software.
- Cycle power again at the breaker (OFF 60 seconds, then ON).
- If your oven is connected, check Wi-Fi and connected features in the settings.
- If the issue happens during or after a power outage, press Cancel, set the clock, and restart cooking.
What to check before you call for service
| Symptom | What we check first | What it points to |
|---|---|---|
| Clock/timer dead | House breaker/fuse | Power supply issue |
| Fan runs after oven is off | Cooling fan operation | Normal cooling behavior |
| Oven won’t respond to touch | Power cycle, software update | Control/display issue |
Why it matters
A breaker reset restores stable power to the control board and clears temporary faults after a surge or outage. It also helps you avoid interrupted cooking modes, especially after a clean cycle or when the clock resets.
Helpful references
- Use the reset and control guidance in the PTD7000BN1TS owner's manual.
- Confirm breaker and power checks in the PTD7000BN1TS installation guide.
Last updated: February 2026
What are the parts of an electric oven?
An electric wall oven like the GE PTD7000BN1TS is built around heating elements, temperature sensing, airflow for cooling and convection, lighting, and door hardware that seals and locks for safe operation. Your exact configuration and features are listed in the PTD7000BN1TS owner's manual.
Main parts you will find in most electric wall ovens
- Bake system: bake element (sometimes hidden) that provides primary heat
- Broil system: broil element at the top for high-heat browning
- Oven temperature sensor: tells the control how hot the oven is (example: wall oven temperature sensor WB21X10165)
- Electronic control: control board and user interface that manage modes and temperature
- Convection system (if equipped): convection fan motor and blade to circulate hot air
- Cooling system: cooling fan and related controls to protect electronics and cabinetry (example: wall oven cooling fan WB26X35089)
- Door system: door glass/window, hinges, and gasket/door seal (example: wall oven door seal WB35X32825)
- Oven racks: standard and sliding racks for cookware support
- Oven light: bulb and lens/cover (example: wall oven light bulb WB25T10102)
Quick “what it does” guide
| Part or system | What it does | Common symptom when it fails |
|---|---|---|
| Heating elements (bake/broil) | Create heat for cooking | Slow heat, uneven cooking, no heat in a mode |
| Temperature sensor | Regulates temperature accuracy | Overheats, underheats, temperature swings |
| Control board/UI | Runs cooking modes and timing | Dead display, won’t start, random beeping |
| Convection fan | Improves even baking/roasting | Hot spots, weak airflow, noisy fan |
| Cooling fan | Cools cabinet and electronics | Fan runs constantly, loud fan, overheating shutdown |
| Door seal and glass | Holds heat in, protects exterior | Heat leaking, longer preheat, hot handle/trim |
Why it matters
Knowing the major oven parts helps you match symptoms to the right repair path. For example, temperature accuracy problems often point to the sensor, while overheating cabinets or loud airflow usually points to the cooling fan system.
Safety notes before inspecting parts
- Turn power off at the breaker before removing panels or touching wiring.
- Never lean on or hang from the oven door; wall ovens can tip if not secured.
- Use the wiring and installation requirements in the PTD7000BN1TS installation guide when checking electrical connections.
Last updated: February 2026