
Where is the model number on a Craftsman rear tine tiller?
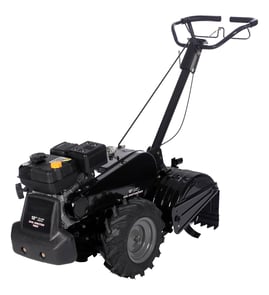
On a Craftsman rear-tine tiller like model 917299660, the model number is usually on a printed label or metal tag on the tiller frame. Most commonly, we see it on the tine shield (tine guard) area or near the engine and fuel tank.
Common places to check first
Look for a sticker, foil label, or riveted tag in these spots:
- On the tine shield/tine guard, above or behind the tines
- On the main frame rails near the transmission housing
- Near the engine mounting area (side of the engine plate)
- Around the fuel tank area (on the frame, not on the plastic tank)
- Near the handle support brackets or depth stake mount
How to use the model number once you find it
The model number helps us match the correct Craftsman parts diagrams and the exact replacement parts for your tiller.
- Write the full model number exactly as shown (for example, 917299660)
- If there is also a product number or serial number, record those too
- Use the model number to confirm fit before ordering wear items like a tine, tire, bearing, or hardware
Quick example: model number vs. part identifiers
| What you see | Example | What it’s used for |
|---|---|---|
| Model number | 917299660 | Identifies the tiller and correct parts list |
| Part ID | 532101194 | Identifies a specific part listing |
| Part name | Tine | Describes the part |
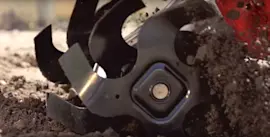
If you’re replacing worn digging components, a common example part listing is the tine 532101194.
Why it matters
Craftsman tillers often have similar-looking frames across multiple model numbers, but the tine set, wheel/tire, and transmission-related parts can differ. Using the exact model number prevents ordering the wrong tine, bearing, or hardware.
Last updated: January 2026
How often should I change the oil in my tiller?
For the Craftsman 917299660 6-hp & 8-hp rear-tine tiller, we recommend changing engine oil after the first few hours of break-in, then about every 25 to 50 hours of use or once per season (at least yearly), whichever comes first.
Recommended oil-change schedule
Use this as a practical baseline for most rear-tine tillers in this class:
- New or rebuilt engine: change oil after the first 5 hours
- Normal use: change oil every 50 hours or once per season
- Dusty, hot, or heavy tilling: change oil every 25 hours
- Long storage (end of season): change oil before storage to reduce corrosion risk
Quick checklist before you drain the oil
These steps help you avoid overfilling, leaks, and stripped threads.
- Warm the engine for a few minutes so oil drains faster (shut it off before servicing)
- Clean dirt from around the fill and drain areas
- Check oil level on level ground
- Use the correct oil viscosity for your temperature range (commonly SAE 30 in warm weather)
- Replace the drain plug washer if it seeps
What “dirty oil” looks like (and what it means)
Oil condition is a better indicator than the calendar alone.
| What you see on the dipstick | What it usually means | What to do |
|---|---|---|
| Dark brown or black oil | Normal contamination from use | Change oil now |
| Gritty feel between fingers | Dirt ingestion or heavy use | Change oil; check air filter |
| Milky or foamy oil | Moisture contamination | Change oil; run engine to fully warm; avoid short run times |
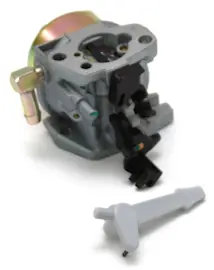
| Strong fuel smell | Fuel dilution | Change oil; check carburetor and starting habits |
Why it matters
Fresh oil protects the crankshaft, piston, and bearings from wear, keeps operating temperatures down, and helps your tiller maintain power under load. Skipping oil changes is one of the fastest ways to shorten engine life.
If you are already servicing the tine end, inspect wear items like the tine 532101194 so the tiller cuts cleanly without overloading the engine.
Last updated: January 2026
What are the common problems with lawn tillers?
Common problems with the Craftsman 917299660 rear-tine tiller include hard starting, rough running, loss of tine drive, and poor tilling performance. Most issues trace back to fuel quality, ignition wear, or drivetrain hardware that loosens or wears over time.
Most common symptoms and likely causes
- Won’t start or starts then dies: stale fuel, clogged fuel line or filter, dirty carburetor, fouled spark plug
- Runs rough or surges: partially clogged carburetor jets, air leak, contaminated fuel
- Tines won’t turn or slip: worn or misadjusted drive components, damaged key, loose fasteners
- Excess vibration or rattling: loose hardware, worn bearings, damaged tines
- Poor soil breakup: worn or bent tines, incorrect depth setting, soil too wet
Quick checks we recommend (fast, high-impact)
- Drain old gas and refill with fresh fuel (use the correct mix if your engine requires it).
- Inspect the spark plug; replace if fouled, cracked, or heavily worn.
- Check for loose hardware on the tine shaft and guards; tighten to a firm, even fit.
- Inspect tines for bending, cracks, or heavy rounding; replace worn tines such as the tine 532101194.
- If tine drive is inconsistent, inspect the drivetrain for wear and check for a damaged key such as the key 532002649.
Parts that commonly wear on rear-tine tillers
| Problem area | What you notice | Example part for this model |
|---|---|---|
| Tilling action | Poor digging, uneven churn | Tine (532101194) |
| Shaft coupling | Slipping, intermittent drive | Key (532002649) |
| Rolling/transport | Wobble, poor traction | Tiller tire (532005015) |
| Support/rotation | Grinding, play in shaft | Bearing (532006803) |
Why it matters
A rear-tine tiller works hardest at the tine shaft and drive system. Keeping fuel fresh and replacing wear items early helps prevent no-start problems and reduces drivetrain damage that can turn a small repair into a bigger teardown.
Last updated: January 2026
What is the best rear tine tiller to buy?
The best rear-tine tiller to buy is the one that matches your soil type, garden size, and how often you till. For most homeowners, a mid-size rear-tine model like the Craftsman 917299660 class (6-hp to 8-hp) is a strong fit for established gardens and moderate clay when it is properly maintained.
How to choose the right rear-tine tiller
Focus on capability first, then comfort and serviceability.
- Garden size: Under 2,000 sq ft usually needs less width and power; larger plots benefit from wider tine paths.
- Soil condition: Hard clay and new ground need more torque and slower ground speed options.
- Tilling depth needs: Deeper initial passes require multiple shallow passes; don’t buy solely on “max depth” claims.
- Control and safety: Look for easy-to-reach drive controls and stable wheel stance.
- Parts support: Choose a model with readily available wear parts (tines, bearings, tires, hardware).
Quick comparison: what “best” means for common buyers
| Buyer goal | What to prioritize | Typical fit |
|---|---|---|
| Small garden upkeep | Maneuverability, lighter weight | Narrower rear-tine or front-tine |
| Established beds, yearly prep | Balanced power and width | Mid-size rear-tine (6-hp to 8-hp class) |
| New ground, heavy clay | Torque, traction, durability | Heavier rear-tine with strong drivetrain |
| Long-term ownership | Parts availability, simple service | Models with common wear parts stocked |
Maintenance items that make any tiller a “best buy”
A rear-tine tiller’s performance drops fast when wear parts are neglected. These are common items we see affect tilling quality and drivability:
- Worn or bent tines (reduced bite and depth)
- Loose hardware and missing retainers (vibration and misalignment)
- Tire wear or low traction (poor forward drive)
- Dry or failing bearings (noise, heat, drivetrain wear)
If you own Craftsman 917299660, common wear parts to check include the tine 532101194 and the tiller tire 532005015.
Why it matters
Buying “too small” leads to bouncing, shallow tilling, and repeated passes; buying “too big” adds cost and makes tight garden work harder. Matching power, traction, and tine condition to your soil gives the best results and the lowest long-term maintenance.
Last updated: January 2026