Owner’s manual
 Error Codes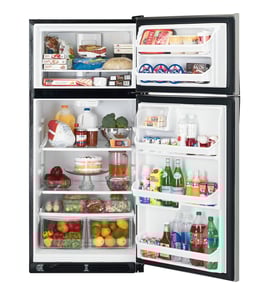

What's the average lifespan of a Kenmore refrigerator?
Most Kenmore refrigerators, including model 10677992791, typically last 12 to 15 years with normal household use; consistent maintenance (especially cleaning and airflow) is what most often determines whether you reach the high end of that range.
What affects lifespan the most
- Condenser coil cleanliness: dust buildup makes the compressor work harder.
- Door seal condition: air leaks cause longer run times and moisture issues.
- Temperature settings: steady, moderate settings reduce cycling stress.
- Airflow and loading: blocked vents and overpacking reduce cooling efficiency.
- Power interruptions: frequent outages and surges can stress electrical components.
Maintenance checklist we recommend
- Vacuum and brush condenser coils every 6 to 12 months.
- Keep door gaskets clean; wipe with mild soap and water, then dry.
- Confirm the refrigerator is level so doors close fully.
- Leave space behind the cabinet for ventilation.
- Follow the care and troubleshooting guidance in the 10677992791 owner's manual.
Typical lifespan expectations (quick reference)
| Refrigerator type | Typical lifespan | Notes |
|---|---|---|
| Top-mount (top freezer) | 12 to 15 years | Often strong longevity with basic upkeep |
| Side-by-side | 10 to 15 years | More features can mean more wear points |
| French door | 10 to 14 years | Higher complexity, more seals and controls |
Why it matters
A refrigerator that is running longer than normal to hold temperature usually wears out key cooling-system and airflow components sooner. Simple upkeep helps reduce run time, stabilize temperatures, and extend the service life.
Last updated: January 2026
What is a top mount refrigerator?
A top-mount refrigerator is a classic refrigerator layout where the freezer compartment is on top and the fresh-food (refrigerator) compartment is below. Your Kenmore 10677992791 uses this style, which is popular for straightforward storage and easy access to everyday refrigerated items.
How a top-mount layout is organized
In a top-mount (top-freezer) refrigerator, the appliance is split into two main zones:
- Freezer on top: frozen foods, ice storage, and often the ice maker area
- Refrigerator below: fresh foods, crisper pans, and most door bins
- Shared cooling system: cold air is produced and distributed to both sections
- Door design: two separate doors (one for freezer, one for refrigerator)
Common benefits (and tradeoffs)
Top-mount refrigerators are known for being practical and easy to live with.
| Feature | What it means for you |
|---|---|
| Freezer above | Frozen items are at eye level for many users |
| Simple design | Fewer complex features to maintain on many models |
| Good capacity per footprint | Often fits well in standard kitchen cutouts |
| Fresh food lower | You bend more often for produce and drinks |
Why it matters when shopping parts or troubleshooting
Knowing you have a top-mount design helps narrow down where to look first when symptoms show up.
- Cooling complaints often involve airflow between freezer and refrigerator sections
- Door closing and alignment can affect temperatures and moisture control
- Ice maker and water line space needs are typically at the back of the cabinet
For model-specific layout details and care guidance, use the 10677992791 owner's manual.
Last updated: January 2026
Where is the temperature sensor on a Kenmore refrigerator?
On Kenmore refrigerator model 10677992791, the temperature sensor (thermistor) is typically clipped to the evaporator tubing or mounted in the airflow path near the evaporator behind the rear panel inside the freezer. We use the wiring harness connector to unplug it after removing the panel.
Where to look first (most common locations)
- Freezer compartment, back wall: behind the interior rear panel near the evaporator coil
- Clipped to evaporator tubing: often held by a small clip or foam sleeve
- Near an air vent/air duct: positioned where it can sense circulating air temperature
- Connected by a small 2-wire plug: usually routed into the cabinet through a grommet
If you are already troubleshooting warm temperatures, check for blocked vents first; restricted airflow can mimic a bad sensor. The vent locations and airflow guidance are shown in the 10677992791 owner's manual.
Quick access steps (safe, typical approach)
- Unplug the refrigerator.
- Remove food and shelves from the freezer as needed.
- Take off the freezer’s rear interior panel (usually a few screws).
- Locate the sensor clipped to tubing or mounted to the liner; follow the two wires to the connector.
- Disconnect the plug, then release the clip/retainer and remove the sensor.
What you should see
| What you find | What it usually means | What to do next |
|---|---|---|
| Sensor buried in ice/frost | Defrost/airflow issue affecting readings | Inspect defrost system and airflow |
| Sensor loose or dangling | Inaccurate temperature sensing | Re-secure in original position |
| Connector corroded/wet | Intermittent readings | Dry/clean connector, check wire routing |
Why it matters
The temperature sensor tells the control system when to run cooling. If it is out of position, iced over, or has a poor connection, the refrigerator can run too long, not long enough, or cycle erratically, leading to warm food or temperature swings.
Related checks that often solve “warm fridge” complaints
- Make sure air vents are not blocked by packages
- Wait at least 24 hours after a control change before judging results
- Confirm doors close fully and seals are making contact
Last updated: January 2026
What causes a Kenmore 10677992791 to stop cooling?
A Kenmore 10677992791 can stop cooling when cold air cannot circulate properly or when the cooling system cannot shed heat. The most common causes are blocked air vents, doors not sealing/closing, dirty condenser coils, or a failed cooling component such as a fan, thermostat, or compressor (see the 10677992791 owner's manual).
Most common causes to check first
- Air vents blocked by food packages; this prevents cold air movement between compartments.
- Doors not closing completely or being opened frequently; warm air loads the system.
- Dirty condenser coils; heat cannot transfer well, so temperatures rise.
- Controls set incorrectly for room conditions; temperatures drift warmer.
- Evaporator airflow problem (fan, ice buildup on coils); freezer may get cold but fridge warms.
- Sealed system issue (compressor or refrigerant problem); both sections warm.
Quick troubleshooting steps (in order)
- Check airflow: Move items away from vents and return shelves/bins to proper positions.
- Confirm door seal and closing: Make sure nothing is preventing the doors from closing firmly.
- Clean condenser coils: Dust buildup makes the compressor run longer and cool less effectively.
- Verify control settings: Set to the recommended mid-range, then allow 24 hours to stabilize.
- Listen for fans: You should typically hear a fan running at times; no fan sound can point to an airflow failure.
Symptom-to-likely-cause guide
| What you notice | Most likely cause | What to do next |
|---|---|---|
| Freezer cold, fresh food warm | Airflow blocked or evaporator airflow issue | Clear vents; check for frost buildup |
| Both sections warm, compressor runs a lot | Dirty condenser coils or poor ventilation | Clean coils; ensure space around cabinet |
| Lights work, but no cooling sounds | Control/thermostat or compressor start issue | Check settings; consider start components |
| Ice maker stopped too | Water supply issue or temps too warm | Confirm freezer temp first |
Parts that commonly relate to “not cooling”
If troubleshooting points to a failed component, these model-compatible parts are common suspects:
- Refrigerator thermostat WP627985 (temperature control)
- Condenser motor W10822259 (moves air across condenser coils)
- Refrigerator compressor W10309988 (sealed system compressor)
Why it matters
Cooling problems are often airflow or heat-transfer related. Fixing blocked vents, door sealing, and dirty condenser coils can restore normal temperatures quickly and also reduces compressor run time and energy use.
Last updated: January 2026