Installation guide
 Owner’s manual




Can a Kenmore microwave be repaired?
Yes. A Kenmore microwave, including model 40180093700, is repairable when the problem is in common service items (filters, lights, door latches, switches, or venting). For any internal high-voltage or door safety-interlock repair, we recommend using a properly qualified service person as directed in the 40180093700 owner's manual.
These checks solve many “won’t run” or “acts dead” complaints without replacing parts:
- Confirm the plug is fully seated in a grounded outlet.
- If the outlet is on a wall switch, make sure the switch is ON.
- Unplug the microwave for 10 seconds, then plug it back in.
- Reset the circuit breaker or replace a blown house fuse.
- Make sure the door closes securely and nothing is stuck on the door seal.
- Press STOP/CLEAR twice, then re-enter the cook settings.
For a microwave/hood combo like the Kenmore 40180093700, these repairs are usually straightforward and cost-effective:
| Symptom | Common repair area | Typical next step |
|---|---|---|
| Vent fan noisy or not moving air | Venting and fan components | Inspect vent path; check damper movement |
| Poor smoke/odor capture | Filters | Clean grease filter; replace charcoal filter if recirculating |
| Door won’t start cycle | Door latch and interlock system | Inspect latch alignment; test interlock switches |
| Light out | Cooktop/night light | Replace with correct appliance bulb type/wattage |
Microwaves contain components that can be dangerous to service incorrectly. Stop DIY repair and schedule service if you notice any of the following:
- The unit runs but does not heat.
- Burning smell, arcing, or visible damage.
- The door, hinges, latches, or sealing surfaces are bent, loose, or damaged.
- The microwave appears to run with the door not fully latched.
If diagnosis points to a specific component, these are common repair parts for this model:
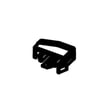
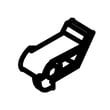
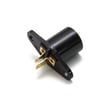
- Microwave door interlock switch 3405-001034 (door safety switch issues)
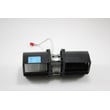
- Microwave grease filter DE63-00196A (venting performance)
- Microwave charcoal filter DE63-00367D (recirculating installations)
A microwave/hood combo depends on a properly closing door and working safety interlocks to operate safely. Following the troubleshooting steps and service guidance in the manual helps you avoid repeat failures and protects the venting and cooking systems.
Last updated: February 2026
How do I reset a Kenmore microwave?
To reset your Kenmore microwave model 40180093700, do a power reset: unplug it (or switch off the breaker) for 10 seconds, then restore power. If the display prompts you to set the clock after power is restored, set the time and retest.
- Power reset (best first step): Unplug for 10 seconds, then plug back in.
- Clear a stuck program: Press STOP/CLEAR twice, then re-enter cooking instructions.
- After a power outage: Set the clock when prompted, then reprogram any settings.
- Control lock (Child Lock): Touch and hold ENTER/START for more than 3 seconds to toggle the lock on or off (the display shows the lock status).
- Unplug the microwave or turn the circuit breaker off.
- Wait 10 seconds.
- Restore power.
- If prompted, set the clock.
| Situation | What you see | Next step |
|---|---|---|
| Random glitch or unresponsive display | Normal display returns | Run a short test (heat 1 cup of water for 1 minute) |
| Power outage occurred | Clock prompt | Set clock, then retry cooking |
| Child Lock was on | Lock message changes after toggle | Try the keypad again |
A reset clears temporary control issues caused by a brief power interruption, voltage drop, or accidental programming. If problems continue after resetting, the troubleshooting section in the 40180093700 owner's manual helps narrow it down.
Last updated: February 2026
How many watts are in a Kenmore microwave?
For the Kenmore microwave/hood combo model 40180093700, the cooking (microwave output) power is 1,100 watts, and the input power is 1,700 watts. You can confirm both ratings in the 40180093700 owner's manual.
Microwaves are commonly described using two watt ratings:
- Cooking power (output watts): the heating power delivered to food (what most people mean by “microwave watts”).
- Input power (watts used): the electrical power the microwave draws from the outlet.
- Circuit needs: over-the-range microwaves typically require a dedicated 110 to 120V, 60 Hz household circuit.
| Spec | Value | Why you care |
|---|---|---|
| Cooking power (output) | 1,100 W | Predicts heating speed and cook times |
| Input power (draw) | 1,700 W | Helps with circuit planning and troubleshooting |
Using the correct wattage helps us set realistic cook times, compare performance between Kenmore models, and avoid nuisance issues like blown fuses or slow cooking when the microwave shares a circuit with other high-draw appliances.
If your microwave runs but does not heat, the issue is usually in the high-voltage system (not the control panel). Use safe, guided troubleshooting steps in why is my microwave not heating.
Last updated: February 2026
How to silence a Kenmore microwave?
To silence the keypad beeps on your Kenmore 40180093700 microwave/hood combo, use the Control setup (default settings) menu on the control panel and turn the sound option off. The exact button sequence is listed in the 40180093700 owner's manual.
- Touch CONTROL SETUP.
- Scroll through the available options (use the number pads as prompted on the display).
- Find the sound or beep setting.
- Select OFF to mute tones.
- Press ENTER/START to save.
- Test by pressing a few keys; you should no longer hear beeps.
These are the most common reasons the microwave keeps making sounds even after changing settings:
- Child Lock is on; press and hold ENTER/START for more than 3 seconds to toggle it.
- You are hearing end-of-cook tones (some models keep a reminder tone even when key beeps are off).
- The control did not save; repeat the steps and confirm with ENTER/START.
- Power was interrupted; re-set your preferences after restoring power.
| Button | What it’s used for | Why it matters for silencing |
|---|---|---|
| CONTROL SETUP | Changes default settings | Where sound options are typically stored |
| ENTER/START | Confirms a selection | Saves the new sound setting |
| STOP/CLEAR | Cancels or clears entries | Helps you back out and retry |
Silencing tones is useful in open kitchens and at night, but keeping at least some alerts on helps prevent missed cook cycles and reduces the chance of leaving food in the cavity too long.
Last updated: February 2026
Where is the fuse on a Kenmore microwave hood combination?
On the Kenmore 40180093700 microwave/hood combo, the main fuse is typically located behind the top vent grille area, near the control compartment. Access usually starts by removing the upper grille, then removing the small metal cover that shields the fuse and wiring (follow the steps and safety notes in the 40180093700 owner's manual).
Microwaves store high voltage even when unplugged. We recommend limiting DIY work to basic access and visual inspection; have a qualified technician handle any high-voltage testing.
- Unplug the microwave (or switch off the breaker) before removing any panels
- Never defeat the door interlock system
- Do not use an extension cord; use a properly grounded outlet
- If a fuse blows repeatedly, stop replacing fuses and troubleshoot the cause
Most Kenmore over-the-range units use a similar layout:
- Remove the top vent grille (usually a few screws across the top).
- Remove the screw(s) securing the small metal control-area cover.
- The fuse is commonly in a clip-style holder on or near the noise filter/line input area.
If your unit is hardwired into cabinetry or you need to remove the microwave from the wall, use the 40180093700 installation guide for the correct mounting and support steps.
A blown fuse is often a symptom, not the root problem. Common causes include a door switch issue, a shorted component, or a failing high-voltage part.
| Symptom | Common direction | What to check next |
|---|---|---|
| Dead display, no lights | Line fuse open | Door switches, wiring, noise filter |
| Blows when door opens/closes | Interlock problem | Door switch alignment and mounts |
| Runs but does not heat | High-voltage circuit issue | Diode, capacitor, transformer |
If troubleshooting points beyond the fuse, these model-compatible parts are commonly involved:
- Microwave door interlock switch 3405-001034 (can cause blowing fuses or no-run conditions)
- Microwave noise filter assembly DE96-00400D (line input filtering; shorts can affect power)
- Microwave high-voltage diode DE91-70063D (heating circuit component)
The fuse protects your Kenmore 40180093700 from overheating and electrical damage. Replacing a fuse without correcting the underlying cause can lead to repeated failures and unsafe operation.
Last updated: February 2026
Why did my Kenmore microwave stop working?
If your Kenmore 40180093700 microwave/hood combo stopped working, the most common causes are a power interruption, an active control lock, a door not fully latching, or a safety device (thermal cut-off or door interlock switch) opening to prevent operation. Start with the quick checks below.
- Confirm the outlet has power (test with a lamp).
- Reset a tripped breaker or GFCI.
- Unplug the microwave for 2 minutes, then plug it back in.
- Make sure the door closes firmly and the latch area is clear.
- Turn Child Lock off: press and hold ENTER/START for more than 3 seconds; steps are in the 40180093700 owner’s manual.
Microwave/hood combos use door safety interlocks and temperature protection. If the door switch circuit does not prove the door is closed, or if an overheat protector opens, the microwave can appear dead or stop during cooking.
- Door interlock switch worn, loose, or misaligned
- Thermal cut-off opened from overheating or restricted airflow
- Loose wiring connection or a failing noise filter
| Symptom | What to check | Example part for this model |
|---|---|---|
| Won’t start, intermittent start | Door latch and interlock circuit | Microwave door interlock switch 3405-001034 |
| Stops during cooking, dead until cool | Overheat protection devices | Range thermal cut-off DE47-20034A |
| Runs but does not heat | High-voltage circuit (service-level repair) | Microwave high-voltage diode DE91-70063D |
These components are designed to prevent operation if the door is not safely latched or if internal temperatures rise too high. Keeping airflow clear (clean grease filter, open vent path) helps prevent nuisance shutdowns.
Follow the safety precautions in the 40180093700 owner’s manual; do not defeat safety interlocks and do not operate the microwave if the door, hinges, latches, or seals are damaged. High-voltage testing and repairs should be handled by a qualified technician.
Last updated: February 2026