Owner’s manual
 Error Codes



How to remove the bottom shelf of a GE fridge?
To remove the bottom shelf in your GE GNE29GSKISS bottom-mount refrigerator, we remove everything from the shelf first, then tilt the front edge up, lift the back edge up, and pull the shelf straight out. Follow the same steps in reverse to reinstall it; see the owner's manual.
- Remove all food, bins, and bottles from the shelf.
- Hold the shelf with both hands (glass can be slippery).
- Tilt the shelf up at the front.
- Lift the shelf up at the back to unhook it from the track.
- Pull the shelf out of the refrigerator compartment.
- Tilt the shelf up and set the top hook at the back into a slot on the track.
- Lower the front edge until the bottom of the shelf locks into place.
- Gently tug the shelf to confirm it is seated and stable.
Glass shelves can break if they are bumped or exposed to sudden temperature changes.
- Let a cold glass shelf warm up before washing.
- Clean with mild soap and warm (not hot) water.
- Dry the shelf before reinstalling to prevent slipping.
- Avoid hitting the shelf edges on the door bins or side walls.
| Task | What to do | What to avoid |
|---|---|---|
| Remove shelf | Tilt front up, lift back up, pull out | Forcing it while still hooked |
| Clean shelf | Mild soap, warm water after it warms | Washing cold glass with warm water |
| Reinstall shelf | Hook back first, then lock front | Leaving it partially seated |
Removing the shelf the right way prevents cracked tempered glass, broken shelf supports, and poor shelf alignment that can cause rattles or spills.
Last updated: February 2026
How to remove bottom grille on GE refrigerator?
On the GE GNE29GSKISS bottom-mount refrigerator, the bottom grille (base grille) typically comes off by releasing its retaining tabs or removing a few screws (model-dependent), then pulling the grille straight out. We recommend following the exact access steps shown in the GNE29GSKISS owner's manual to avoid cracking the plastic.
- Unplug the refrigerator or switch off power at the breaker (safer when working near wiring).
- If your grille has screws, remove them with a Phillips screwdriver.
- Grip the grille near the ends and pull straight outward; avoid twisting.
- If it feels stuck, look along the top edge for locking tabs; press the tabs while pulling.
- Set the grille on a soft surface to prevent scratches.
- Reinstall by lining it up and pushing straight in until it seats; reinstall screws if used.
A base grille can break if it is forced at an angle. Before removal, check these common “hang-up” points:
| What you see | What it usually means | What to do |
|---|---|---|
| Visible screws at the corners | Screw-mounted grille | Remove screws first |
| No screws, tight at the top edge | Tab-locked grille | Press tabs, pull straight out |
| Grille won’t clear the floor | Leveling legs are down | Raise front leveling legs slightly |
Removing the bottom grille the right way helps you access the lower front area (leveling legs, condenser area on some designs) without damaging the grille or surrounding trim. The manual also notes to pull the refrigerator straight out when moving it and to avoid rolling over the power cord or water line.
Last updated: February 2026
What is the most common problem with a GE refrigerator?
The most common GE refrigerator complaint is not cooling correctly (fresh food warm, freezer warm, or temperatures swinging). On the GE GNE29GSKISS bottom-mount refrigerator, the fastest wins are confirming settings and airflow, then checking common cooling parts like the evaporator fan motor and temperature sensor using the owner's manual.
- Make sure vents inside the fresh food and freezer sections are not blocked by food packages.
- Confirm the temperature settings were not accidentally changed.
- Give the refrigerator time after a power outage or first plug-in; normal recovery is up to 24 hours.
- Clean dust from the condenser area (restricted airflow can reduce cooling).
- Verify doors close and seal fully; a poor seal can cause warm temps and frost.
The GNE29GSKISS can make sounds that worry people but are expected during normal operation:
- Fans speeding up after door openings or when adding a lot of food
- Cracking or popping as the cabinet and coils expand and contract
- Gurgling water-like sounds from refrigerant moving
- A brief hum as the ice chute motor closes after dispensing ice
If the basic checks do not fix warm temperatures, these parts are frequent suspects:
| Symptom | What it often points to | Example part on this model page |
|---|---|---|
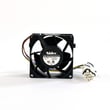
| Fresh food warm, freezer cold | Air not circulating from freezer | GE refrigerator evaporator fan motor WR60X26866 |
| Temps swing, unit runs oddly | Sensor feedback issue | Refrigerator temperature sensor WR55X10025 |
| Frost buildup, weak cooling | Defrost system problem | Refrigerator defrost bi-metal thermostat WR50X10108 or refrigerator defrost heater WR51X10132 |
A refrigerator that is not cooling can spoil food quickly and can also force the compressor to run longer than normal. Catching airflow, door seal, or defrost issues early helps restore stable temperatures and reduces strain on major components.
Last updated: February 2026