Installation guide
 Owner’s manual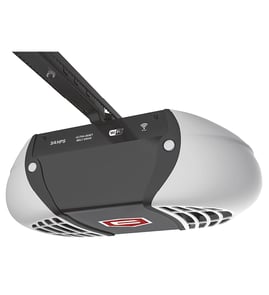
How do I know what model my garage door opener is?
You can identify your Craftsman garage door opener model by finding the model number label on the opener’s powerhead (the motor unit mounted to the ceiling). For Craftsman model 20057963, confirm the number on that label, then match it to the information in the Craftsman 20057963 owner's manual.
Where to look for the model number label
Check these common label locations on the powerhead:
- Under or behind the light lens/cover
- On the side panel of the motor housing
- On the back panel near the wiring terminals
- Near the learn/program button area (often close to the antenna wire)
- On the underside of the unit (visible from below)
What to write down (so you get the right parts)
When you find the label, record these details:
- Model number (example: 20057963)
- Serial number (helps identify production run)
- Motor type (AC vs DC, if listed)
- Drive type (chain, belt, or screw, if listed)
- Any diagnostic LED/blink code notes printed on the housing
Quick checks if the label is missing or unreadable
If the label is damaged, these checks usually narrow it down:
- Look at the rail and trolley style (chain vs belt)
- Check the wall control style (basic button vs multi-function)
- Watch the opener lights for blink patterns and compare to Craftsman error codes
Common identifiers and what they’re used for
| Identifier | Where you’ll see it | Why it matters |
|---|---|---|
| Model number | Label on powerhead | Ensures correct parts and instructions |
| Serial number | Same label | Helps confirm exact version |
| Error code/blink pattern | Opener lights/LED | Speeds up troubleshooting |
Why it matters
Using the exact model number prevents ordering the wrong safety sensor, wall control, remote, or logic board. It also helps you follow the correct setup and safety steps, including photo eye alignment and reversal testing described in the Craftsman 20057963 installation guide.
Last updated: January 2026
Is it worth repairing a 20 year old garage door opener?
For a 20-year-old garage door opener, replacement is usually the better value than repair because most openers have a typical 10 to 15 year lifespan. If your Craftsman model 20057963 is that old, repairs often become frequent, and you miss out on newer safety and convenience features.
When repair still makes sense
Repair can be worth it when the problem is simple, the door hardware is in great shape, and the opener is otherwise reliable.
- The door is properly balanced and moves smoothly by hand
- The issue is a basic adjustment (force/limits) or a minor wiring/connection problem
- You have a newer opener head but an older door system
- The opener passes the monthly reverse test after adjustment
- You are not seeing repeated failures (intermittent operation, random reversals, frequent sensor issues)
When replacement is the smarter choice
If any of these apply, we typically recommend replacing the opener instead of investing in major repairs.
- The door binds, sticks, or is unbalanced (this can damage an opener quickly)
- The opener will not reliably reverse during the safety test
- You suspect worn internal drive components (gears) or a failing motor
- You want modern features (rolling-code security, quieter operation, smart control)
- You are paying for multiple service calls over a short period
Quick decision guide
| Situation | Best next step |
|---|---|
| Door is smooth and balanced; opener needs adjustment | Repair/adjust using the Craftsman 20057963 owner’s manual |
| Door is unbalanced, sticks, or has damaged rollers/cables/springs | Fix door hardware first (service technician), then reassess opener |
| Opener fails the 2x4 reverse test even after adjustment | Replace opener for safety |
| Repeated breakdowns or major internal failure | Replace opener |
Why it matters
A garage door that is not properly balanced can create a serious safety risk and can also shorten the life of the opener. The manual emphasizes checking door balance and testing the safety reverse monthly; those two checks often determine whether repair is reasonable.
Helpful troubleshooting resources
If you are seeing flashing lights or diagnostic codes, use these Craftsman-specific references:
Last updated: January 2026
Can you get a universal remote for an old garage door opener?
Yes. For a Craftsman garage door opener like model 20057963, you can usually use a universal remote if it supports your opener’s radio frequency and learn-button programming. If it does not, adding an external receiver kit is the standard universal solution.
How to tell what will work
Most “universal” garage door remotes work in one of two ways: they either learn directly to the opener, or they pair to an add-on receiver that you wire to the opener’s push-button terminals.
- Check whether your opener has a LEARN button and can store remotes
- Confirm the universal remote supports your opener’s frequency/technology (common older systems used fixed codes; newer use rolling code)
- If compatibility is unclear, plan on an external receiver (most reliable for very old openers)
- If you already have many remotes/keypads programmed, remember openers often have a storage limit
Programming basics (what our manual supports)
Our documentation for this Craftsman platform shows the opener can learn transmitters using the LEARN button sequence and can store multiple transmitters.
Typical steps:
- Press the opener’s LEARN button (the unit accepts a transmitter for about 30 seconds).
- Press and release the remote button you want to use.
- Look for confirmation (often a light flash and/or beeps).
For the exact button locations and the model-specific sequence, use the Craftsman 20057963 owner’s manual.
Remote capacity (helpful when adding a universal remote)
| Item | What to expect | What to do if you hit the limit |
|---|---|---|
| Stored transmitters | Often up to about 20 (including keypad codes) | Delete old codes, then reprogram the remotes you still use |
If a universal remote will not pair: add an external receiver
An external receiver connects to the same terminals as the wall push button. Many kits include a receiver and one or more remotes.
- Unplug the opener before wiring
- Connect receiver wires to the push button terminals (often shared/spliced with existing wall control wires)
- Restore power and program the receiver to its remotes
Wiring and terminal details are shown in the Craftsman 20057963 installation guide.
Why it matters
Using a compatible universal remote (or an add-on receiver) restores reliable access without changing the motor unit, and it avoids intermittent operation caused by mismatched frequency or coding.
Last updated: January 2026
How do I know which garage door opener is compatible?
For a Craftsman garage door opener like model 20057963, compatibility depends on what you’re trying to add or replace (remote, wall control, smart controller, safety sensors) and the opener’s series and control technology. The fastest way to confirm is to match the opener’s model/series and follow the compatibility notes in the 20057963 installation guide.
Quick compatibility checklist
- Confirm the brand and model number on the motor unit label (Craftsman 20057963).
- Identify the accessory type: remote, keypad, wall control, or smart controller kit.
- Check whether your opener uses rolling code technology (common on newer units) versus fixed code/DIP switches (common on older units).
- Verify the accessory’s supported frequency (often 315 MHz or 390 MHz on many Craftsman/LiftMaster-era systems).
- If you’re adding a smart controller kit, confirm the opener series is listed as compatible.
Model-series notes for smart controller compatibility
The smart controller kit installation guide calls out specific Craftsman opener families that work with that device:
| Opener family (examples) | Smart controller kit compatibility | What to do |
|---|---|---|
| Series 100 models 57933, 57943, 57953, 57963, 57973, 57983 | Compatible | Proceed with the kit steps in the guide |
| 53XXX models without AssureLink | Compatible | Proceed with the kit steps in the guide |
| 3043, 30437, 54XXX series, 57915, 57918 | Not compatible | Use a different smart solution designed for that family |
If your Craftsman 20057963 is part of the compatible group, the kit wiring typically ties into the opener’s push button terminals and shares terminals with existing wall-control wiring.
Why it matters
Using the wrong compatible technology can cause symptoms like remotes that will not program, wall controls that do not respond, or a smart add-on that never connects. Matching the opener’s model/series first prevents wasted time and incorrect parts.
Helpful troubleshooting resources
- Use Craftsman error codes to interpret blinking lights or diagnostic codes before buying parts.
Last updated: January 2026