 Installation guide
 Owner’s manual



Can I replace dishwasher parts myself?
Yes, for the GE PDW8280N00SS dishwasher you can replace many common parts yourself (like seals, filters, and spray components) if you shut off power and water first and follow the steps in the PDW8280N00SS owner’s manual. For repairs not specifically recommended in the manual, we recommend using a qualified technician.
These repairs are typically straightforward with basic hand tools and careful reassembly:
- Replace a leaking door seal such as dishwasher door seal WD08X10055
- Clean or replace the wash filter such as dishwasher filter WD12X10109
- Replace a worn or clogged spray arm such as dishwasher spray arm WD22X10047
- Replace a tub gasket if you see seepage around the tub opening (often tied to alignment and sealing)
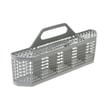
- Replace rack rollers or the silverware basket if the racks don’t glide smoothly
The manual’s safety guidance is clear: disconnecting power is required before maintenance, and repairs not specifically recommended should be referred to a qualified technician. These jobs often involve electrical testing, leak-risk connections, or deeper disassembly:
- Control and wiring diagnostics (control panel, electronic control module)
- Motor and pump issues (circulation or drain) when troubleshooting points to internal leaks or electrical faults
- Hard-wired power connection or grounding concerns
- Persistent “won’t run” symptoms after basic reset and power checks
Use this checklist every time you work on the PDW8280N00SS:
- Turn off the circuit breaker (turning the dishwasher off at the controls does not remove power)
- Shut off the dishwasher water supply valve
- Let the heating element cool before reaching into the tub
- Wear cut-resistant gloves around sharp racks, panels, and fasteners
- Take photos of wire and hose routing before removal
| What you’re seeing | Most likely DIY level | Typical next step |
|---|---|---|
| Door leak at the front edge | Easy | Inspect/replace door seal, check for debris on sealing surfaces |
| Dishes not getting clean | Easy to moderate | Clean filter, check spray arm holes, verify loading |
| Won’t start but has power | Moderate | Check wall switch/breaker reset steps in the manual |
| Burning smell, tripping breaker, wiring damage | Technician | Stop using; electrical diagnosis and repair |
Dishwashers combine water, heat, and electricity. Doing the right DIY repairs saves time and money, but following the manual’s safety steps and choosing the right repair level helps prevent shocks, leaks, and repeat failures.
Last updated: February 2026
How to remove the filter and spinner on GE dishwasher?
On the GE PDW8280N00SS dishwasher, we remove the filter and spinner (spray arm) from inside the tub by taking out the lower rack, unlocking or lifting out the filter screen, then removing the spray arm so you can clean debris that causes poor washing or draining.
- Turn the dishwasher off at the control panel.
- Let the unit cool if it recently ran (hot water and heater area).
- Pull out the lower rack for clear access.
- Keep a towel handy for water in the sump area.
- Use only light hand pressure; forcing plastic tabs can crack them.
Most GE dishwashers like PDW8280N00SS use a coarse screen and a finer filter area near the sump.
- Remove the lower rack.
- Locate the filter screen at the bottom of the tub.
- Release the screen by turning the lock ring (if equipped) or squeezing the retaining tabs and lifting up.
- Rinse the filter under warm water; use a soft brush to remove grease and food soil.
- Reinstall by seating it flat and locking it fully so it cannot lift during the wash.
If your filter is damaged or won’t seat securely, replace the dishwasher filter WD12X10109.
- With the lower rack out, grab the lower spray arm at the hub.
- Depending on the design, either:
- Twist the center nut/retainer counterclockwise to release, or
- Lift the spray arm straight up off the bearing.
- Rinse spray holes from the underside; clear clogs with a toothpick (do not enlarge holes).
If the arm is cracked, warped, or the jets are plugged and won’t clean out, replace the dishwasher spray arm WD22X10047.
| What to check | What “good” looks like |
|---|---|
| Filter seating | Flat, locked, no rocking |
| Spray arm spin | Turns freely by hand |
| Wash performance | No gritty residue after a cycle |
A clogged filter or restricted spray arm reduces water flow and circulation, which leads to dirty dishes, redepositing grit, and sometimes poor draining. Regular cleaning helps protect the pump and motor assembly.
For diagrams and model-specific component locations, use the PDW8280N00SS owner's manual.
Last updated: February 2026
What is the average lifespan of PDW8280N00SS?
A GE dishwasher like model PDW8280N00SS typically lasts 10 years with normal household use. Consistent cleaning, correct detergent use, and fixing small leaks or drain issues quickly are the biggest factors in reaching that lifespan; see the owner's manual for care and cleaning routines.
- Water quality and temperature: hard water and low inlet temperature increase wear and reduce cleaning performance.
- Drain and filter maintenance: keeping the filter area clear prevents pump strain.
- Door sealing and leaks: a small leak can damage components over time.
- Loading habits: overloading blocks spray and forces longer, hotter cycles.
- Detergent and rinse aid use: too much detergent can leave residue; too little reduces cleaning.
- Remove debris and clean the filter area; replace the dishwasher filter WD12X10109 if it is damaged or won’t clean up.
- Inspect the door seal for tears, flattening, or gaps; replace the dishwasher door seal WD08X10055 if it’s leaking.
- Check spray performance; clear clogged holes or replace the dishwasher spray arm WD22X10047 if it’s cracked or warped.
- Run a cleaning cycle per the manual’s care instructions.
| Symptom | Often fixable? | Common next step |
|---|---|---|
| Not cleaning well | Yes | Clean/replace filter; inspect spray arm |
| Leaking at the door | Yes | Inspect/replace door seal |
| Won’t drain | Yes | Clear drain path; check drain tube routing |
| Repeated electrical/control failures | Sometimes | Diagnose per manual troubleshooting |
Knowing the expected 10-year lifespan helps you decide whether to maintain and repair (filters, seals, spray components) or plan for replacement when major failures stack up.
Last updated: March 2026





