Owner’s manual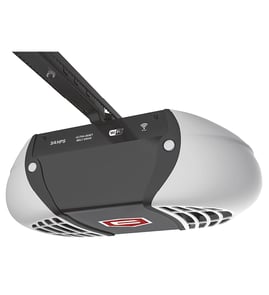


How do I know what model my garage door opener is?
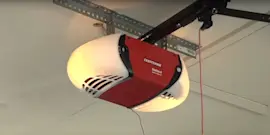
For a Craftsman garage door opener, the model number is printed on a label on the powerhead (the motor unit on the ceiling). On model 1393043, it’s typically under a light lens or on the side of the opener housing; confirm the exact label location in the owner's manual.
Where to look on the opener (powerhead)
Check these common label locations first:
- Under the front light lens cover
- Under the left light lens (when you’re facing the garage door)
- On the side of the opener housing opposite the antenna wire
- Near the logic board cover or the hanging bracket area
What the model number looks like (and what to write down)
The model is usually a short number string (for this unit, 1393043). When you find the label, record:
- Model number
- Serial number (if shown)
- Motor type (AC or DC) and any “learn” button color (helpful for remote compatibility)
| What you find | Why it matters |
|---|---|
| Model number | Ensures you get the right Craftsman garage door opener parts and instructions |
| Serial number | Helps match production variations when parts changed over time |
| Learn button color | Helps identify the correct remote/keypad programming method |
Why it matters
Using the correct model number prevents ordering the wrong safety sensors, wall control, remote, or logic board. It also helps you follow the right troubleshooting steps for travel limits, force settings, and flashing light diagnostics.
Next steps after you find the model
- Use the model number to match diagrams and part descriptions
- If your opener lights flash or you see a diagnostic pattern, use Craftsman error codes
- For broader part searches by model number, use Sears PartsDirect
Last updated: February 2026
Is it worth repairing a 20 year old garage door opener?
For a 20-year-old garage door opener, replacement is usually the better long-term choice because most openers are built to last about 10 to 15 years, and older units often lack newer safety and security features. For a Craftsman 1393043, a small, low-cost repair can make sense if the door system is otherwise in good shape.
When repair makes sense
A repair is worth it when the fix is simple and the opener is still operating safely.
- The opener runs smoothly and the door is balanced (it stays about halfway open when disconnected)
- The problem is a basic wear item (remote, wall control, safety sensor alignment, wiring connection)
- The unit has consistent operation (no intermittent reversing, stalling, or burning smell)
- You only need a short-term solution before a planned upgrade
When replacement is the smarter investment
If any of these are true, we treat replacement as the practical option for a 20-year-old unit.
- The motor hums but the door will not move (common with gear or drive failures)
- The opener struggles, chatters, or reverses frequently even after basic adjustments
- Safety sensors are unreliable or the lights flash repeatedly during closing
- You need modern features (rolling-code security, quieter operation, smart control add-ons)
Quick decision guide
| What failed | Typical outcome on older openers | Best next step |
|---|---|---|
| Remote or wall control issue | Often inexpensive to correct | Troubleshoot and repair |
| Safety sensor problem | Usually fixable if wiring and alignment are good | Repair first |
| Gear/drive or motor issue | Higher cost, more downtime | Replace opener |
| Multiple recurring issues | Costs add up quickly | Replace opener |
Why it matters
A garage door opener is a safety device as much as a convenience item. When an older opener starts failing in ways that affect travel, force, or sensor operation, the risk of damage to the door system and inconsistent closing performance goes up.
What we recommend for Craftsman 1393043 owners
- Start with the troubleshooting and adjustment steps in the 1393043 owner's manual
- If you see diagnostic flashes or code patterns, use Craftsman error codes to narrow the failure
- If you decide to replace, use the model number to search compatible parts and accessories on Sears PartsDirect
Last updated: February 2026
Can you get a universal remote for an old garage door opener?
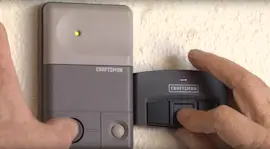
Yes. For an older Craftsman garage door opener like model 1393043, a universal remote often works if it supports the opener’s radio frequency and coding type. If it does not, the reliable fix is adding a universal receiver kit that “translates” the new remote to your opener. Use the 1393043 owner's manual to confirm your opener’s learn/programming method before you buy.
What to check before you buy a universal remote
- Remote compatibility list: the package should list Craftsman/LiftMaster/Chamberlain compatibility.
- Learn button vs. DIP switches: open the light cover and look for a learn button or a row of DIP switches.
- Frequency and code type: many older openers use different frequencies and fixed-code formats.
- Number of doors: choose a 1-button or multi-button remote as needed.
- Battery type: coin-cell vs. AAA affects long-term convenience.
Best options (from easiest to most universal)
| Option | When it works best | What you’ll do |
|---|---|---|
| Universal remote only | Opener is on the remote’s compatibility list | Program to the opener (learn button or DIP pattern) |
| Universal receiver + remote kit | Opener is very old or not listed | Wire receiver to opener terminals, then program remote to receiver |
| Wall control replacement | Wall button is failing (remote may be fine) | Diagnose wiring/control issues first |
Programming basics for older Craftsman openers
- Disconnect power to the opener before opening covers.
- Identify whether you have a learn button system or DIP switches.
- For learn button models: press learn, then press the remote button to pair.
- For DIP switch models: match the remote’s DIP pattern to the opener’s pattern.
Why it matters
Using the right remote or adding a receiver prevents intermittent operation, reduces false “no signal” problems, and avoids accidentally buying a remote that cannot pair with your opener’s coding system.
If you need to search additional compatible accessories by model number, we recommend starting with the parts list for 1393043 and then searching on Sears PartsDirect.
Last updated: February 2026
How do I know what garage door opener is compatible?
For a Craftsman garage door opener like model 1393043, compatibility is determined by the opener’s radio system, not the door itself. Match the accessory (remote, keypad, wall control, or smart hub) to the opener’s learn button type, frequency, and whether it uses rolling-code security or older dip switches; our owner's manual shows the correct programming and accessory details.
What to check on your Craftsman 1393043 opener
Use the motor unit (powerhead) label and the learn/program button area to identify what will work.
- Brand and model: Craftsman 1393043
- Learn button: note the button color and nearby LED behavior
- Radio/security type: rolling code (newer) vs dip switches (older)
- Remote style: number of buttons and whether it is a universal remote
- Wall control wiring: some wall consoles require specific wiring and logic compatibility
Quick compatibility guide (most common cases)
| What you see on the opener | What it usually means | What to buy/program |
|---|---|---|
| Learn button present (often with an LED) | Rolling-code system | Use a compatible rolling-code remote/keypad; program to the learn button |
| No learn button; remote uses tiny switches | Dip-switch system | Match the dip-switch pattern on the remote to the opener |
| Remotes work sometimes, especially in bright sun | Sensor or signal interference issue | Fix alignment/interference first; don’t replace remotes until troubleshooting |
How we recommend confirming compatibility before you buy
- Identify the opener’s learn button type (color and location on the motor unit).
- Check the opener label for any radio/frequency or logic board identifiers.
- Decide what you’re adding (remote, keypad, wall control, smart control).
- Follow the programming steps in the owner's manual to confirm the opener accepts the accessory.
- If the opener flashes diagnostic lights, use Craftsman error codes to match the blink pattern to the issue.
Why it matters
Buying the wrong remote or wall control is the most common reason an accessory will not program. Correct matching prevents wasted time, avoids repeated “learn” failures, and helps you focus on real problems like safety sensor alignment, travel limits, or force settings.
If you need to order accessories or replacement parts by model number, search using 1393043 on Sears PartsDirect.
Last updated: February 2026
What are the common problems with Craftsman garage door openers?
Common problems on a Craftsman garage door opener like model 1393043 are safety sensor issues (misalignment or blocked beam), remote or wall control problems, and drive wear (chain/belt tension, worn gears) that causes grinding, stalling, or reversing. We use the owner's manual to match symptoms to the right checks and adjustments.
Most common symptoms and what they usually mean
- Door will not close and lights blink: safety sensors blocked, misaligned, or wiring issue.
- Door reverses while closing: travel limits or force settings need adjustment; door may be binding.
- Opener hums but door does not move: stripped drive gear, broken sprocket, or door is stuck.
- Remote/keypad works sometimes: weak battery, interference, or opener needs reprogramming.
- Wall button does nothing: wall control wiring issue, lock feature enabled, or logic board problem.
Quick checks we recommend first (safe, no parts guessing)
- Disconnect power for 1 minute, then restore power (resets many logic glitches).
- Check the photo eyes: clean lenses, confirm both LEDs are steady, and aim them directly at each other.
- Try the manual release and lift the door by hand; it should move smoothly and stay about halfway.
- Inspect the rail and drive: look for slack, missing hardware, or obvious gear debris.
- Reprogram remotes using the learn button steps in the owner's manual.
Troubleshooting guide by problem area
| Problem area | What you notice | Typical fix path |
|---|---|---|
| Safety sensors | Won’t close, blinking lights | Align sensors, clear obstruction, check wiring |
| Force/travel settings | Reverses, stops short | Adjust travel/force, verify door moves freely |
| Drive system (gears/chain/belt) | Grinding, motor runs but no travel | Inspect gear/sprocket, set tension, replace worn drive parts |
| Controls (remote/wall) | Intermittent or dead controls | Battery, reprogram, check wall wiring/lock feature |
Why it matters
Most “opener problems” are actually door balance, sensor alignment, or force/travel settings. Fixing those first prevents repeated reversals that can strip gears, stress the motor, and create unsafe closing behavior.
For code-based diagnostics and light-flash patterns, we also use Craftsman error codes to pinpoint the failure faster.
You can order replacement parts for Craftsman 1393043 using the parts list for this model, or search by model number on Sears PartsDirect.
Last updated: February 2026