Installation guide
 Owner’s manual
 Error Codes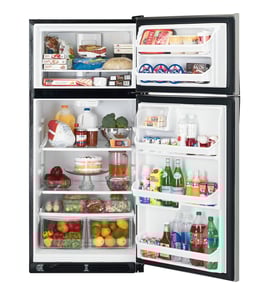



Are all refrigerators 70 inches high?
No. Refrigerator height varies a lot by style and capacity, and Kenmore top-mount models like 25374823400 are often shorter than many 70-inch French door or side-by-side units. The right approach is to measure your opening and compare it to the exact dimensions listed in the 25374823400 use & care manual.
Typical refrigerator height ranges (what you’ll see most often)
Refrigerators are built to fit different kitchen layouts, so “standard height” depends on the type.
- Compact and apartment-size units: often under 66 inches
- Many top-freezer/top-mount refrigerators: commonly mid-60s inches
- Many full-size French door and side-by-side models: commonly 68 to 72 inches
- Built-in or specialty models: can be taller or designed for cabinet panels
What to measure before you shop
Measure the space first, then choose the refrigerator that fits with proper airflow.
- Height from floor to the lowest overhead cabinet or soffit
- Width between cabinets (measure front and back)
- Depth available (include door swing and handle clearance)
- Floor level (an unlevel floor can change door alignment)
- Clearance for ventilation and connections
Installation clearances that matter
For Kenmore 25374823400, the installation guidance calls for these minimum clearances:
| Location | Typical minimum clearance |
|---|---|
| Sides and top | 3/8 inch |
| Back | 1 inch |
| Hinge side near a wall (for door swing) | 1/2 inch |
These clearances help with air circulation and make it easier to connect electrical and (if equipped) water supply.
Why it matters
If the refrigerator is too tall, it can bind against cabinets, restrict airflow, and make leveling harder. Proper leveling and clearance also help the doors seal correctly, which protects temperature and reduces frost.
Last updated: January 2026
What are the disadvantages of a top mount fridge?
Top-mount refrigerators like Kenmore 25374823400 are reliable and efficient, but the main disadvantages are less convenient fresh-food access (you bend more), fewer premium organization features, and fewer built-in dispenser options compared with many bottom-freezer or side-by-side designs.
Common disadvantages (what most owners notice)
- Fresh-food section is lower: you bend more often for produce, drinks, and leftovers.
- Freezer is at eye level: great for frozen items, but it pushes daily-use foods lower.
- Fewer “premium” storage features: many top-mount designs have simpler bins, drawers, and adjustability.
- Less common to have external ice and water: many top-mount models do not include a door dispenser.
- Door swing clearance matters: you may need extra side clearance near walls for full door opening.
What to check before you decide (fit and usability)
Your installation space and door swing can make a top-mount feel better or worse day to day. The installation guidance for this model calls for typical clearances to support airflow and access.
| Item to compare | Top-mount refrigerator | Bottom-freezer refrigerator |
|---|---|---|
| Most-used compartment height | Lower | Higher |
| Freezer access | Easier (higher) | Requires bending |
| Typical organization features | Simpler | Often more flexible |
| Dispenser availability | Less common | More common |
Tips to reduce the downsides
- Store everyday items (milk, lunch items) on the upper refrigerator shelves to reduce bending.
- Use bins to group foods by category (snacks, breakfast, leftovers) for faster access.
- Keep heavier frozen foods on the lower freezer shelf/basket area to avoid lifting overhead.
- Confirm you have enough side clearance for door swing and hinge clearance.
- Level the refrigerator so doors close properly and temperatures stay stable (see the 25374823400 installation guide).
Why it matters
A top-mount refrigerator can be a great value, but comfort and convenience depend on how often you access fresh food versus frozen food, and whether your kitchen layout allows easy door opening and proper clearances.
Last updated: January 2026
What is the upper part of a fridge called?
In a Kenmore top-mount refrigerator like model 25374823400, the upper section is typically the freezer compartment. That is the insulated area designed to keep foods frozen and, on some setups, it also houses the automatic ice maker and ice bin.
What you will find in the upper (freezer) compartment
Common components and features in the freezer area include:
- Freezer shelves or door bins for frozen food storage
- Cold air vents that circulate air between freezer and refrigerator sections
- An ice maker assembly (if equipped) and ice bin
- A freezer light and light shield (some models)
- Temperature control related components (depending on design)
For model-specific layout and feature details, use the 25374823400 owner's manual.
Freezer vs. refrigerator compartment: quick comparison
| Section | Main purpose | Typical temperature range |
|---|---|---|
| Freezer compartment (upper on top-mount models) | Long-term frozen storage, ice production (if equipped) | 0°F to 5°F |
| Refrigerator compartment (lower on top-mount models) | Fresh food storage | 34°F to 40°F |
Why it matters
Knowing the correct name helps when ordering parts, reading troubleshooting steps, and following safety guidance. For example, the manual notes to avoid contact with moving parts of an automatic ice maker and to follow safe handling steps when servicing items like lights and shields.
Related parts customers often replace
If you are working on freezer-related issues (ice production, lighting, door sealing), these are common replacement items for this model family:
- Ice maker mold 241798231 (ice cube forming component)
- Ice maker 5304458371 (complete ice maker assembly)
- Refrigerator light bulb 316538904 (appliance bulb used for interior lighting)
Last updated: January 2026
Are refrigerator water lines 1/4 or 3/8?
For Kenmore refrigerator model 25374823400, the water supply line to the ice maker uses 1/4-inch (6.4 mm) OD tubing. Your home’s cold-water plumbing may be larger (often 3/8-inch), so you typically use a shutoff valve or adapter to transition down to 1/4-inch tubing at the refrigerator.
What size line to buy (and what it connects to)
Most refrigerator ice maker hookups use 1/4-inch outside diameter (OD) tubing, commonly in copper or braided stainless. The refrigerator connection at the inlet valve is designed for that 1/4-inch OD line.
- Buy 1/4-inch OD copper tubing or braided water line for the run to the refrigerator
- Plan for extra length so you can pull the refrigerator out for cleaning (a gentle coil behind the unit helps)
- Use a compression nut and ferrule (sleeve) at the refrigerator inlet valve connection
- Use a proper shutoff valve at the household cold-water line
- Avoid self-piercing saddle valves; they are a common source of restricted flow and leaks
For the exact connection steps and routing guidance, follow the 25374823400 installation guide.
Quick sizing guide: 1/4-inch vs 3/8-inch
| Location | Typical size you see | What it means for your install |
|---|---|---|
| Refrigerator ice maker inlet valve | 1/4-inch OD tubing | This is the line size you run to the fridge |
| Household cold-water pipe or stop valve | Often 3/8-inch (varies) | You may need an adapter/tee to feed a 1/4-inch line |
Why it matters
Using the correct tubing size helps prevent leaks, ensures proper water flow to the ice maker, and makes it easier to service the refrigerator without kinking the line.
Related part note (when leaks are involved)
If you have a sealed-system repair open and a technician is working on the refrigerant circuit, a component like the refrigerator filter drier 5303305677 is part of that system. Water line size is separate from refrigerant components, but both can be involved when diagnosing cooling or moisture issues.
Last updated: January 2026